One pagers

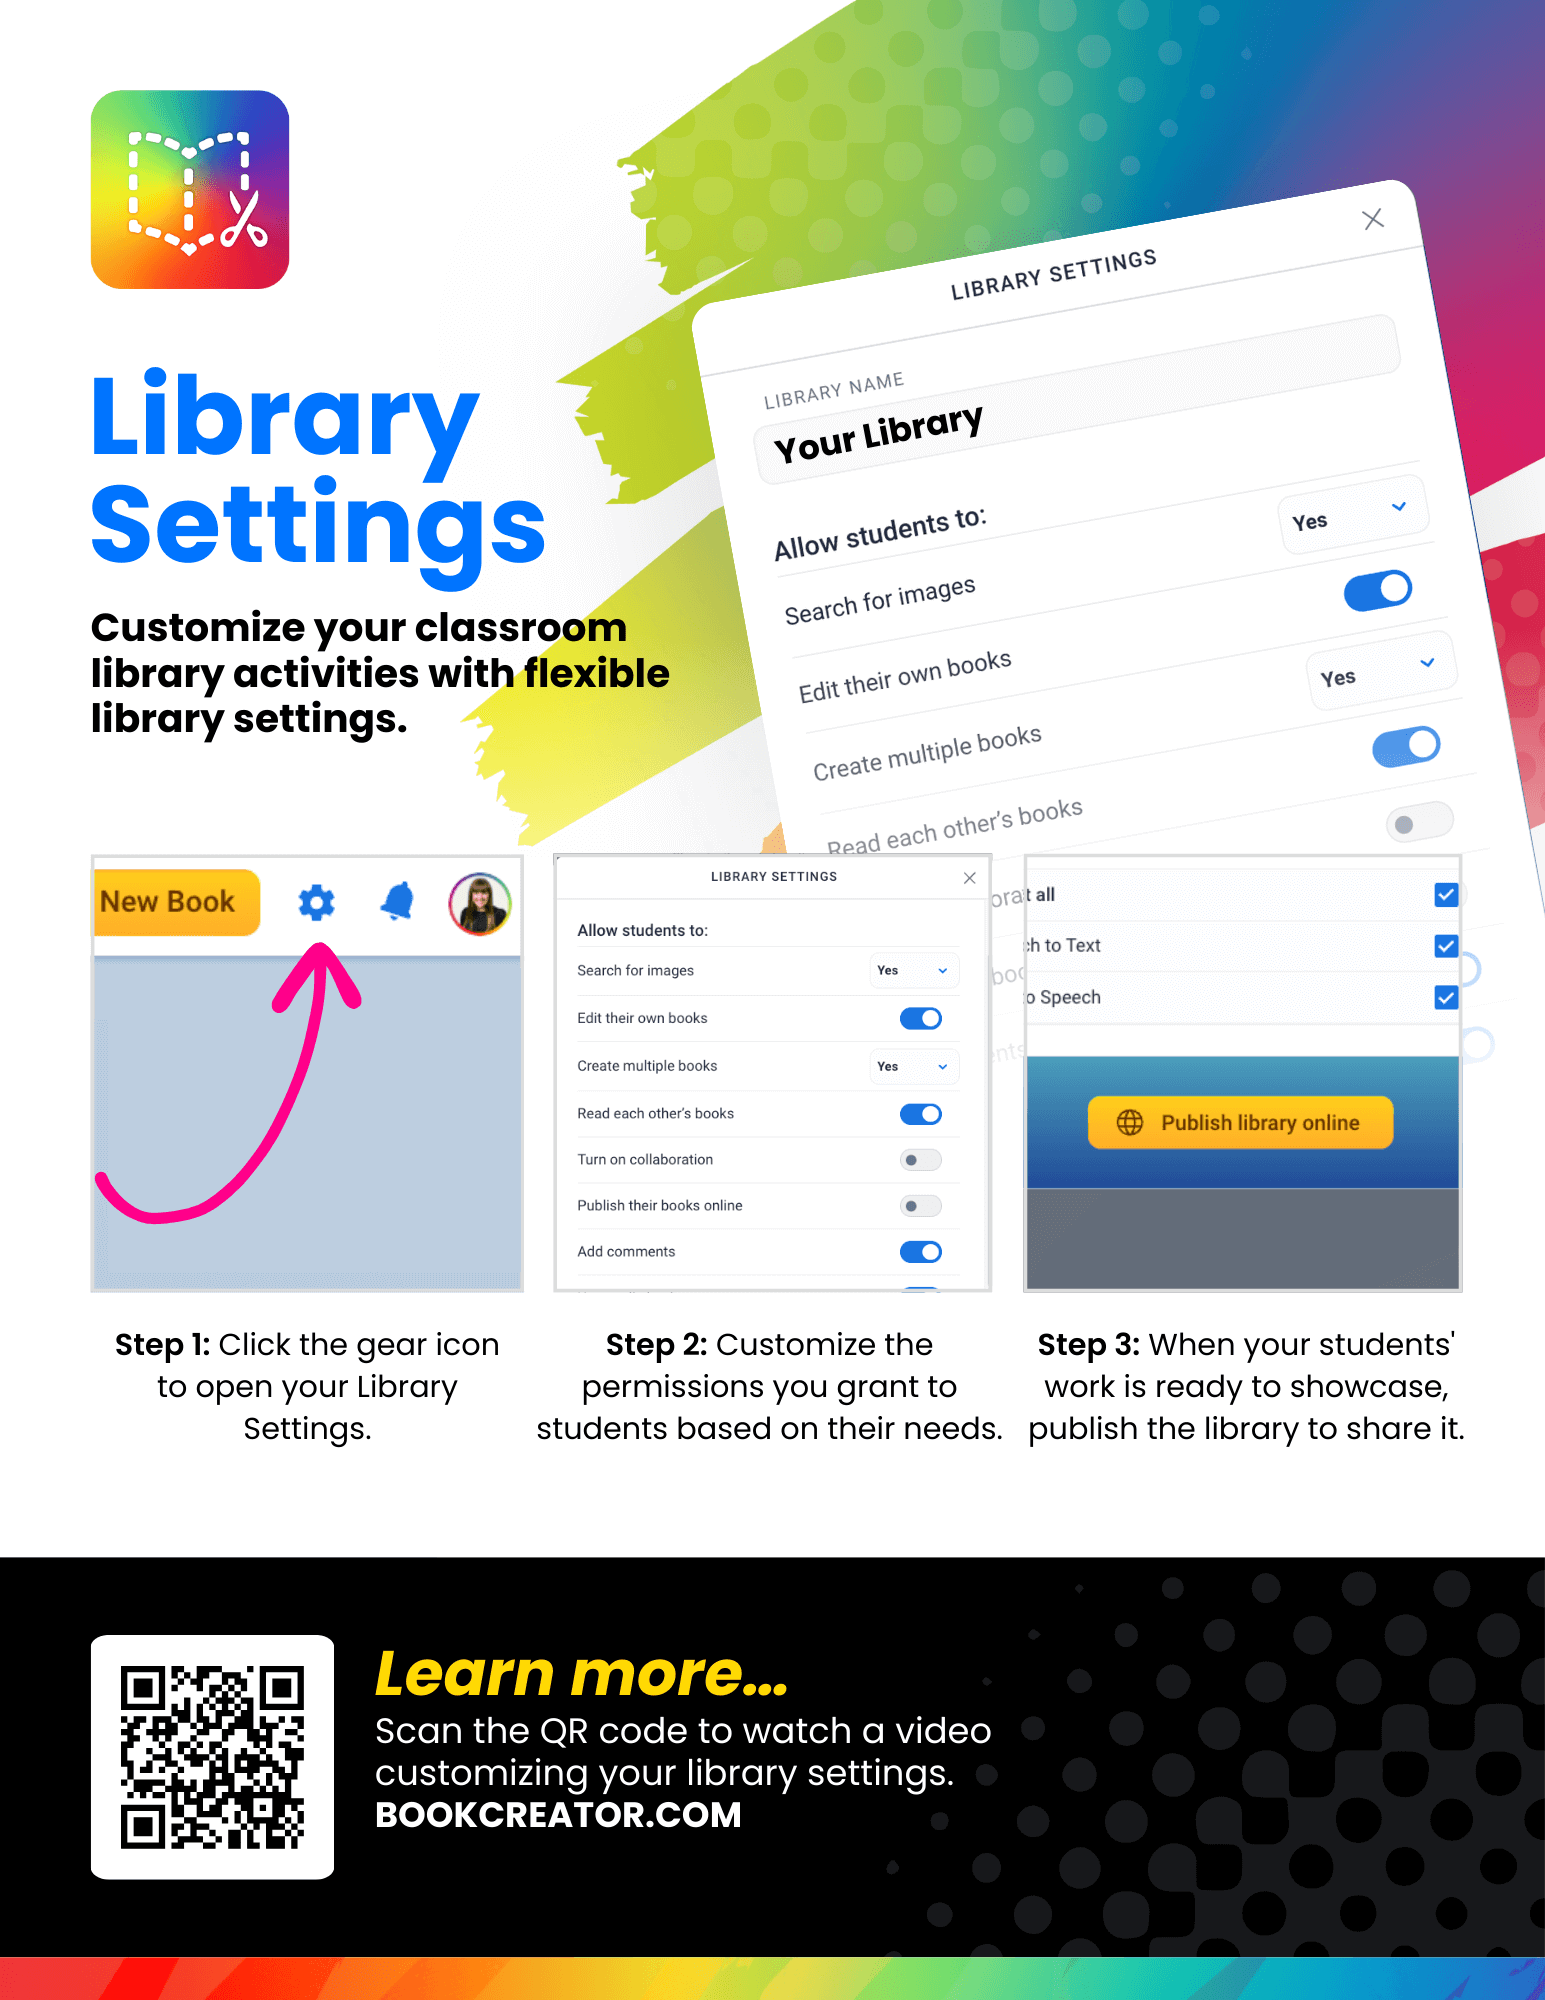
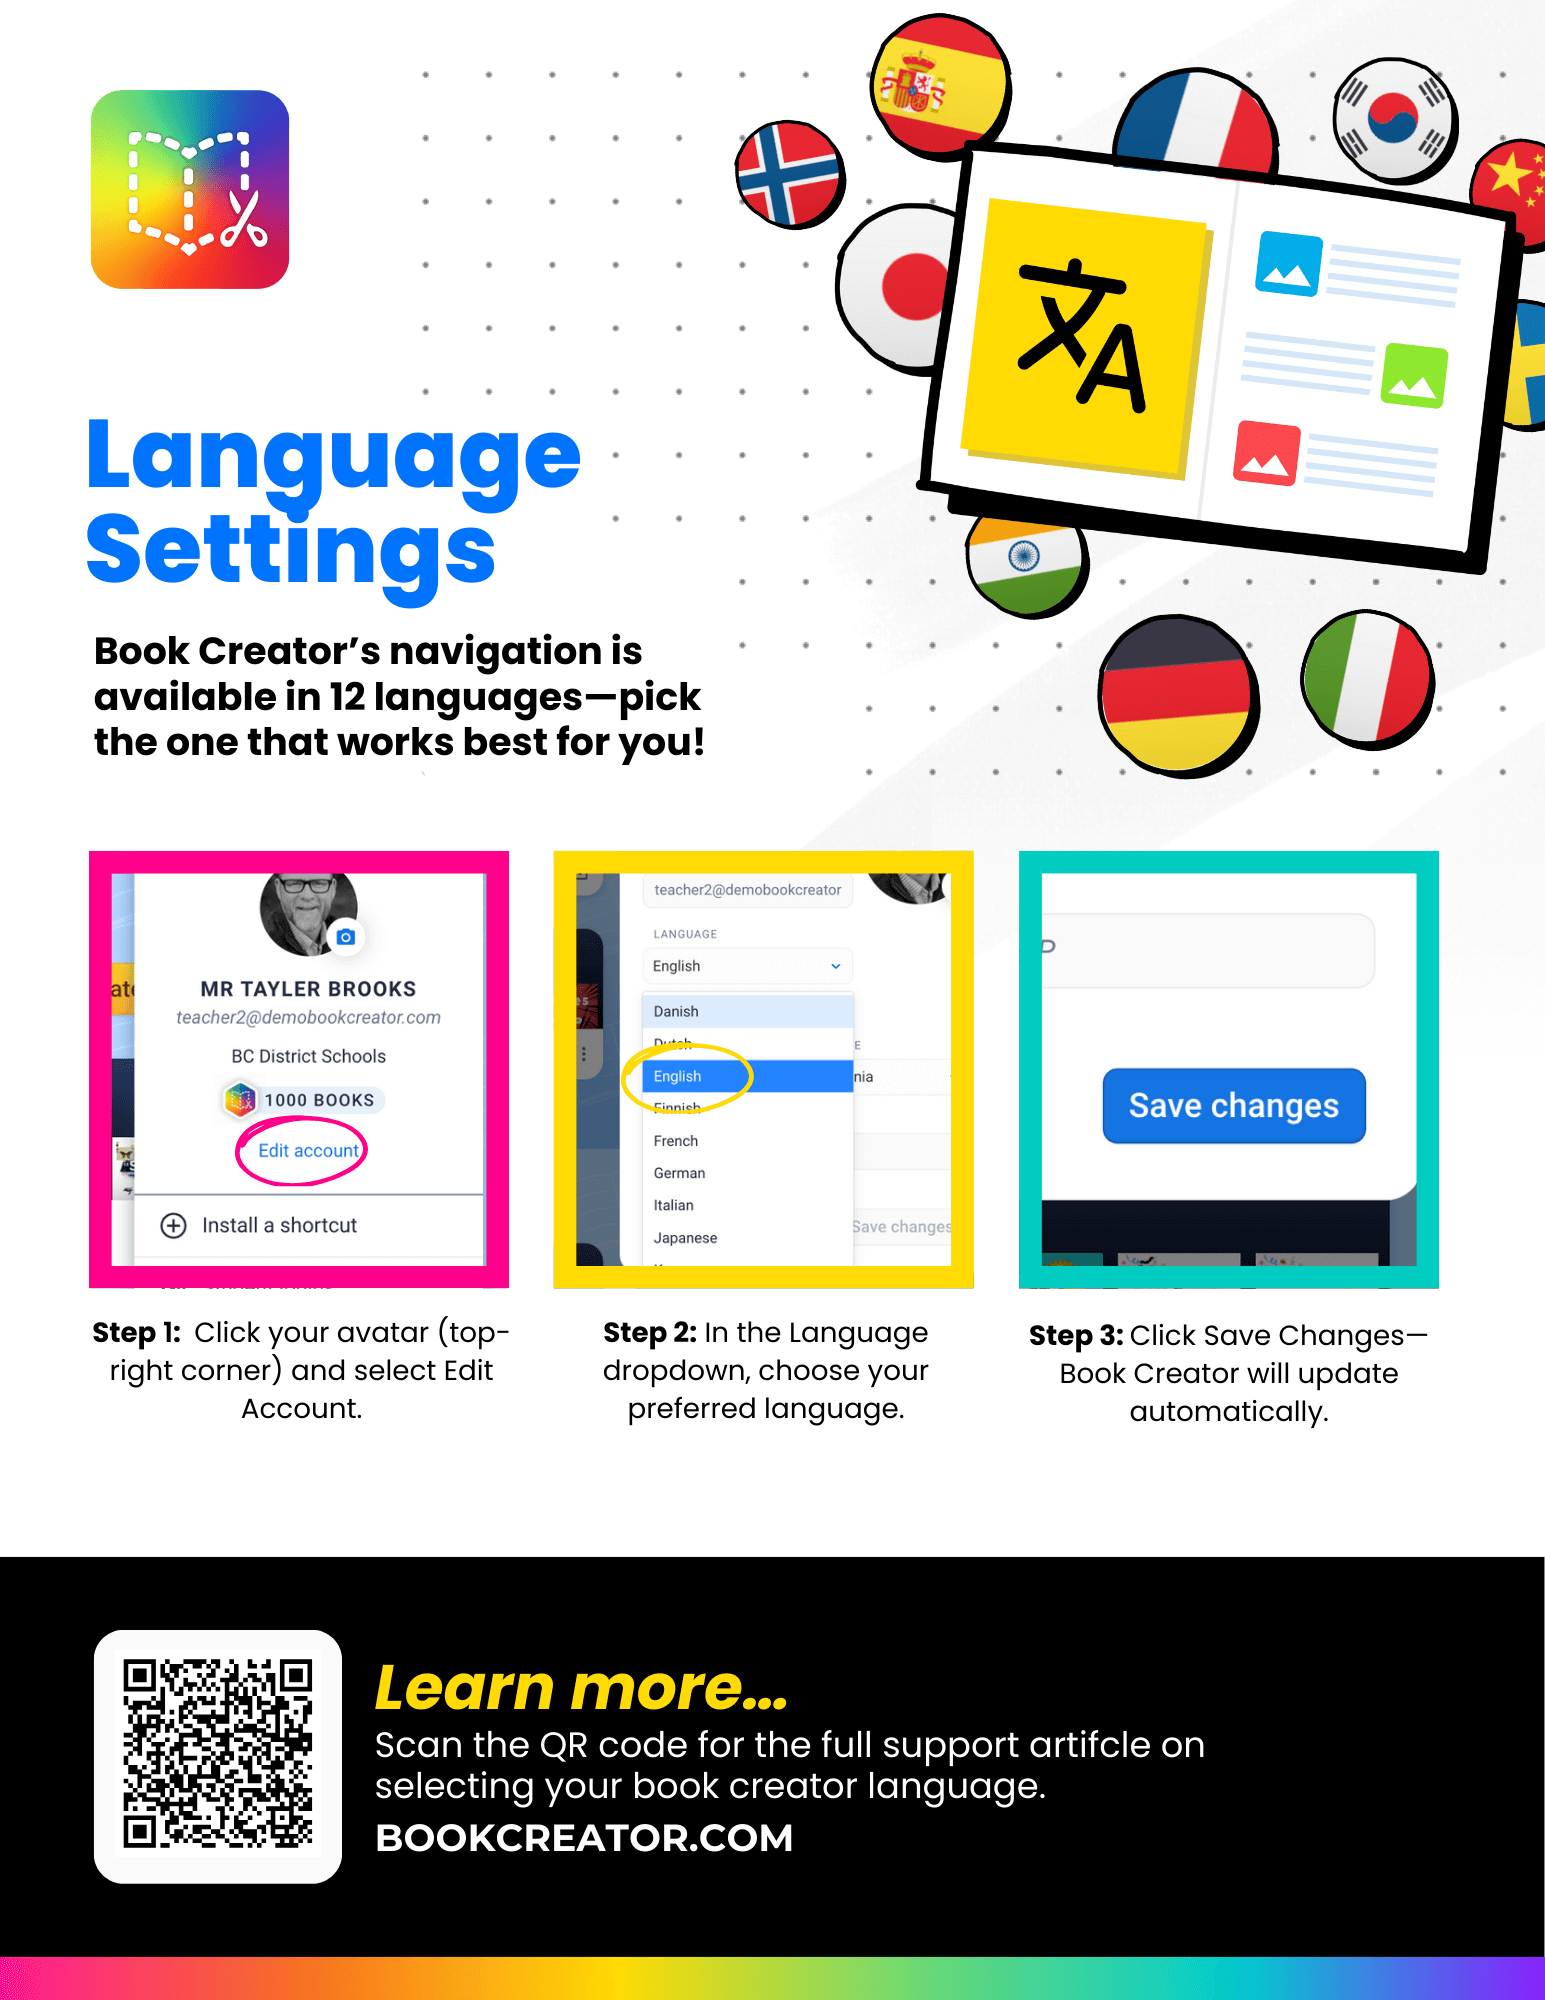
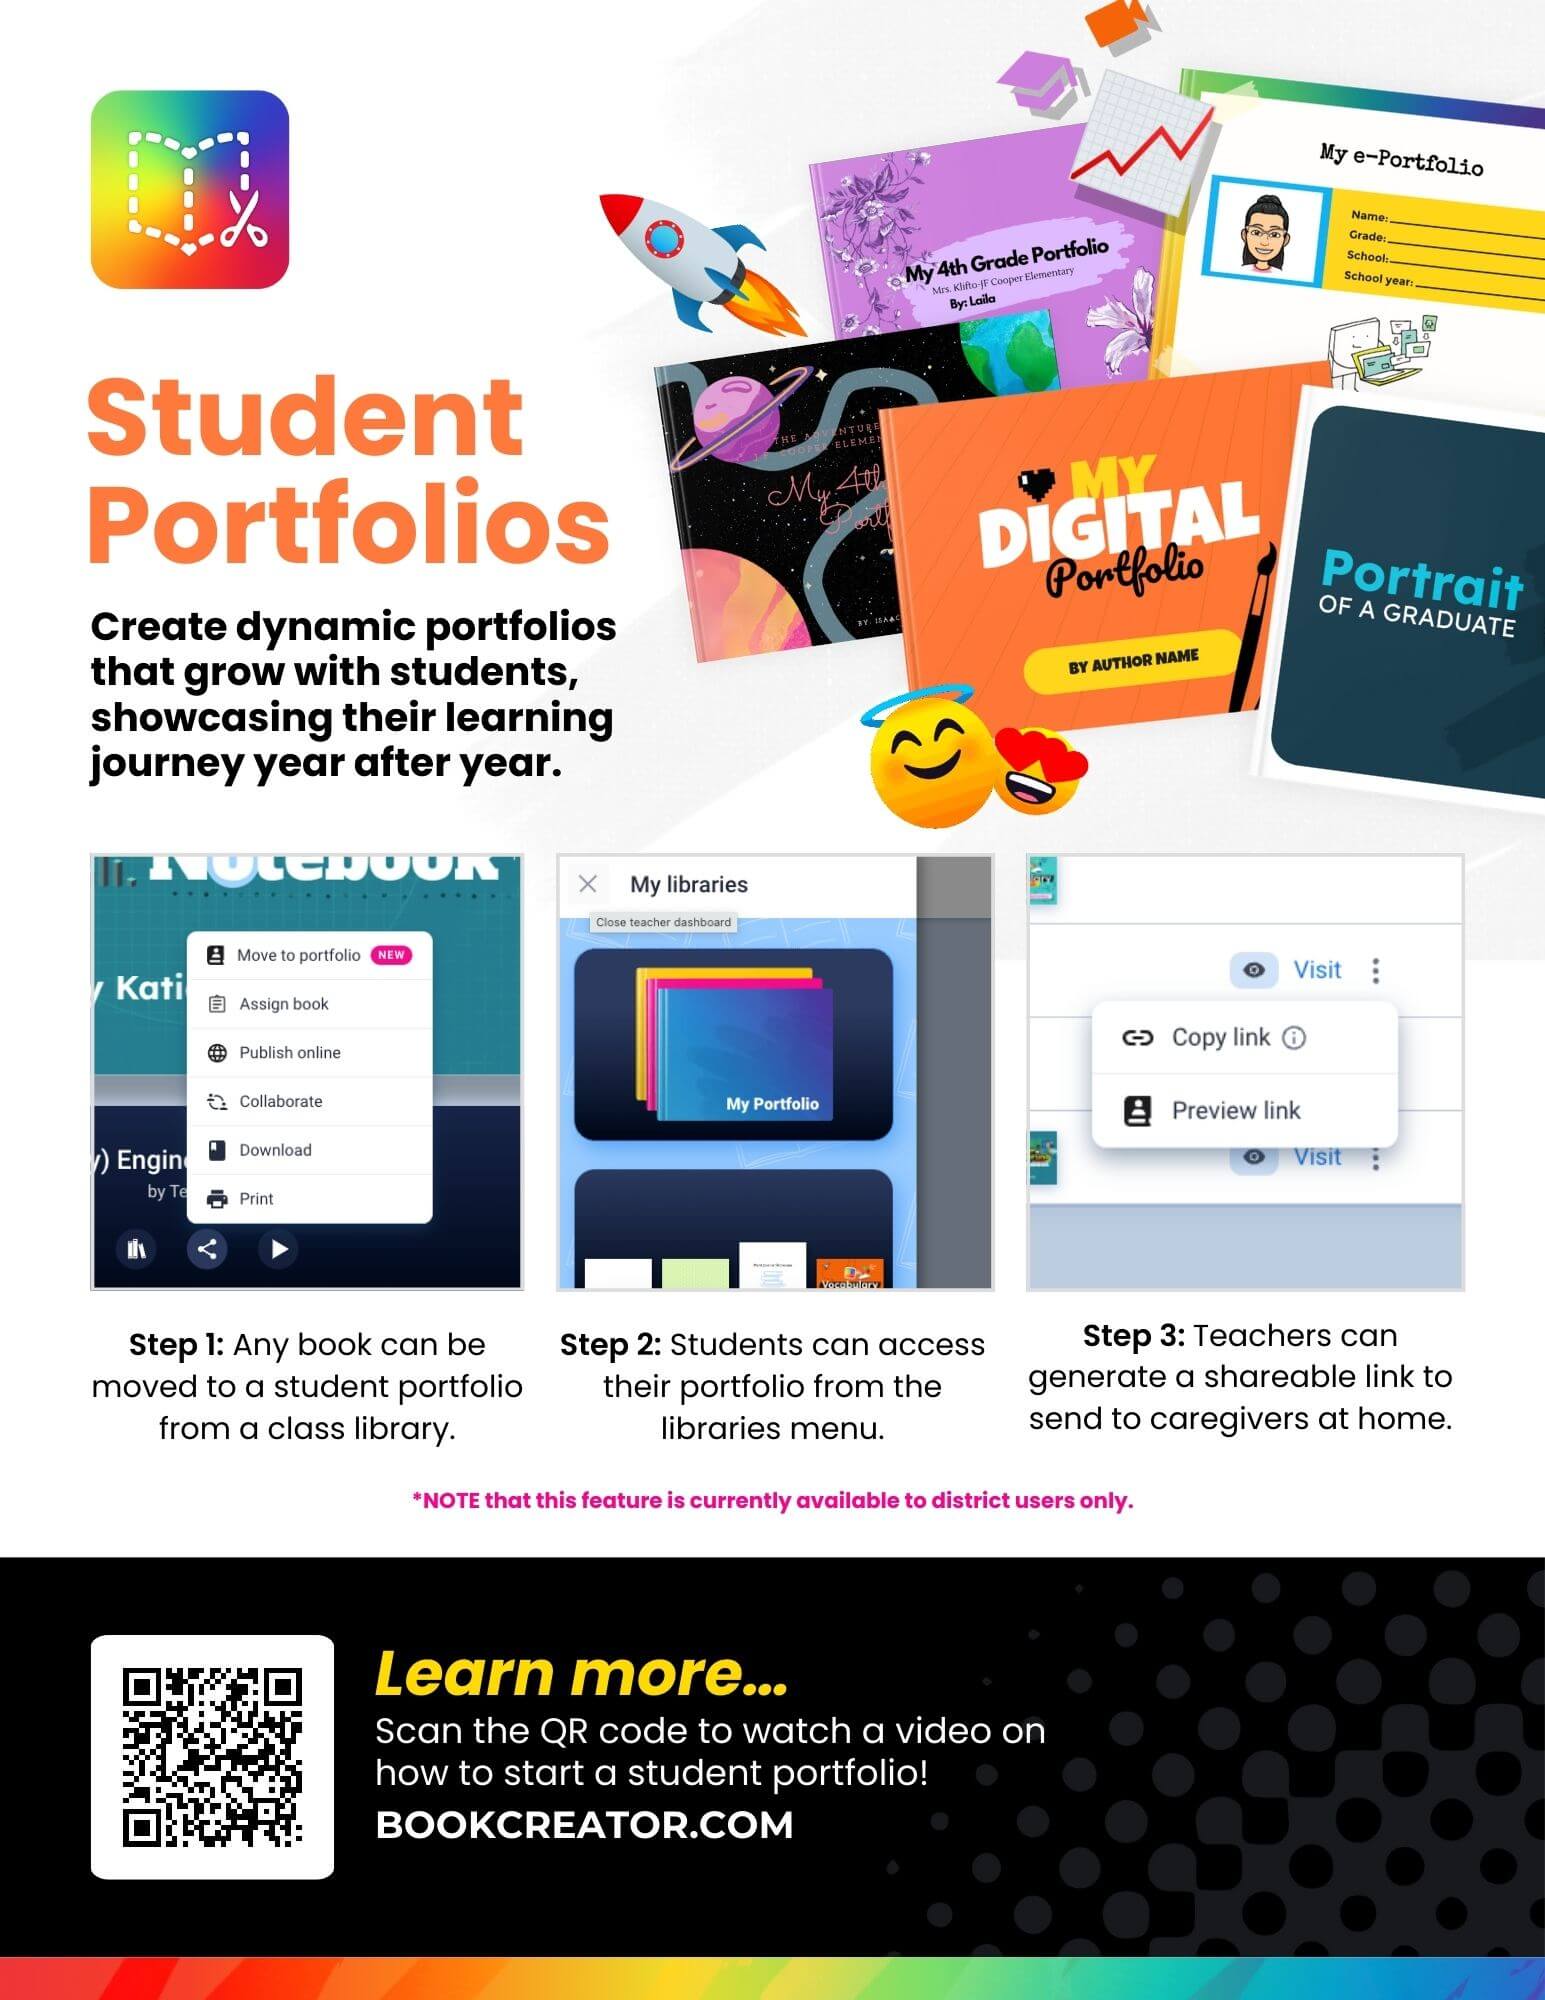
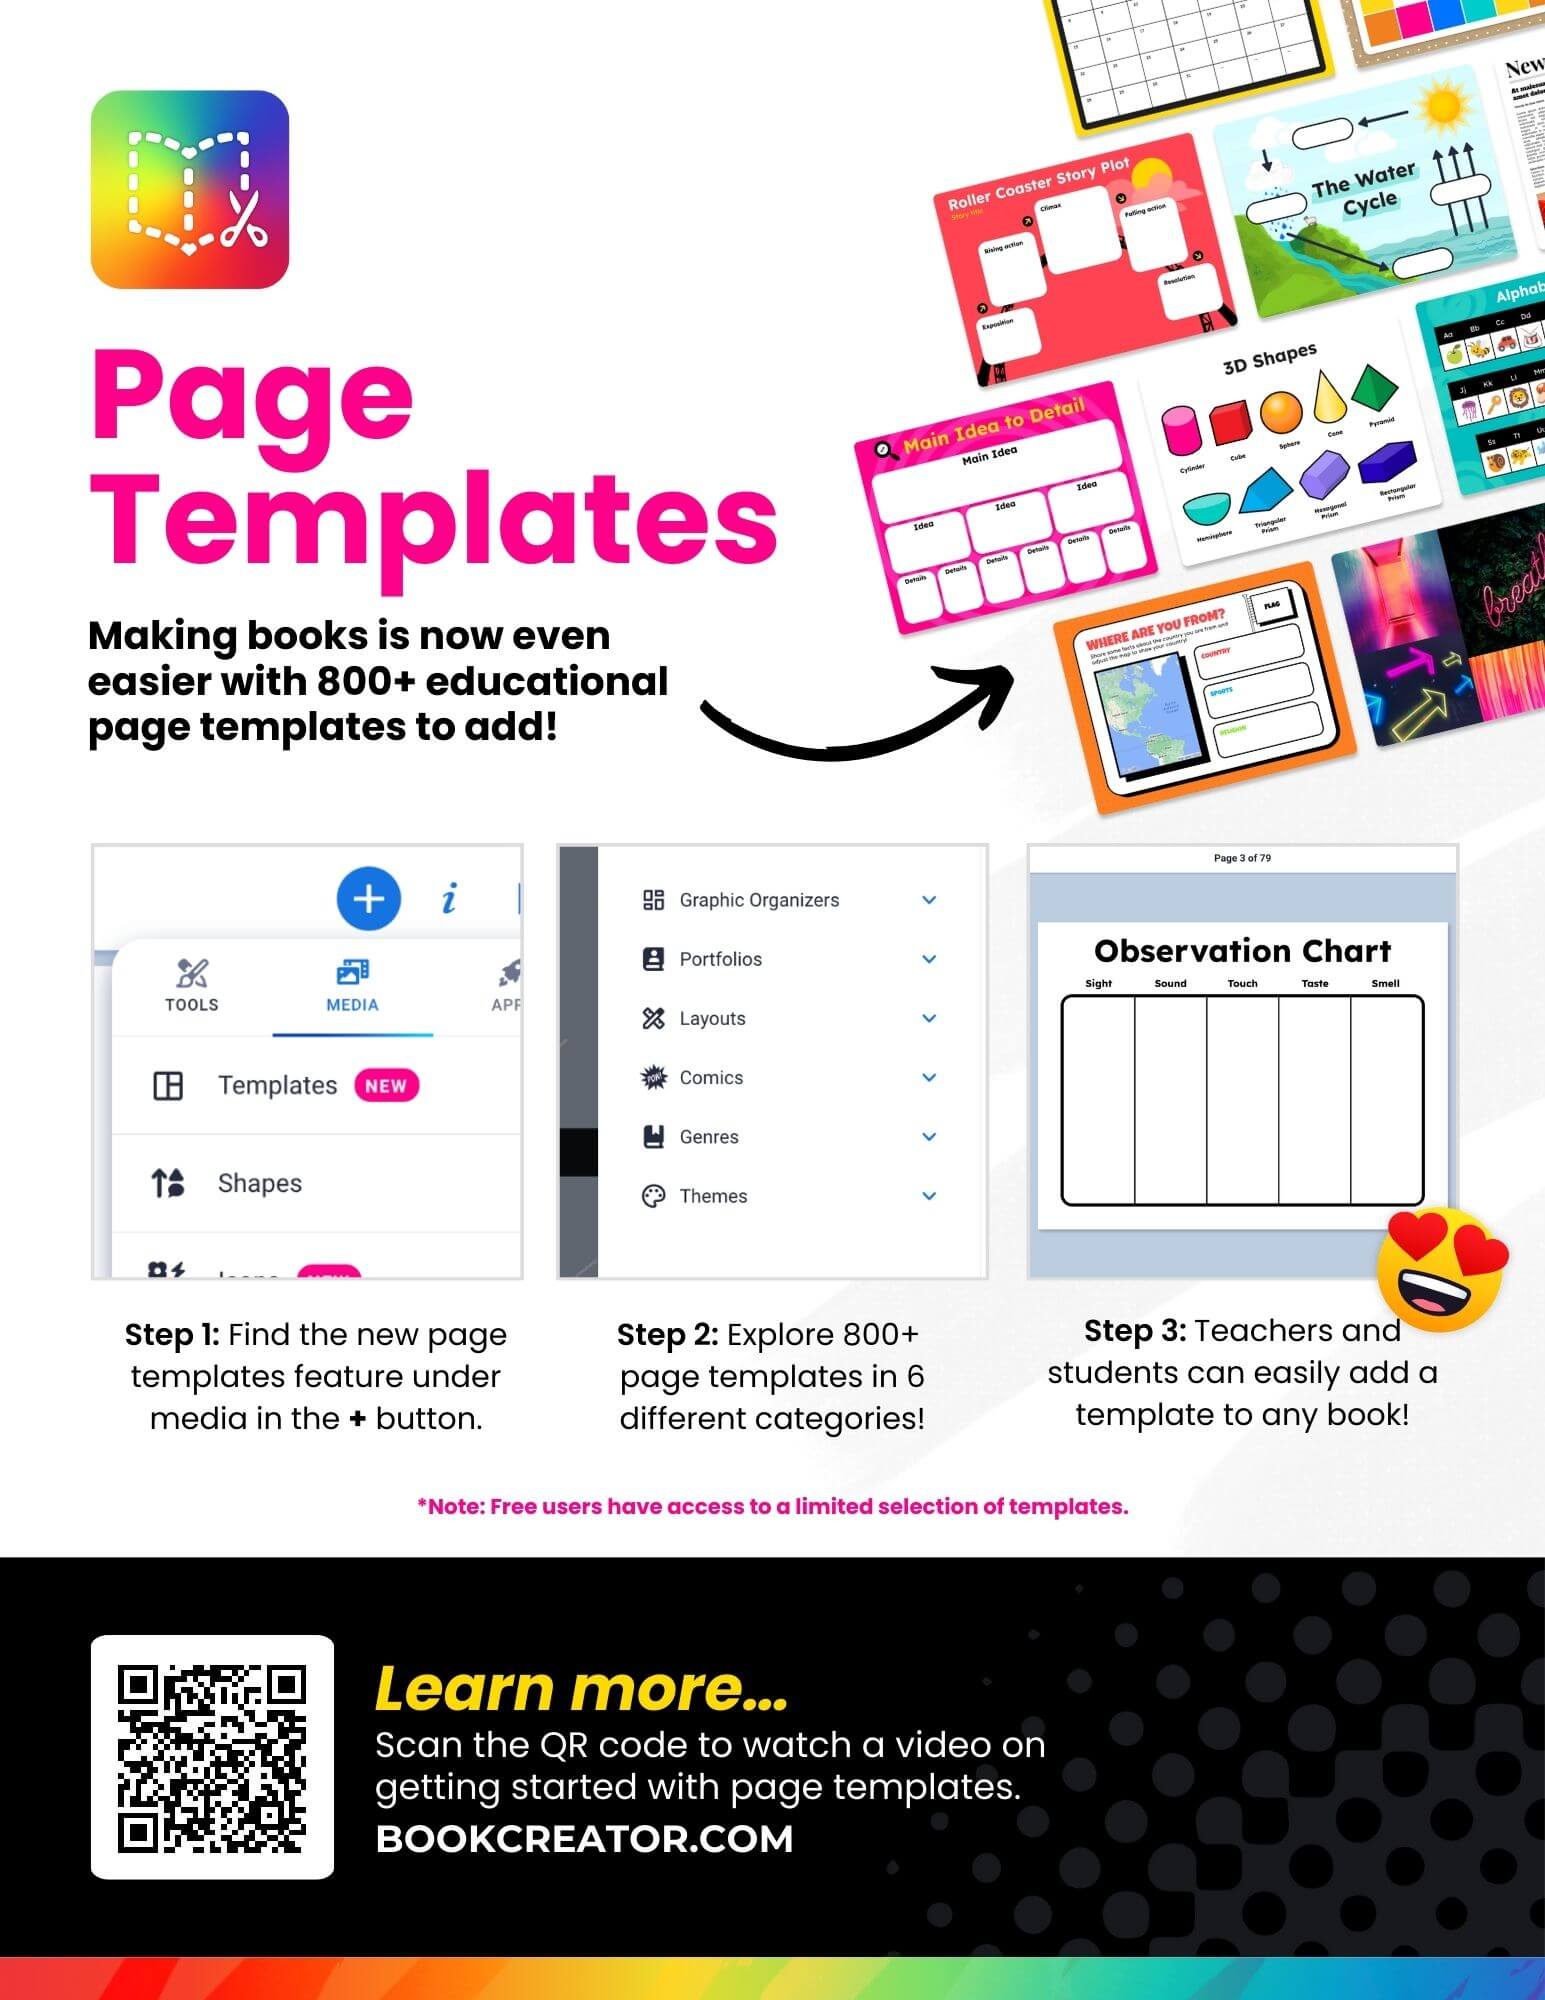
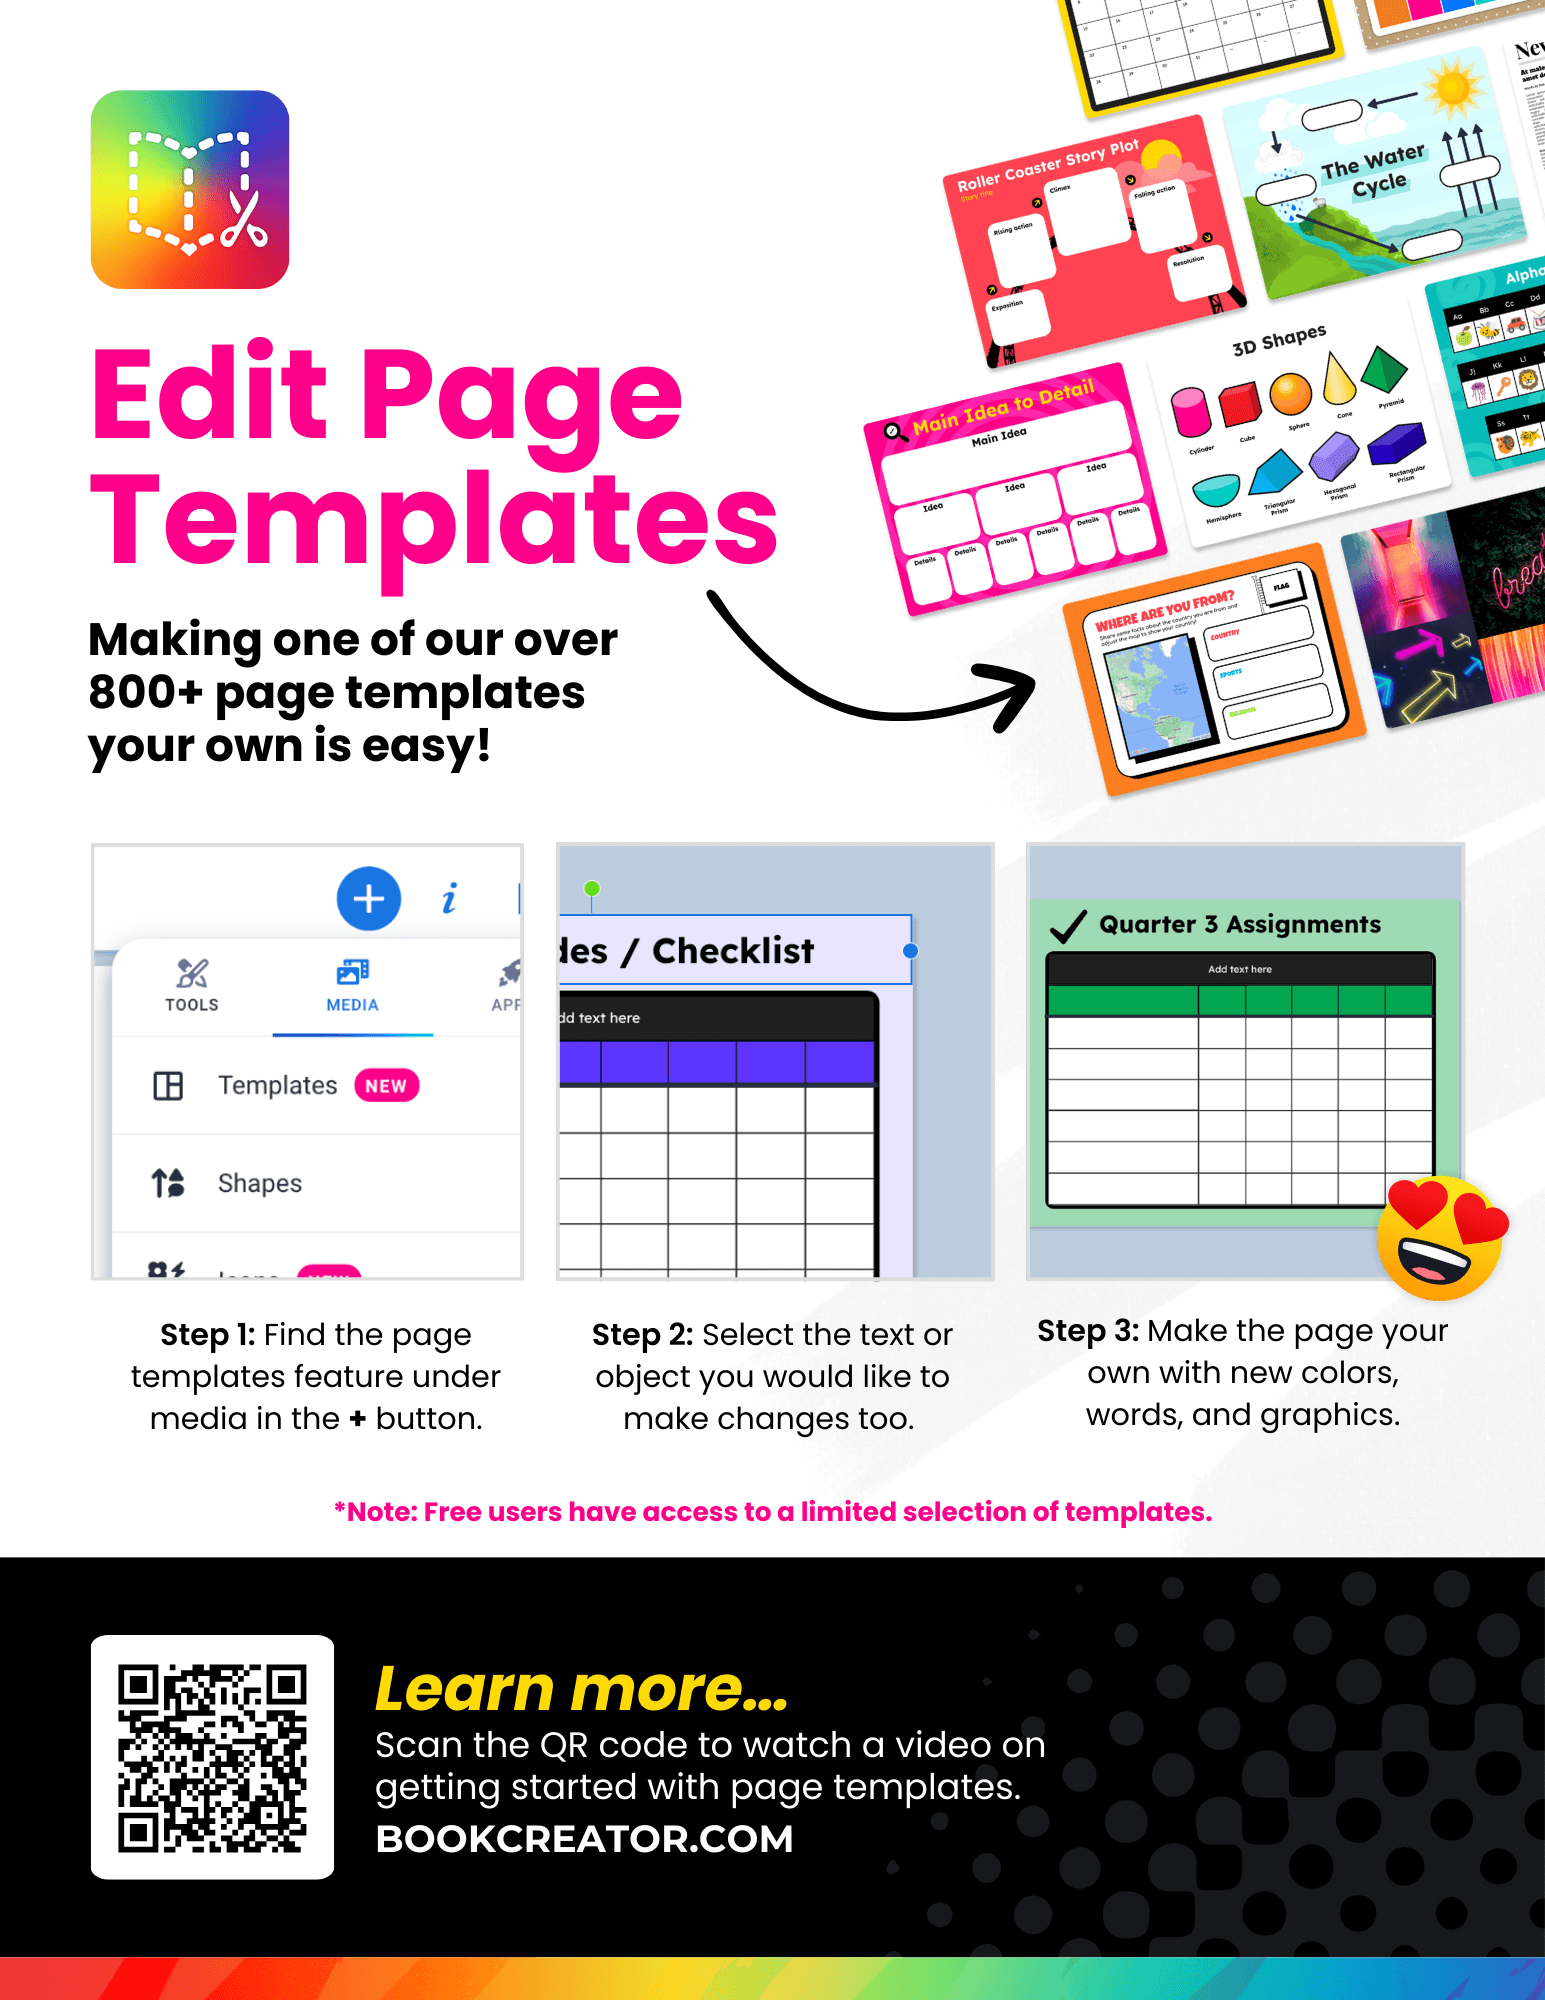
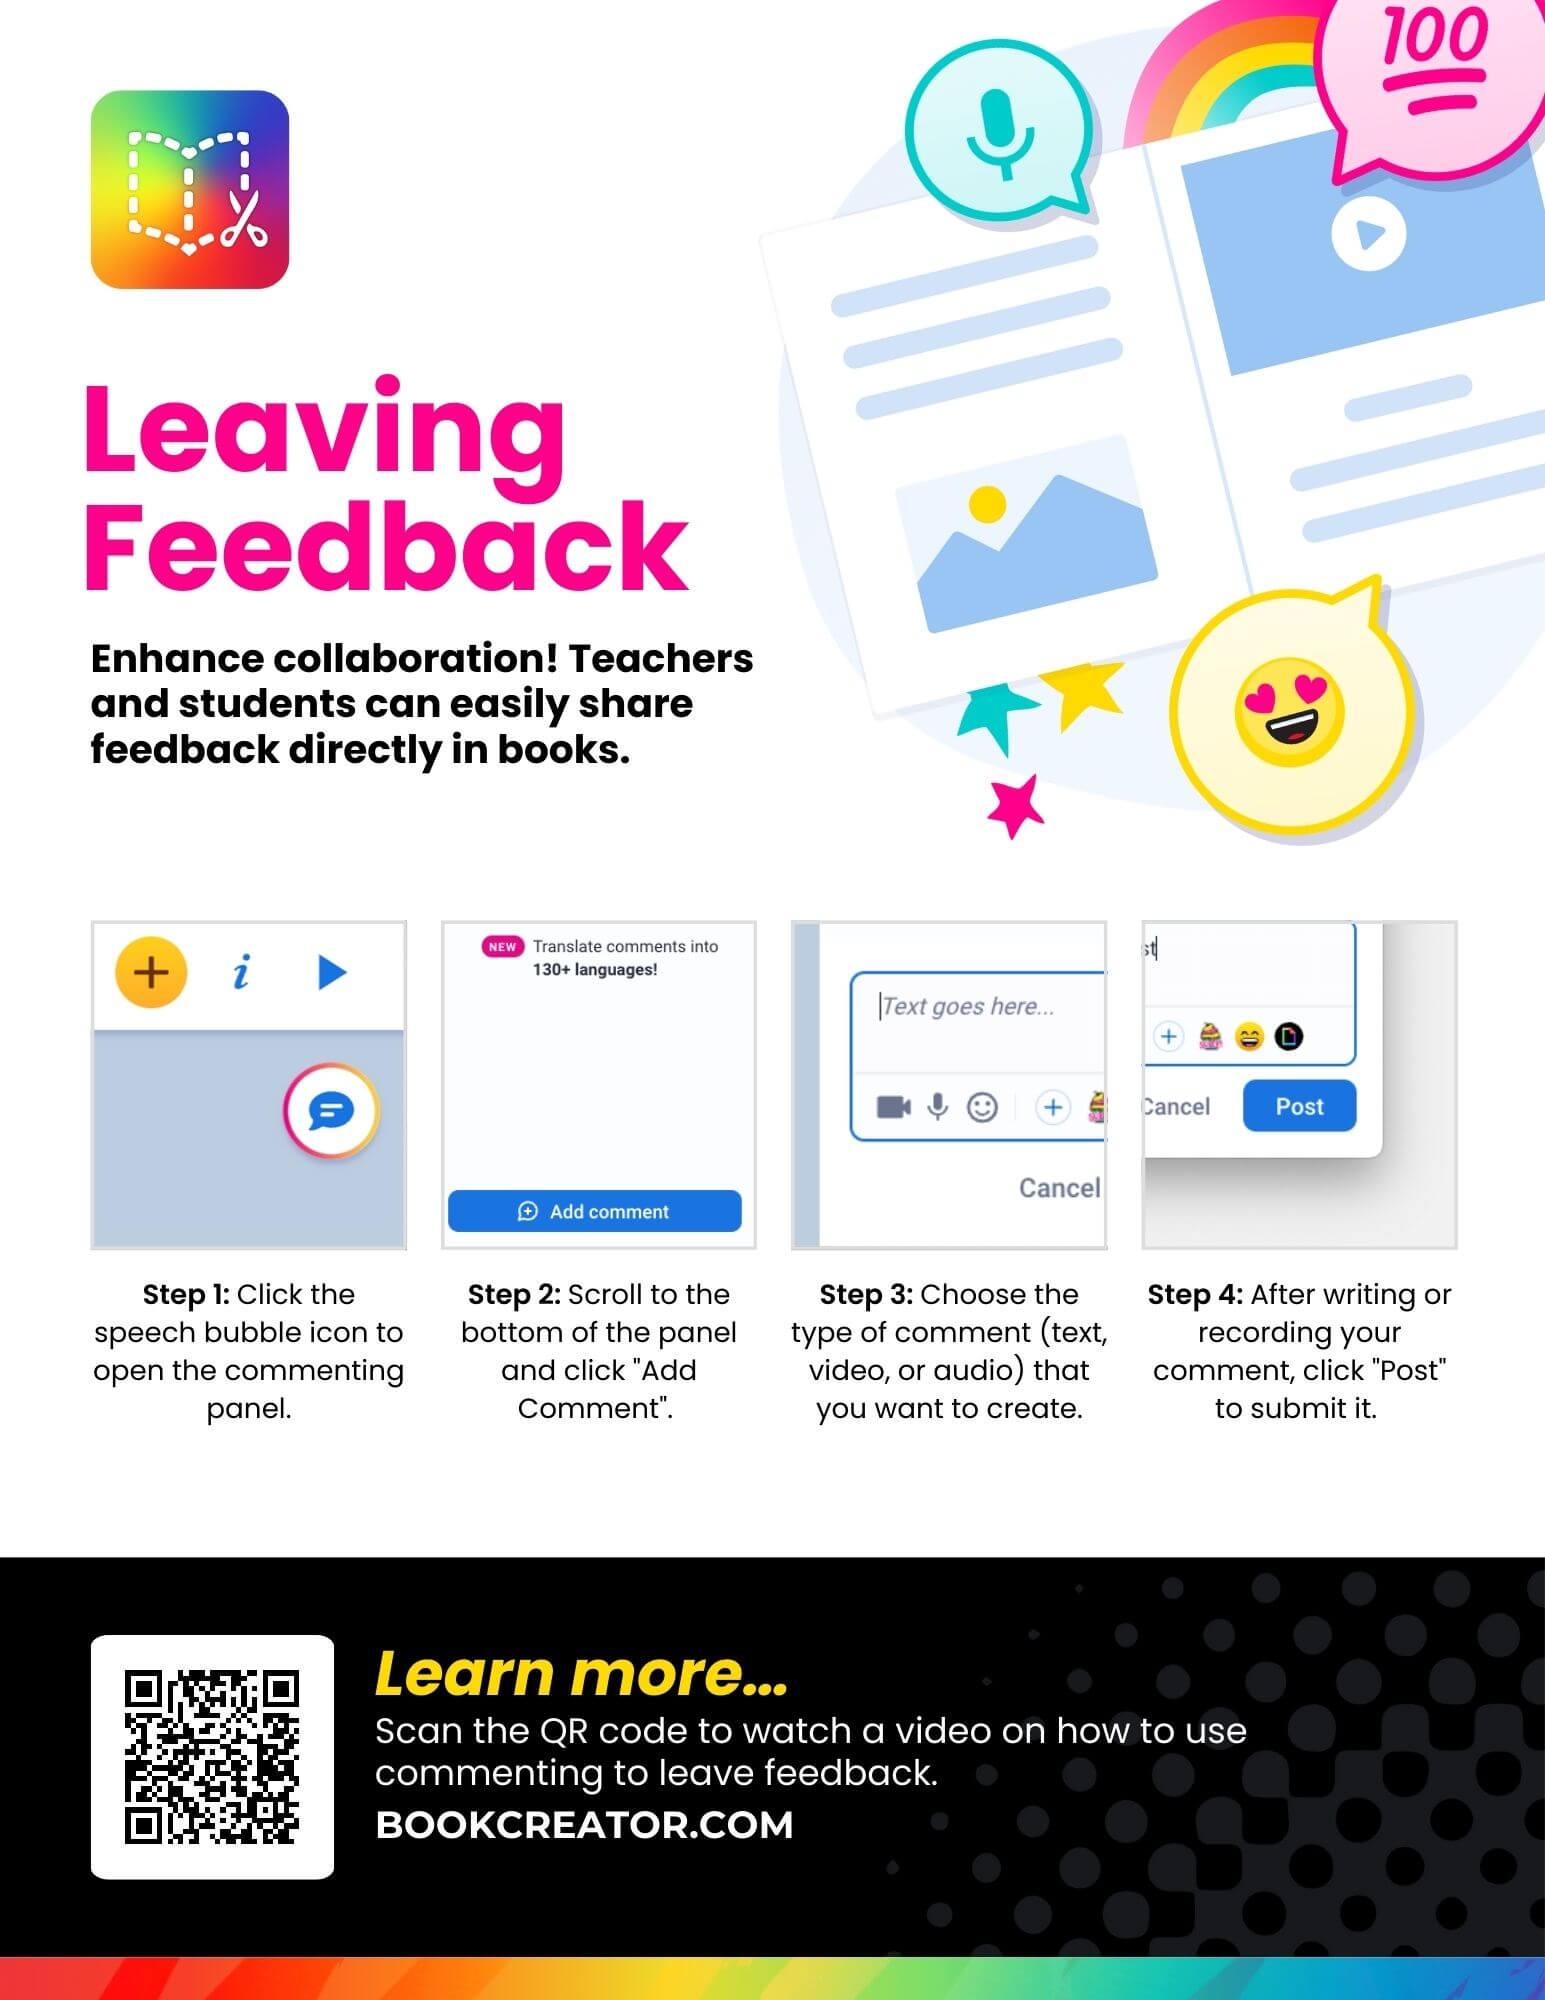
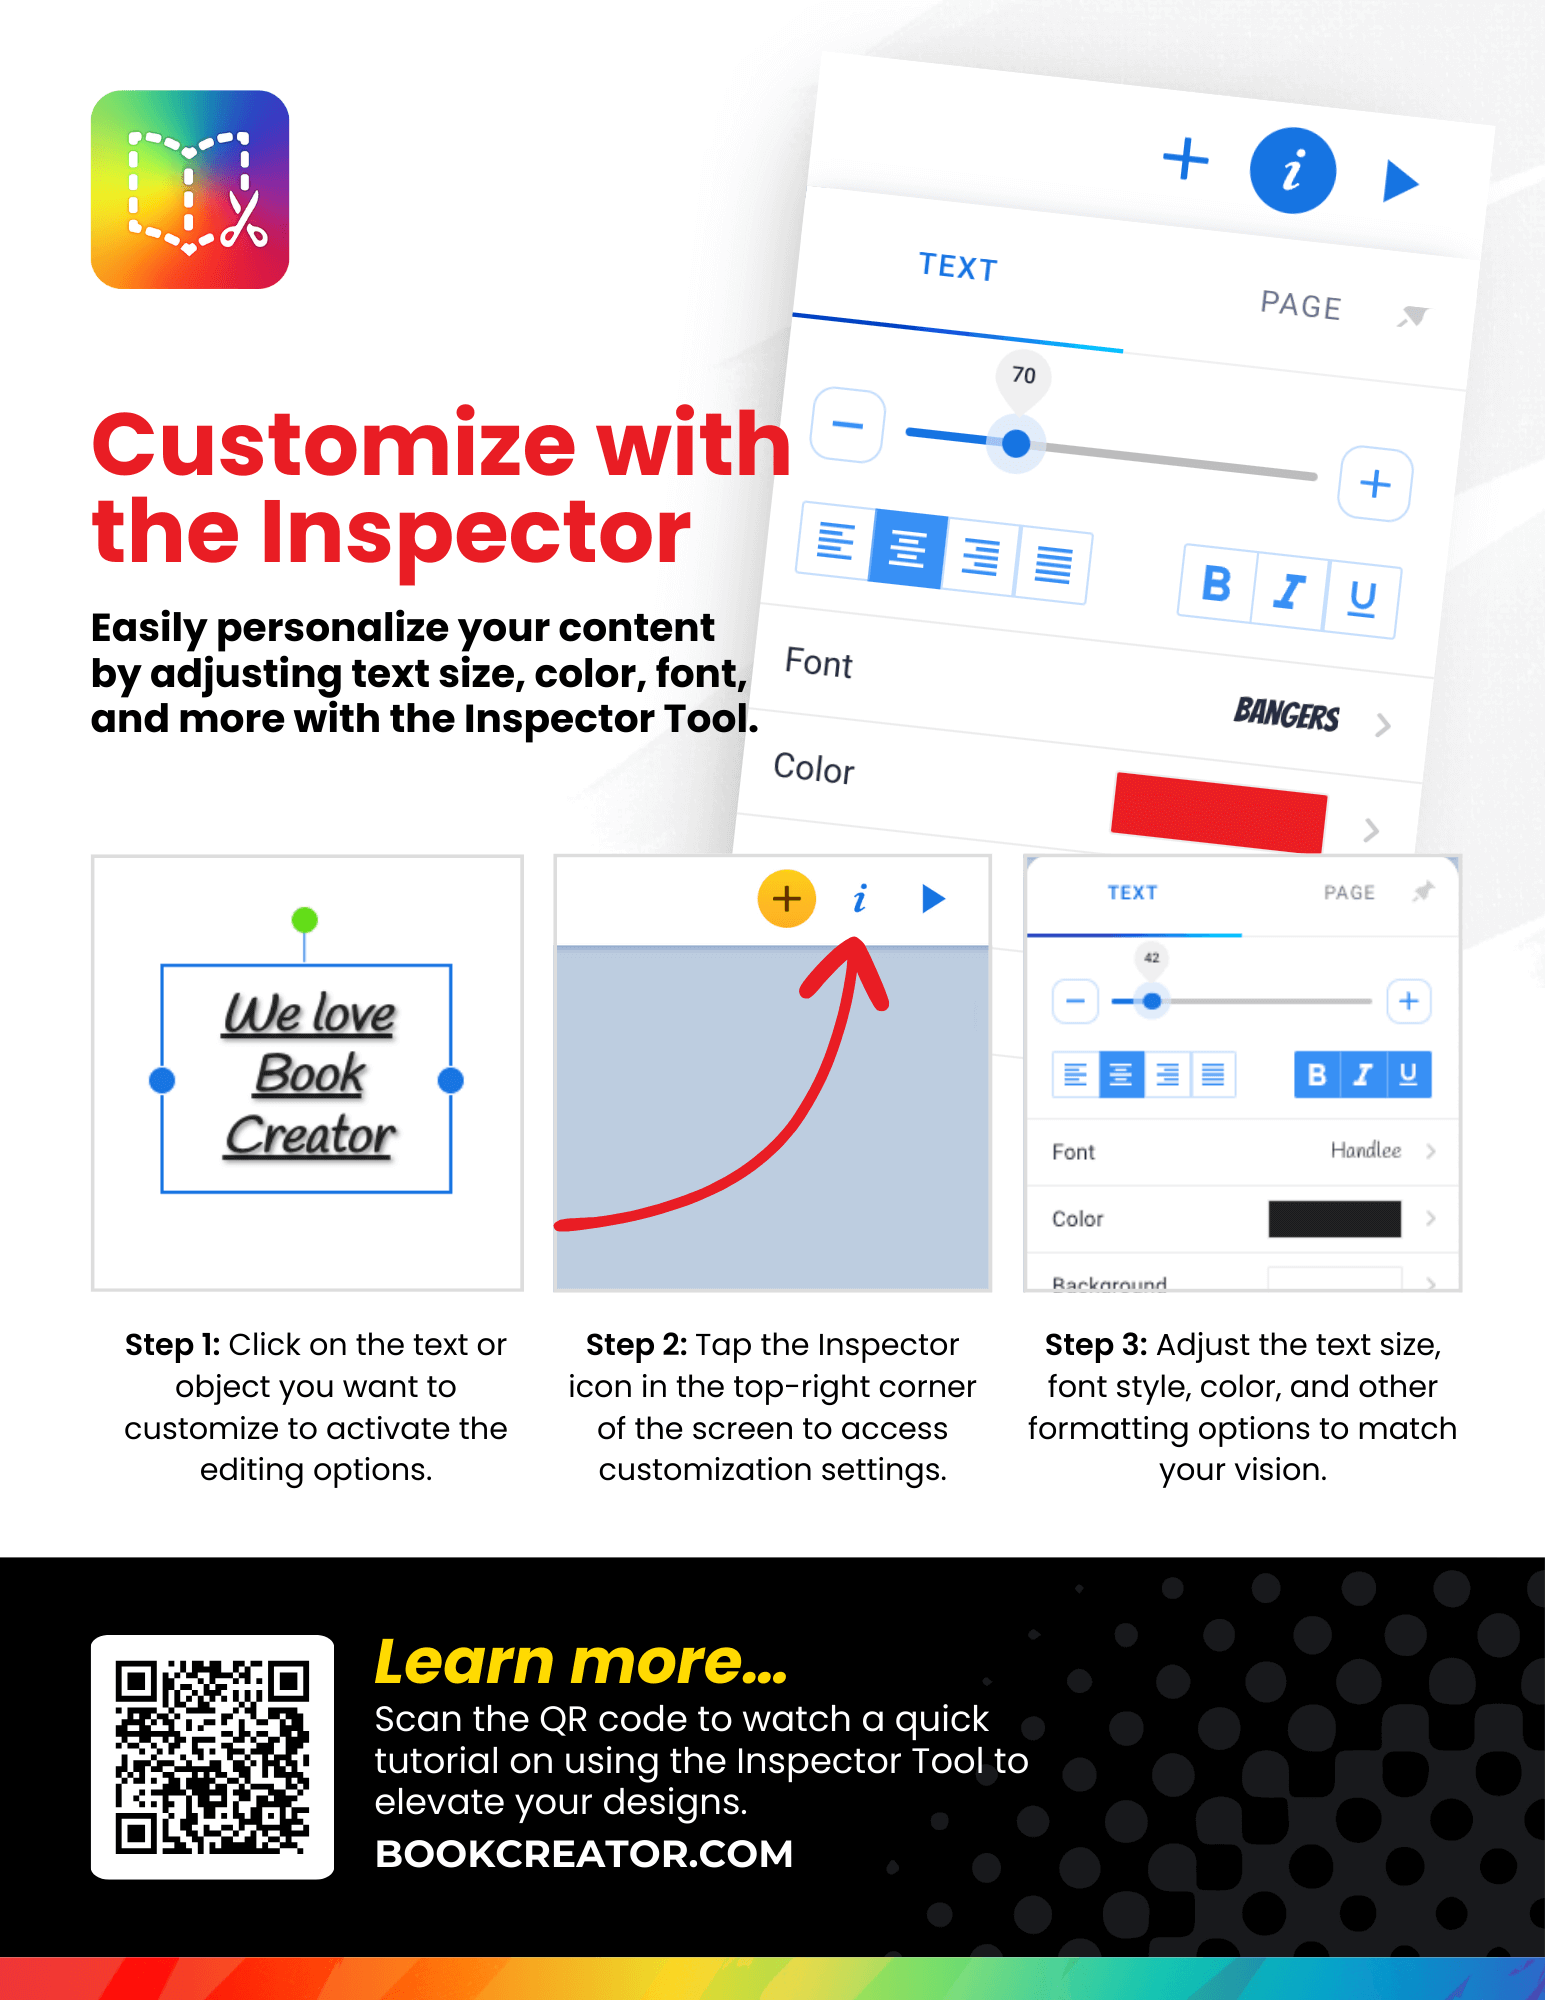
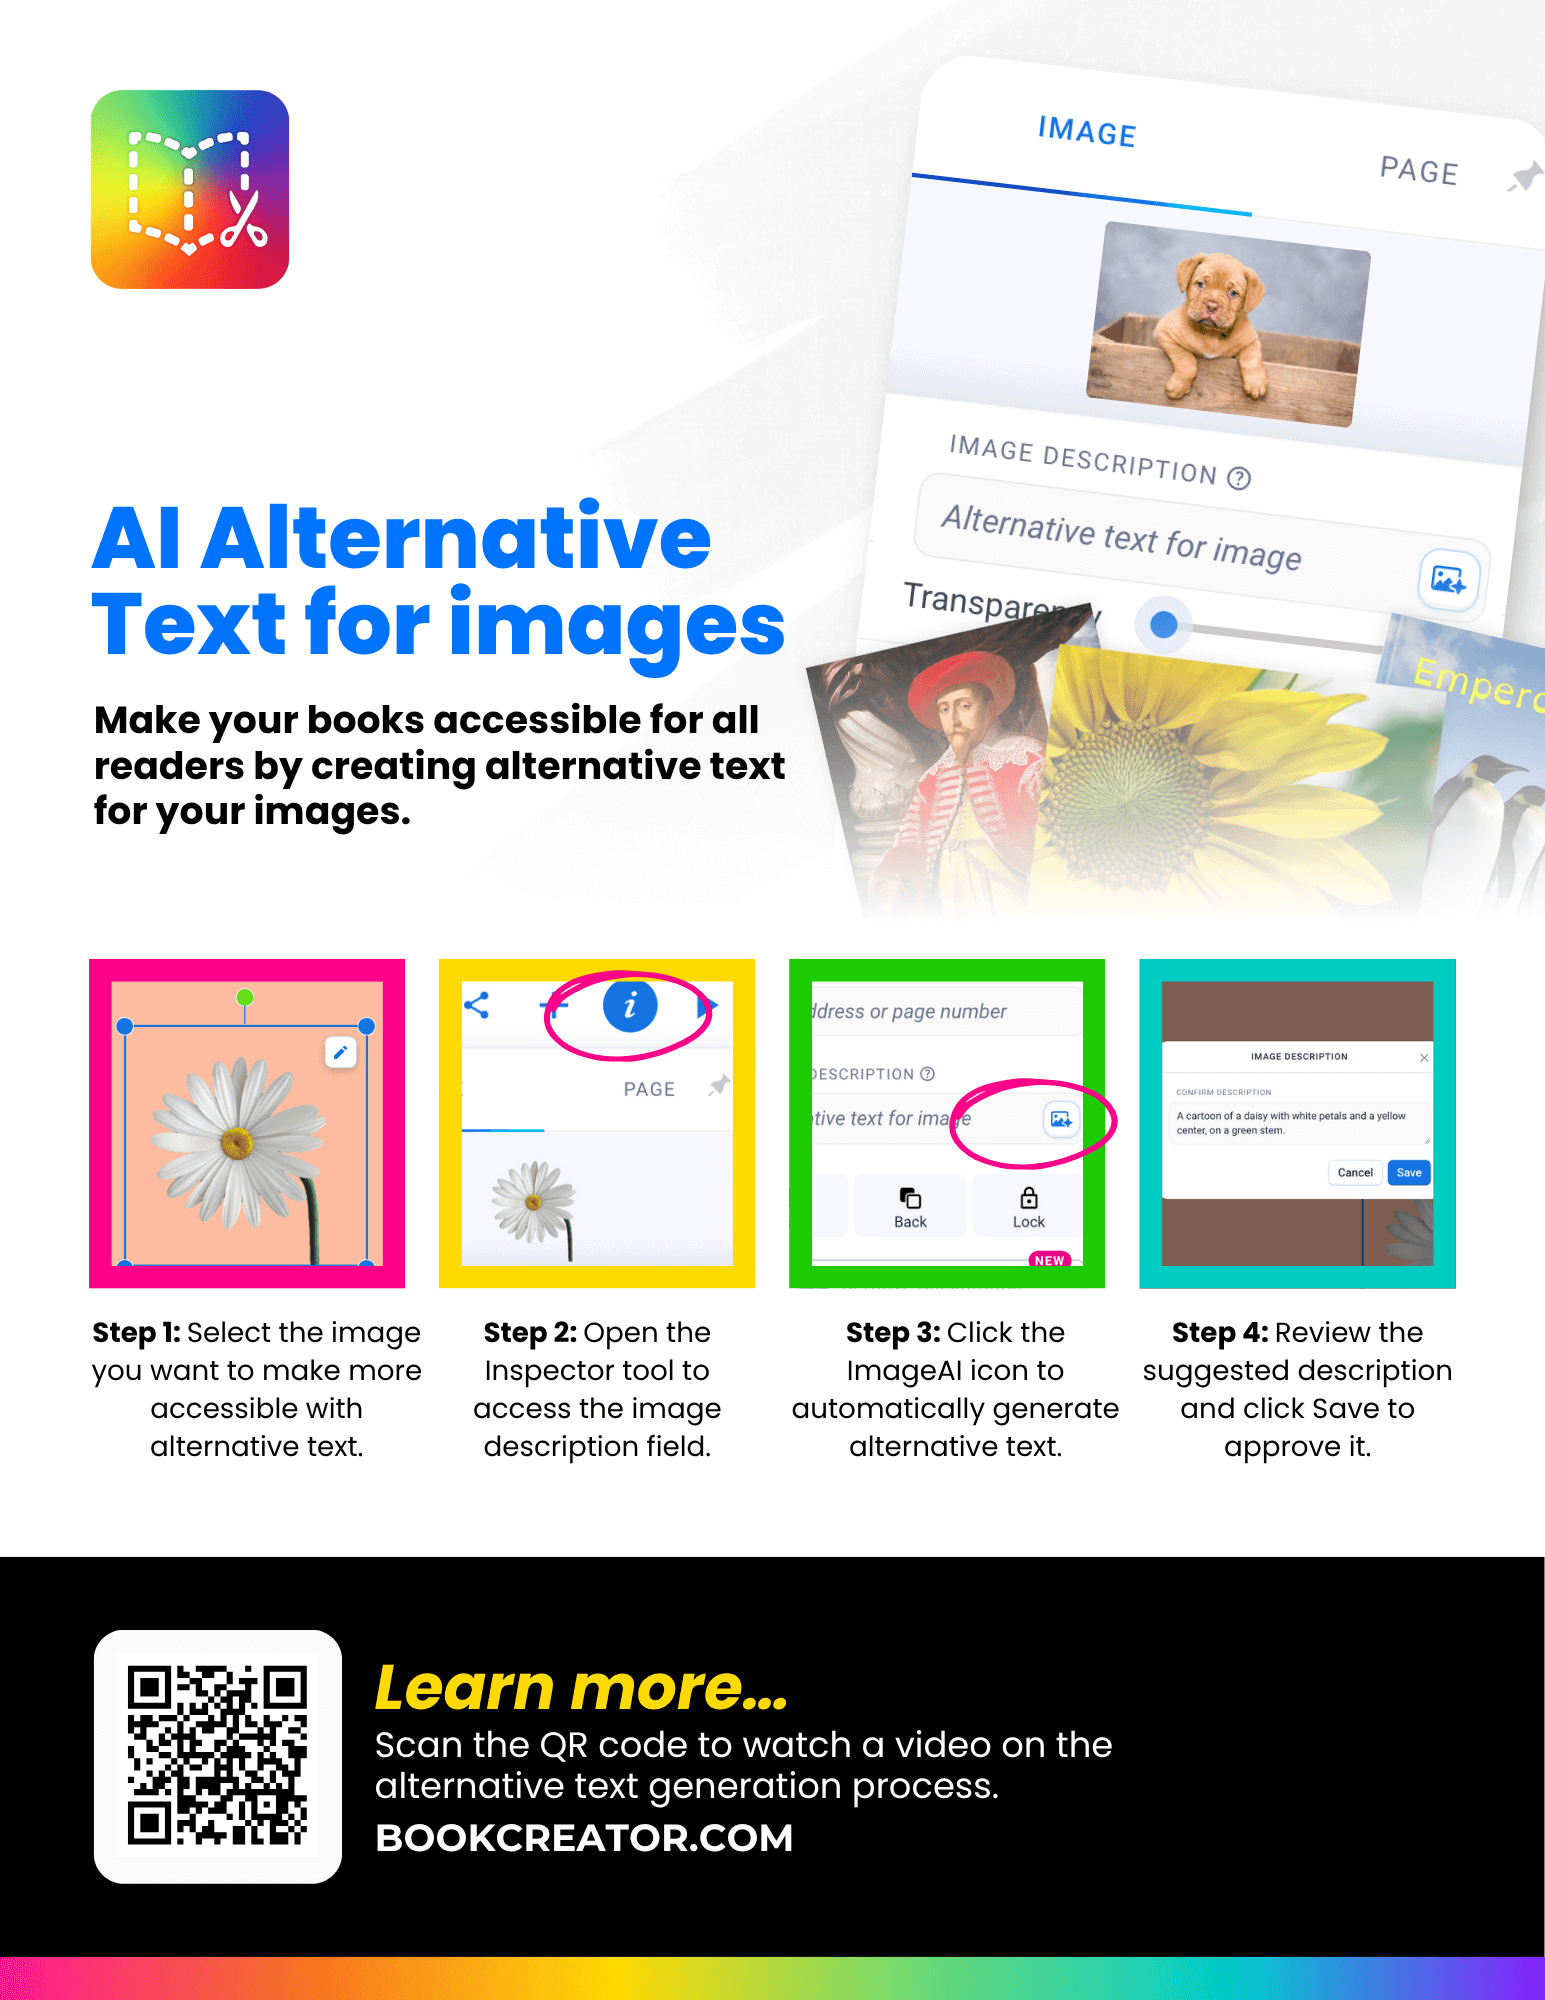
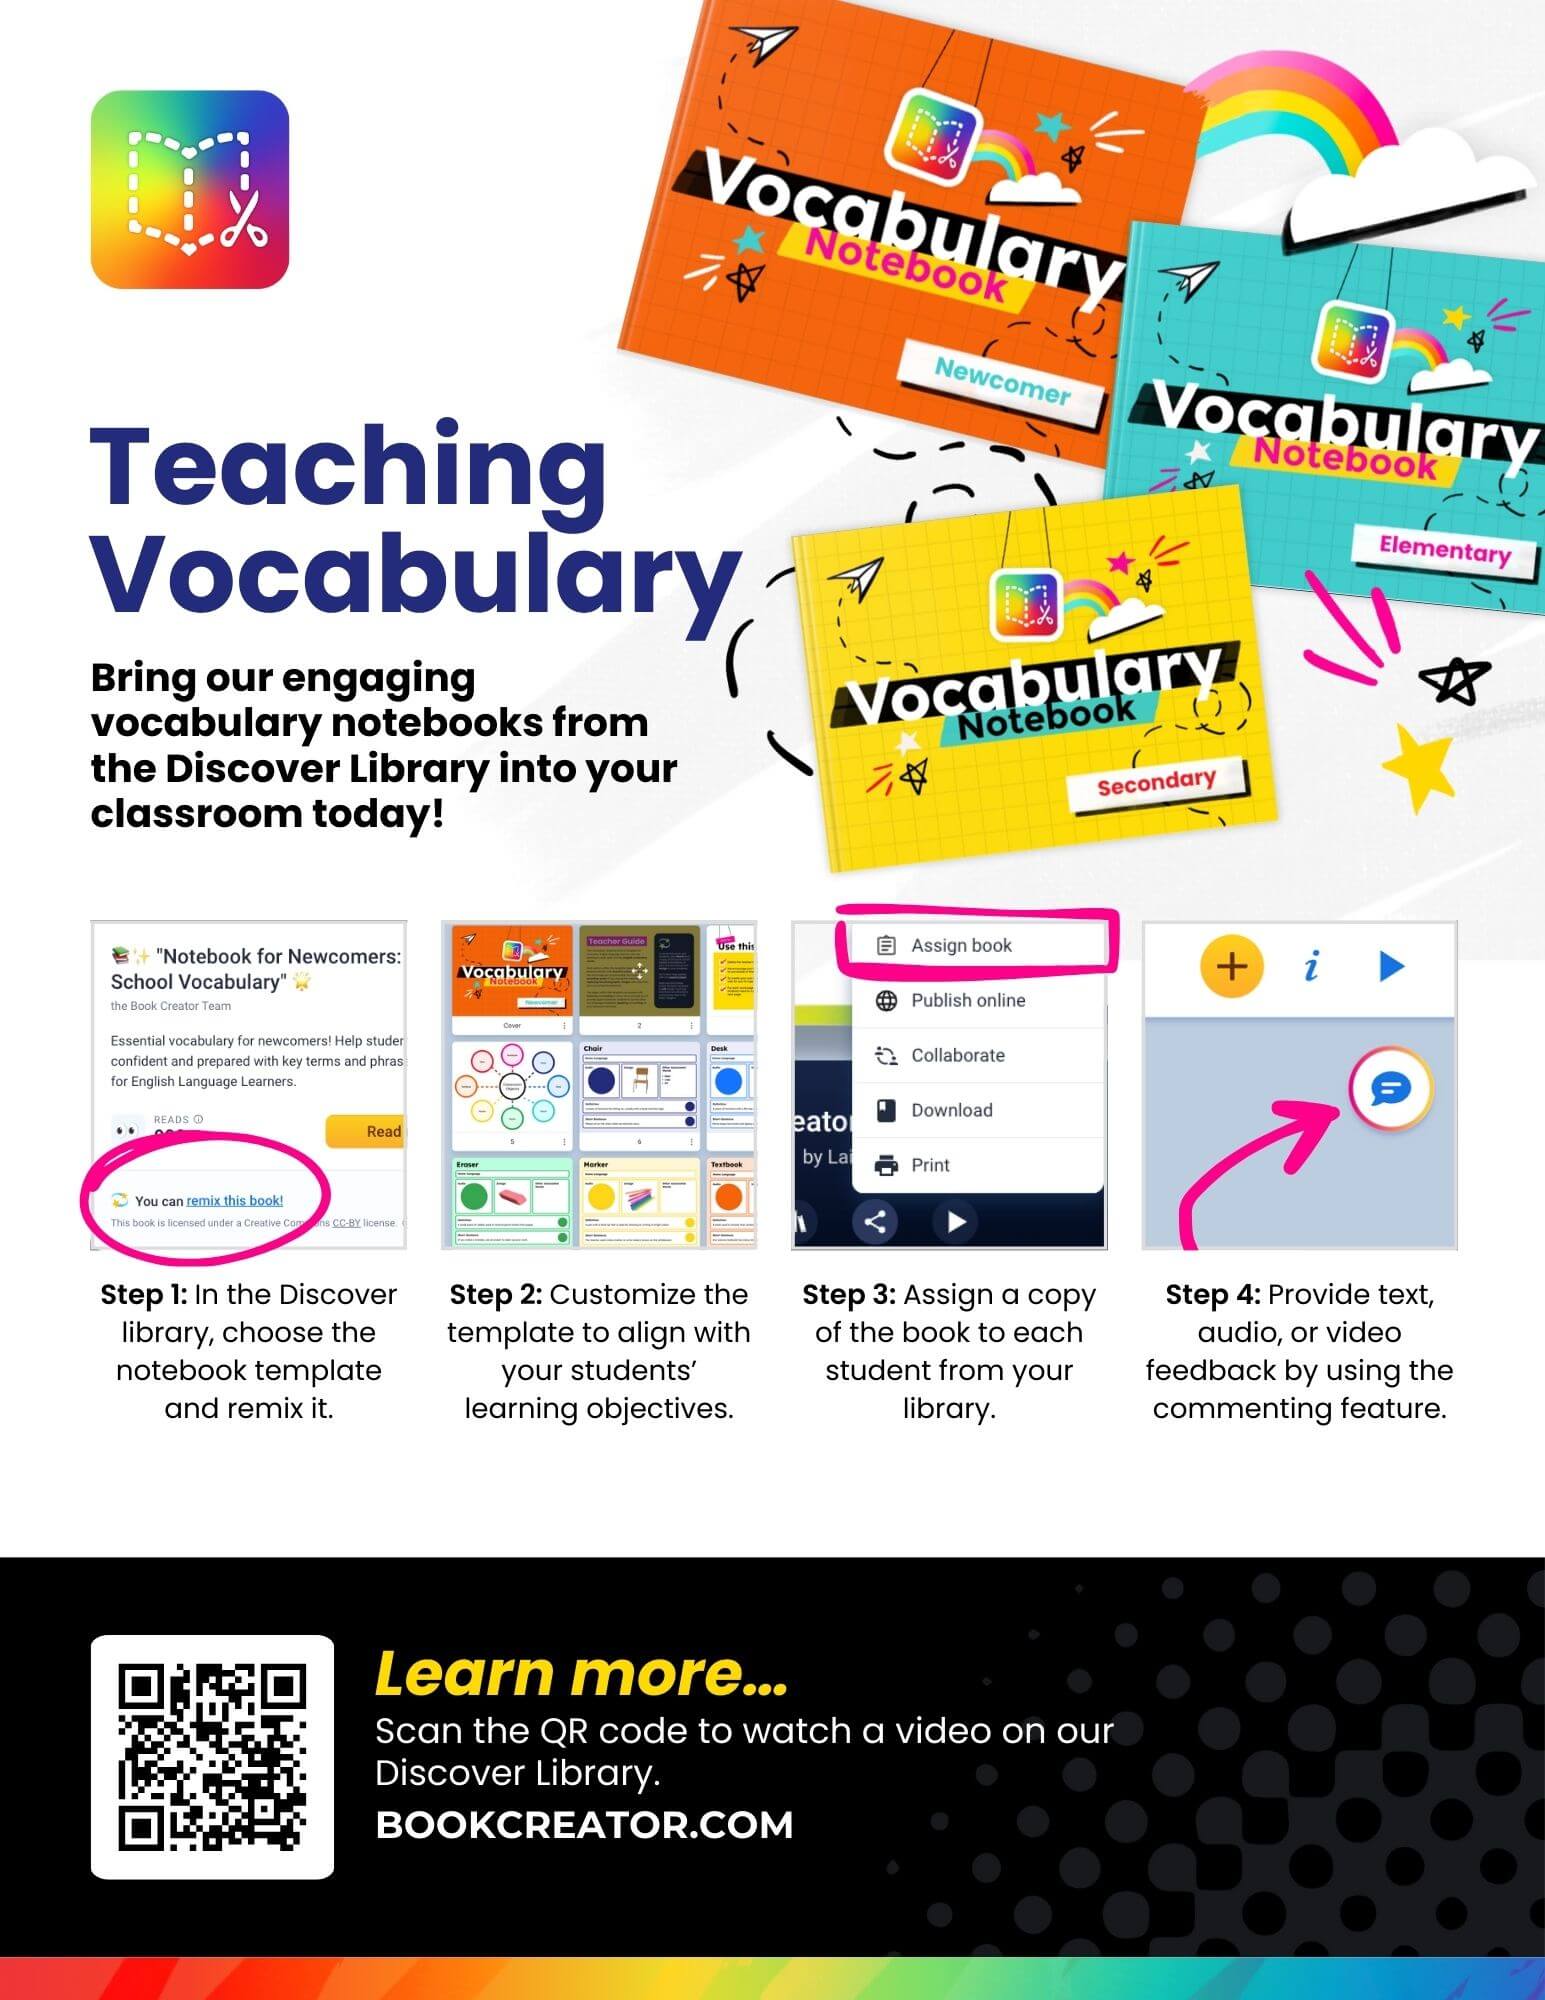
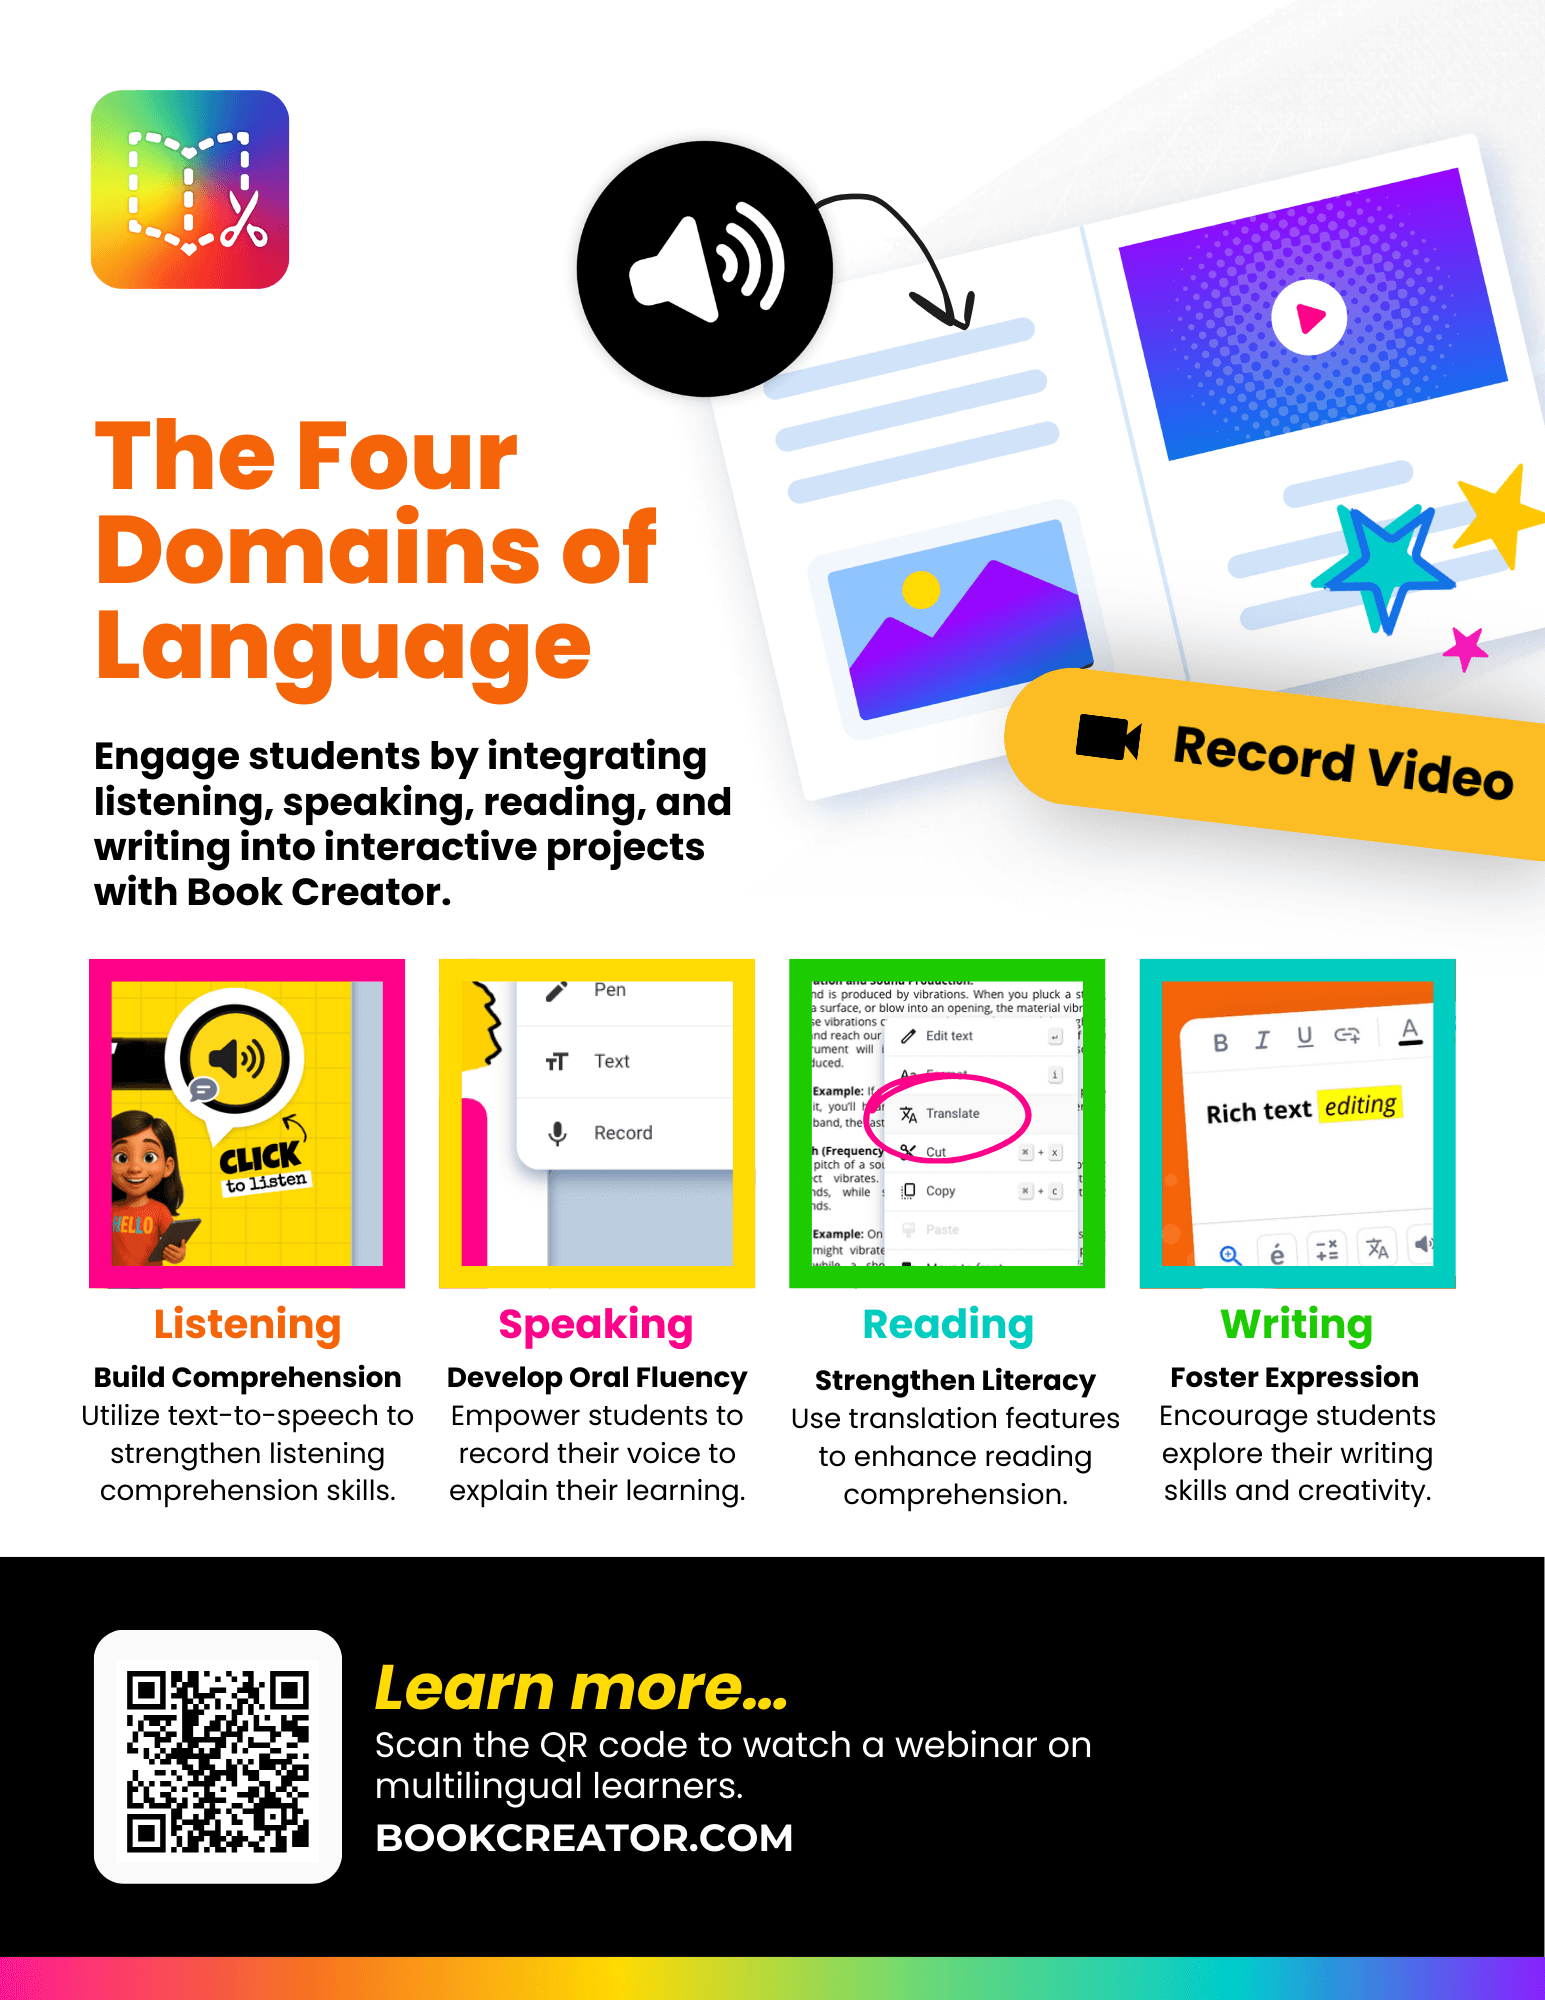
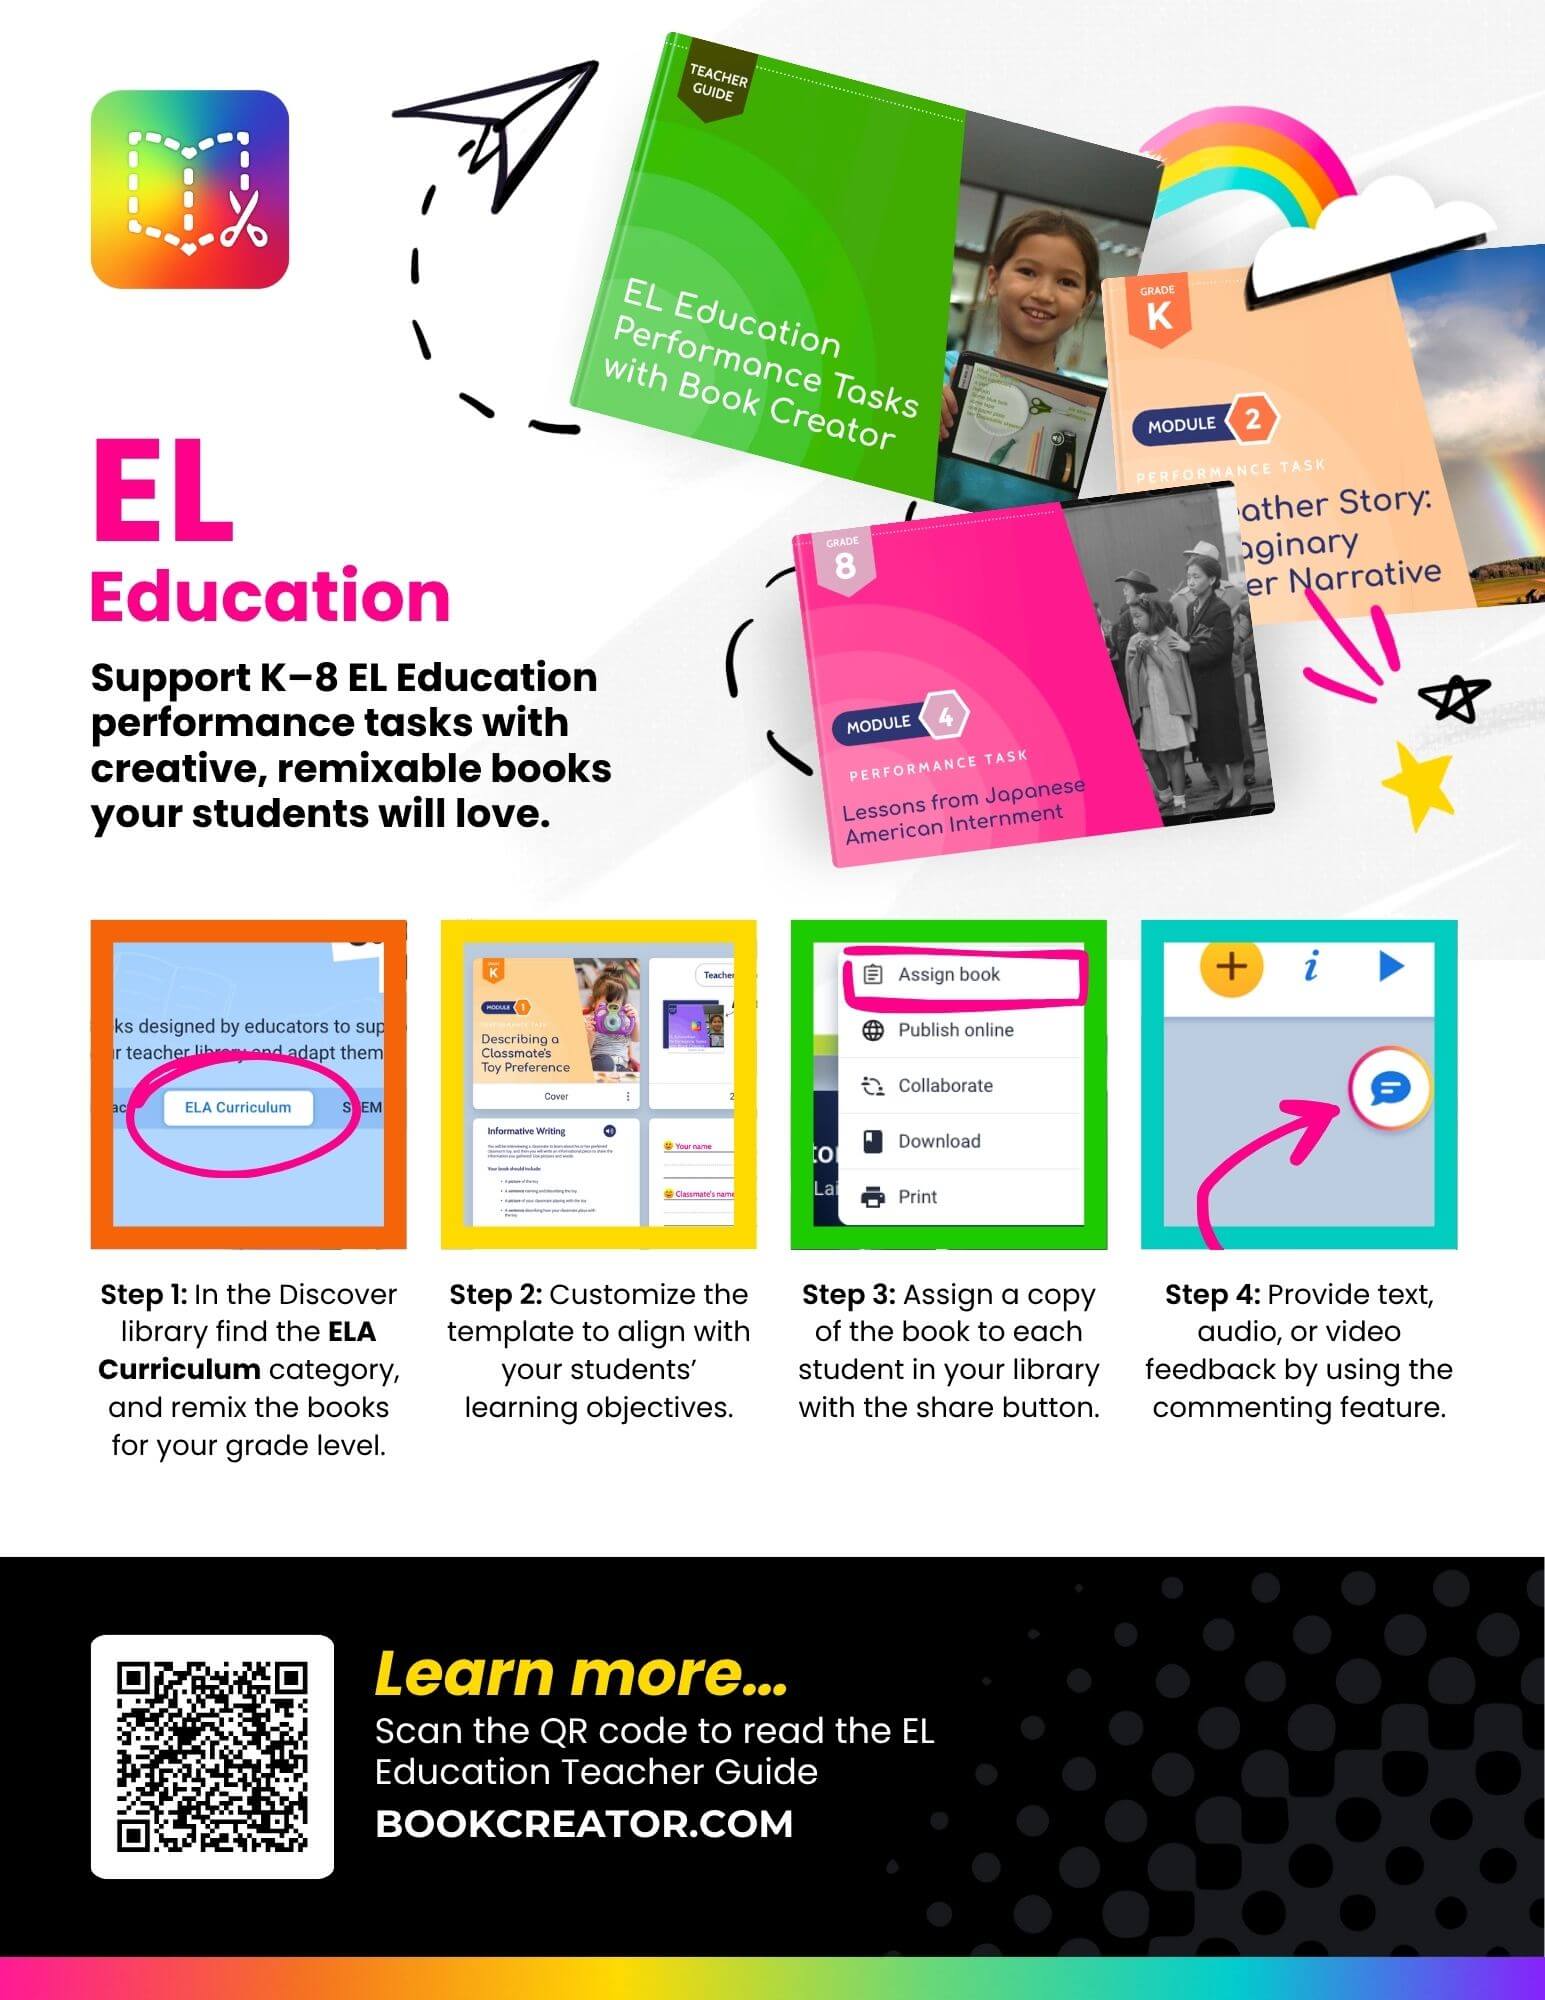
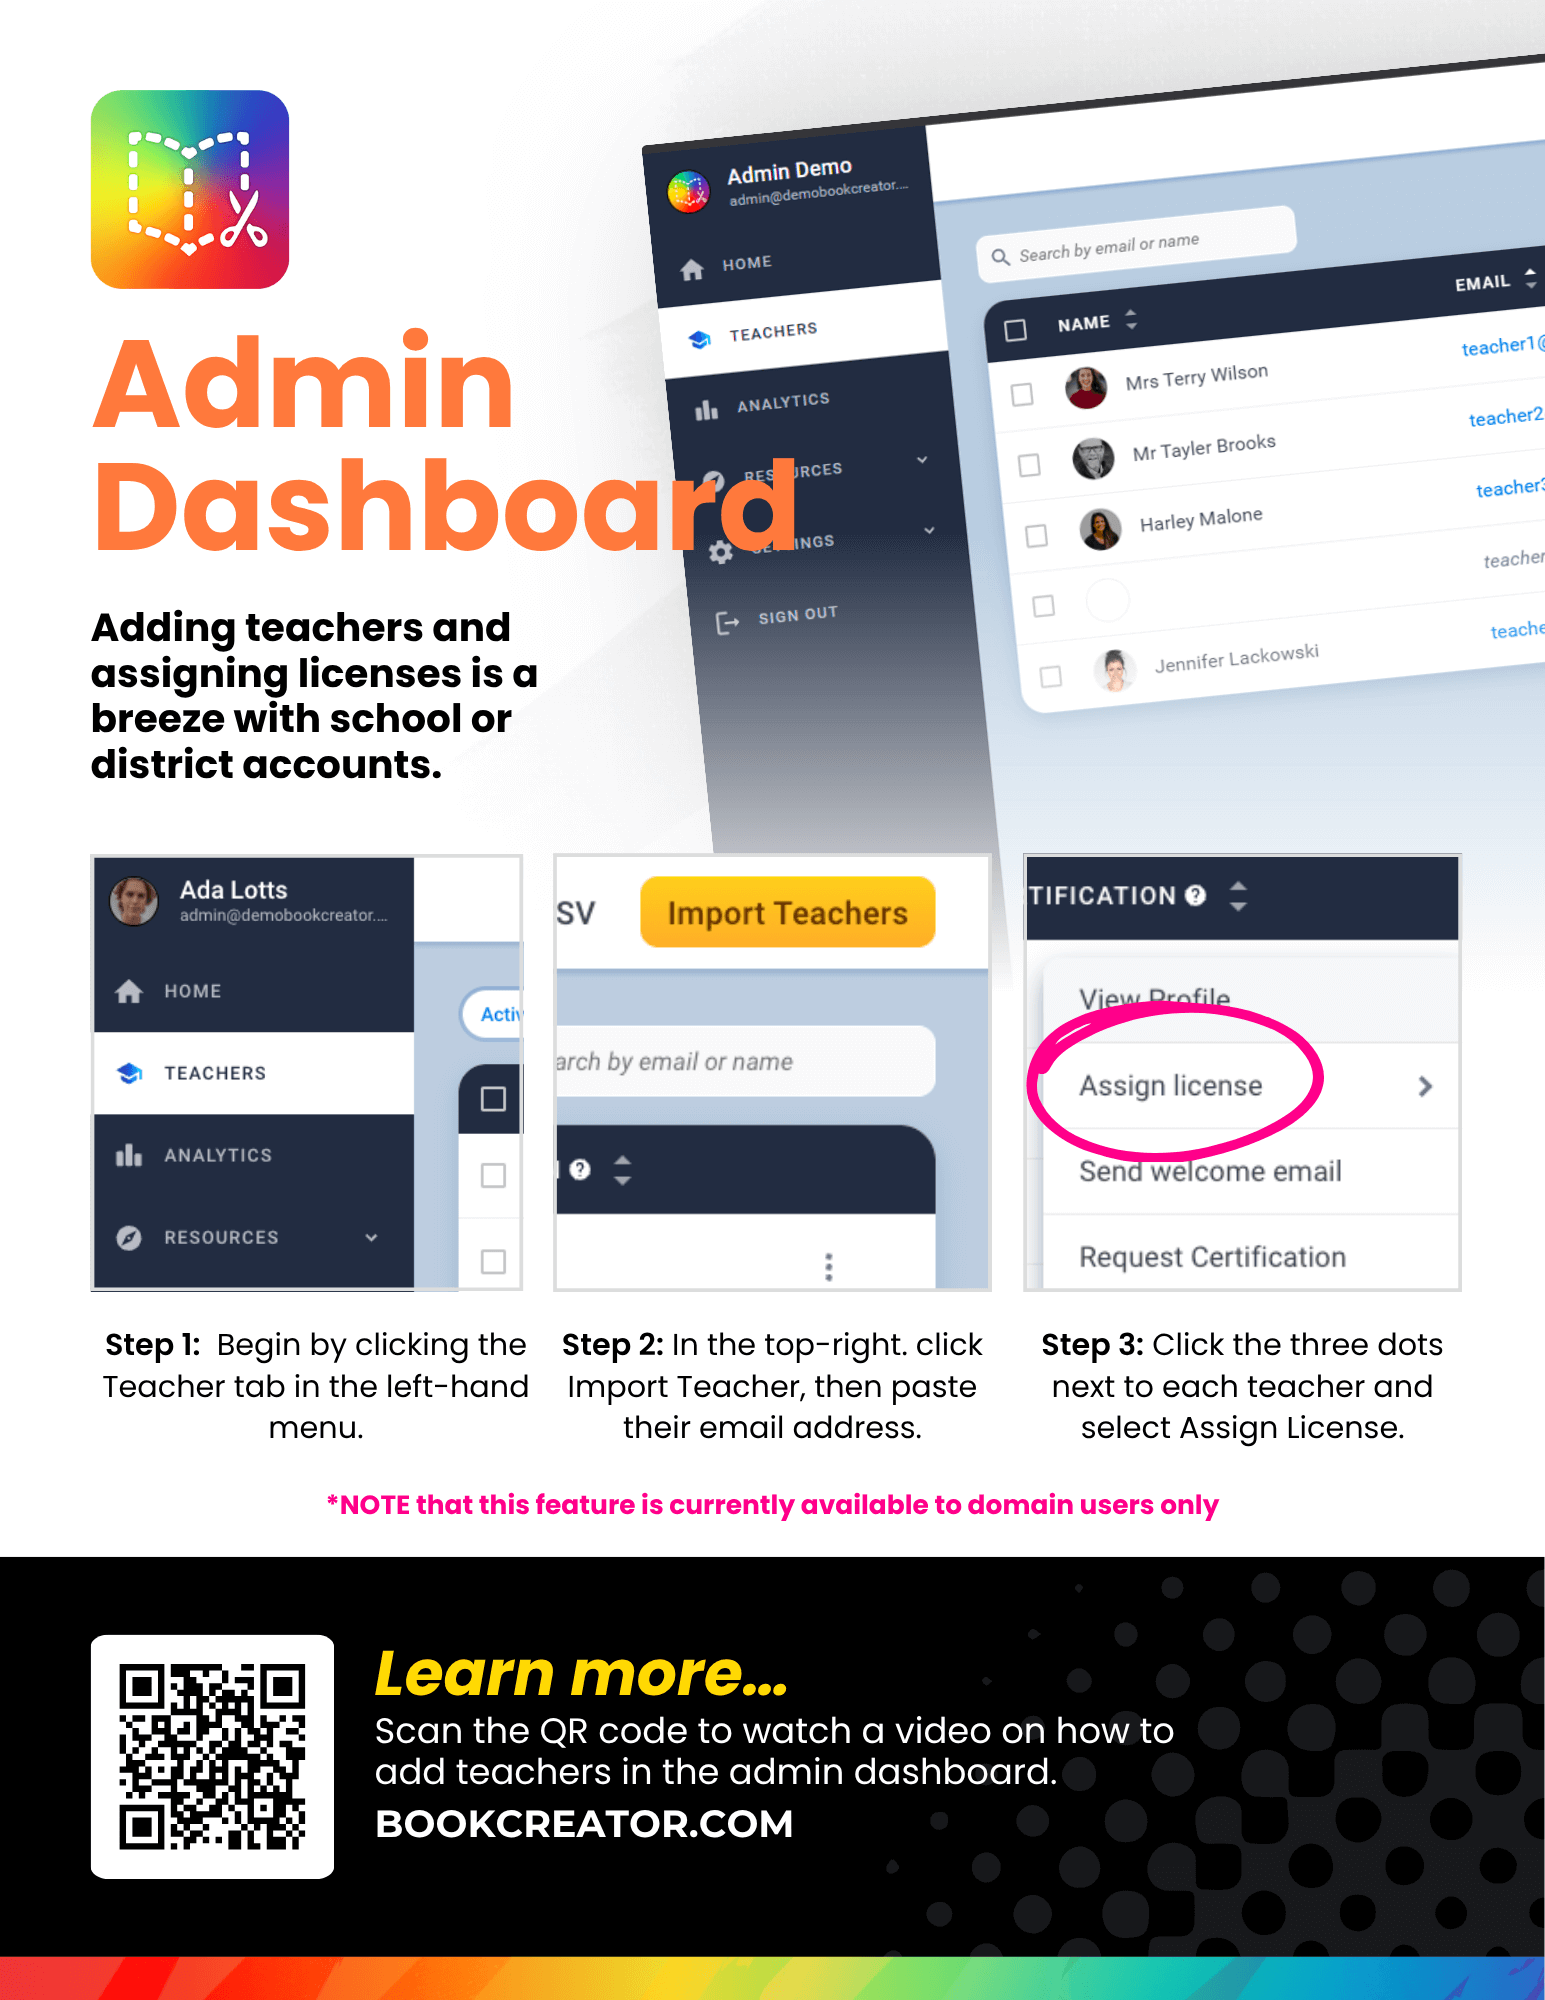
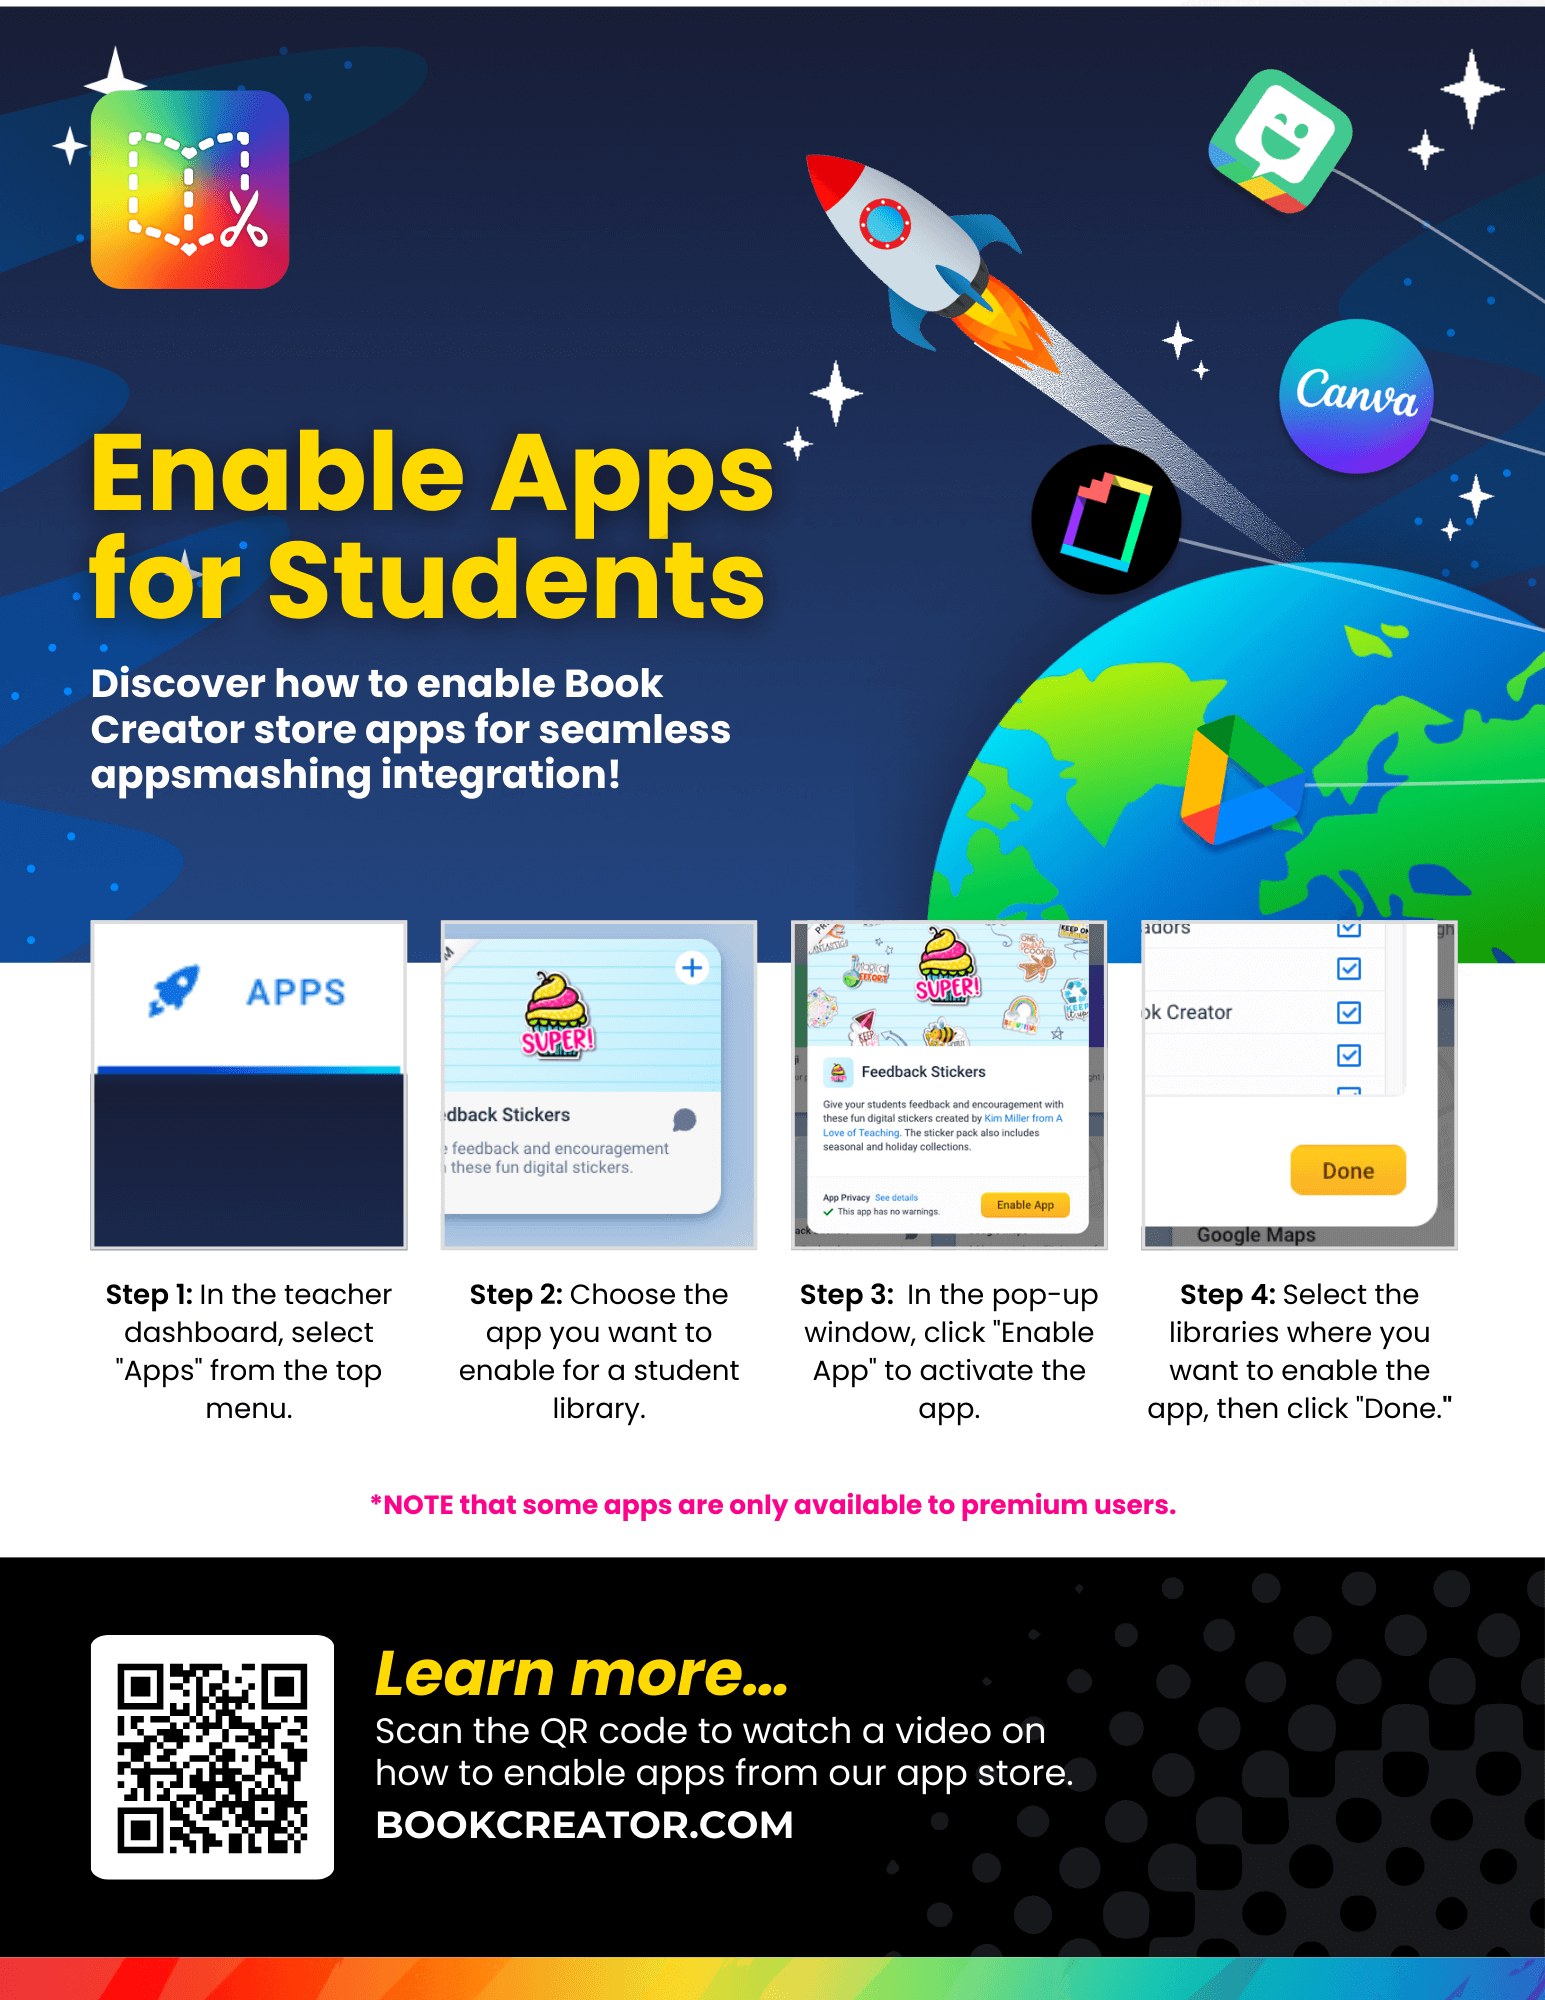
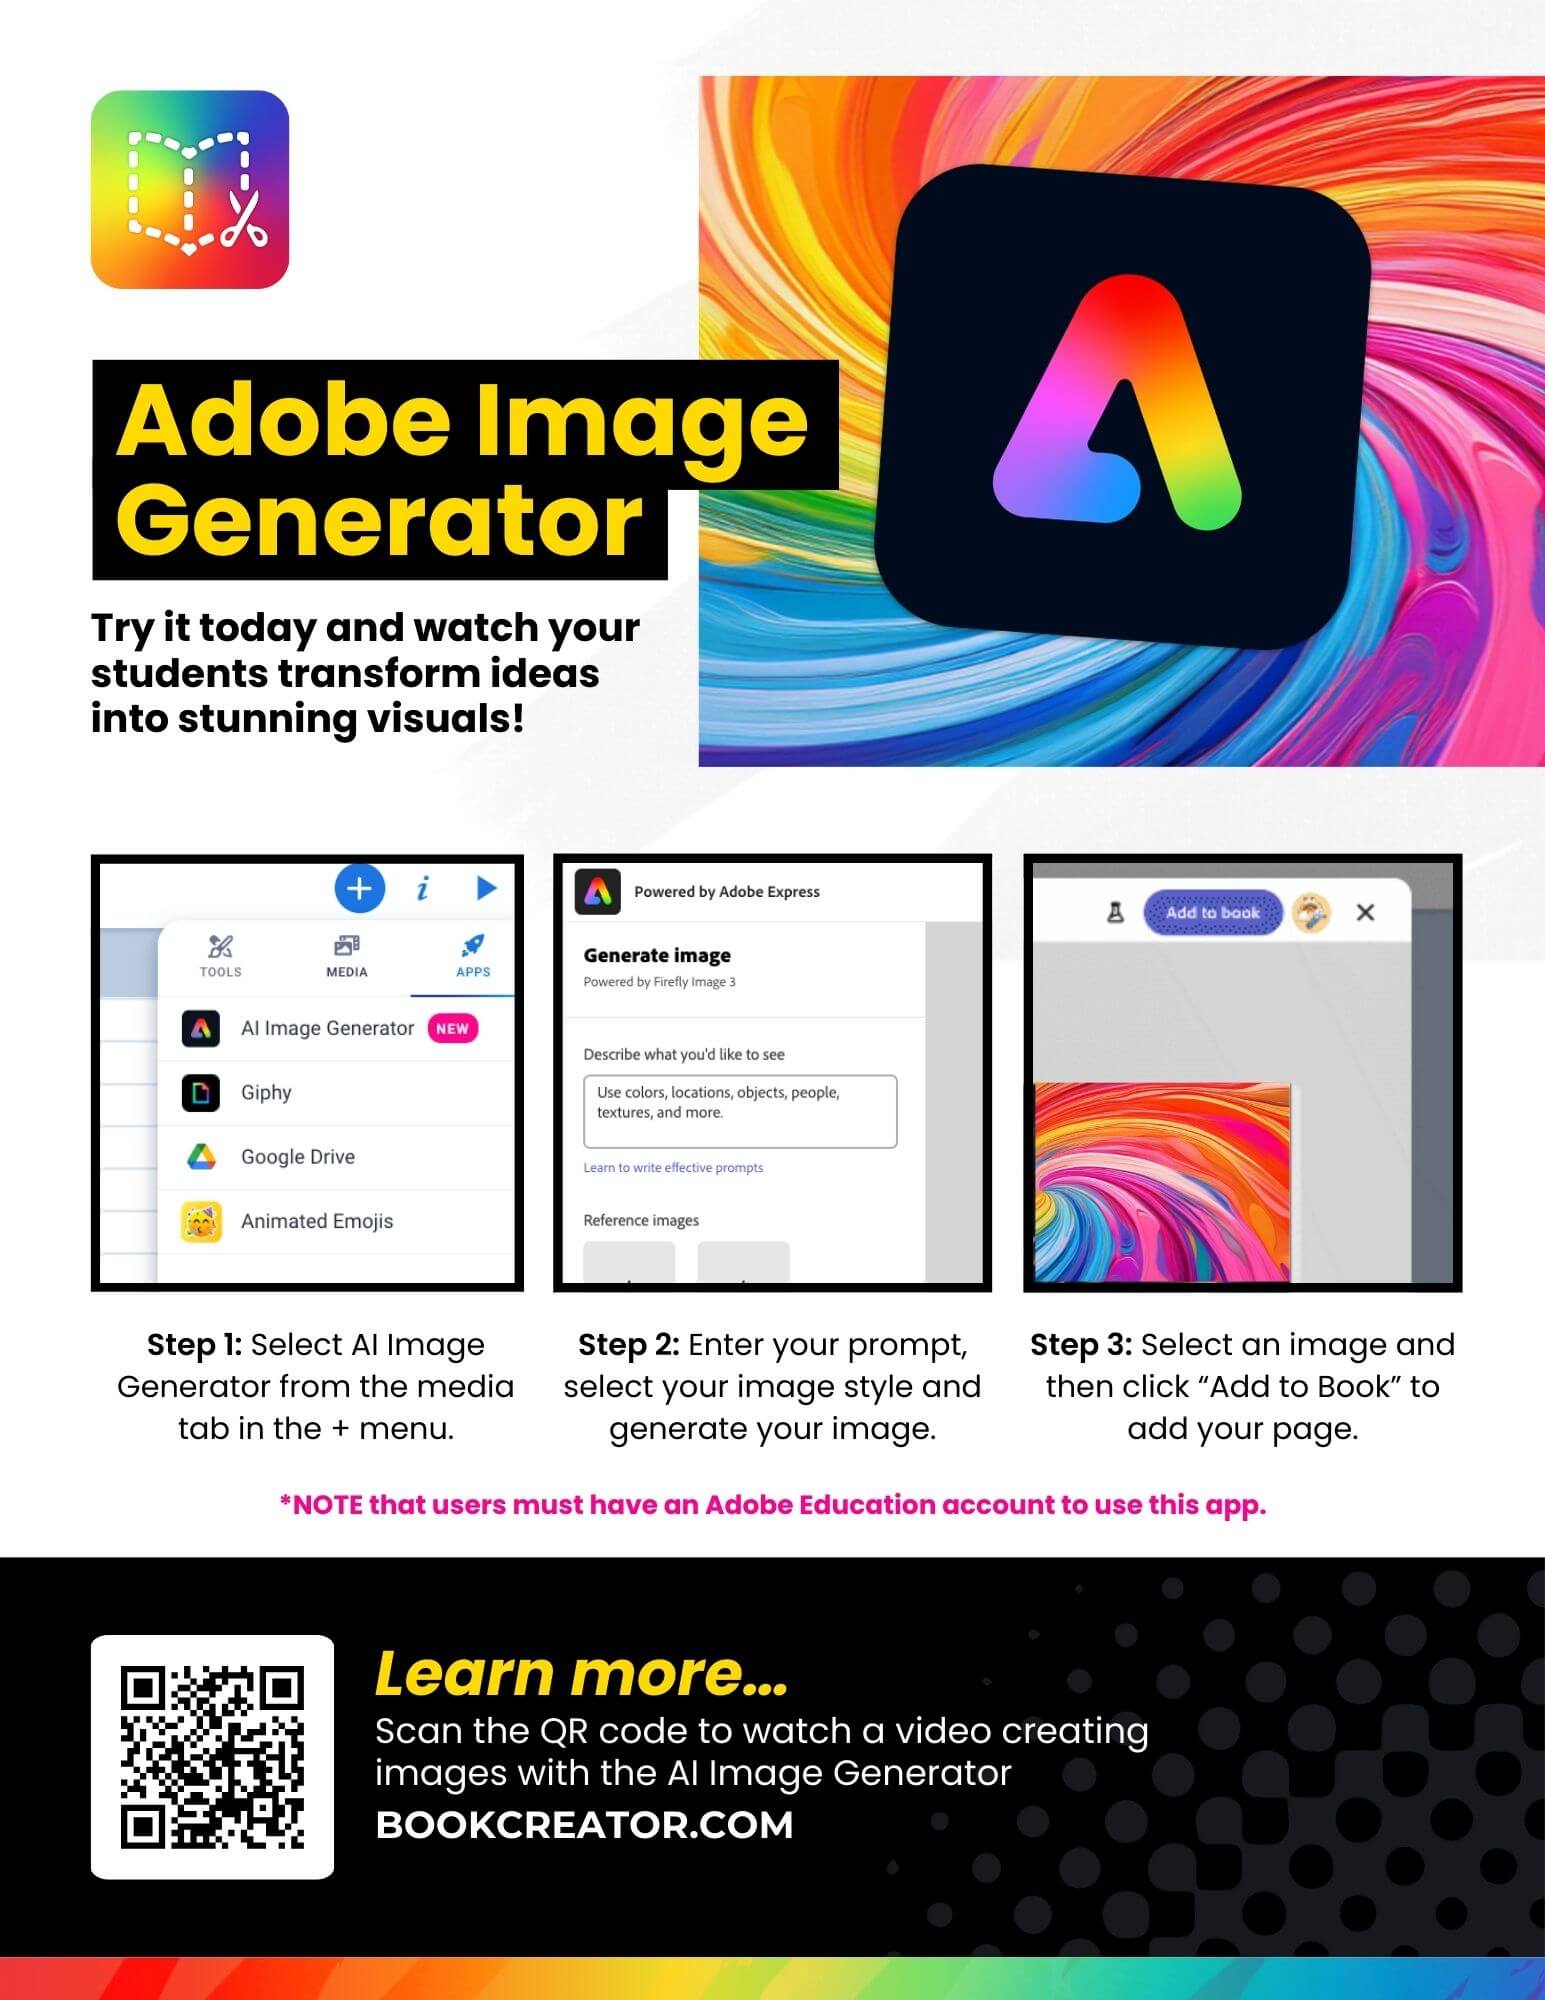
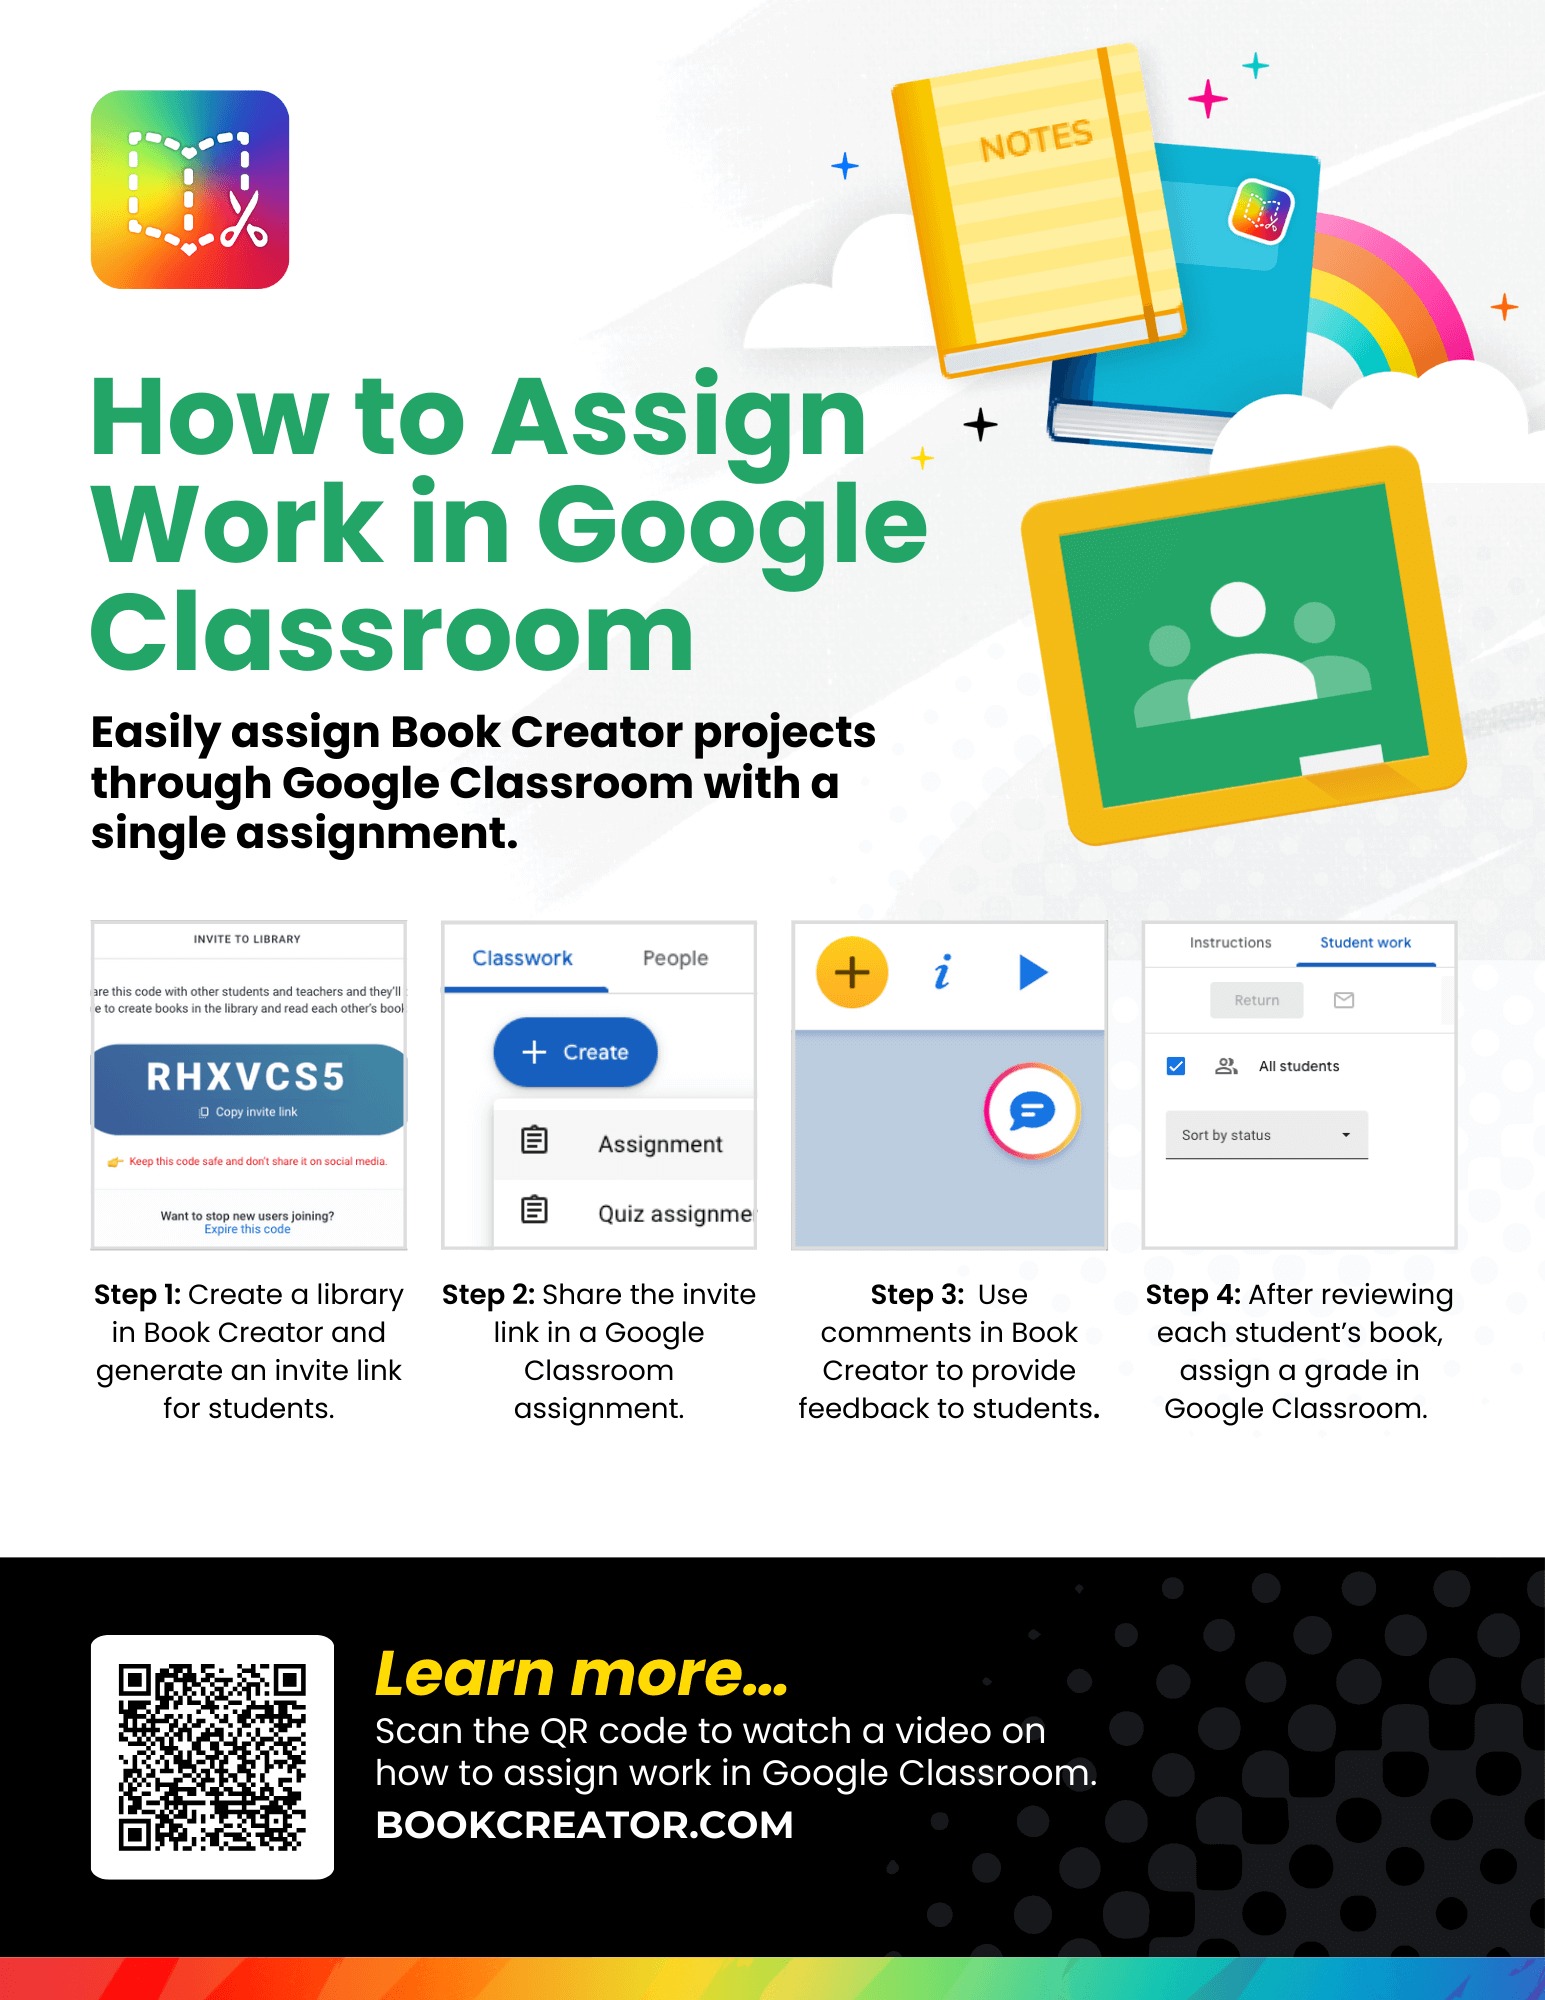
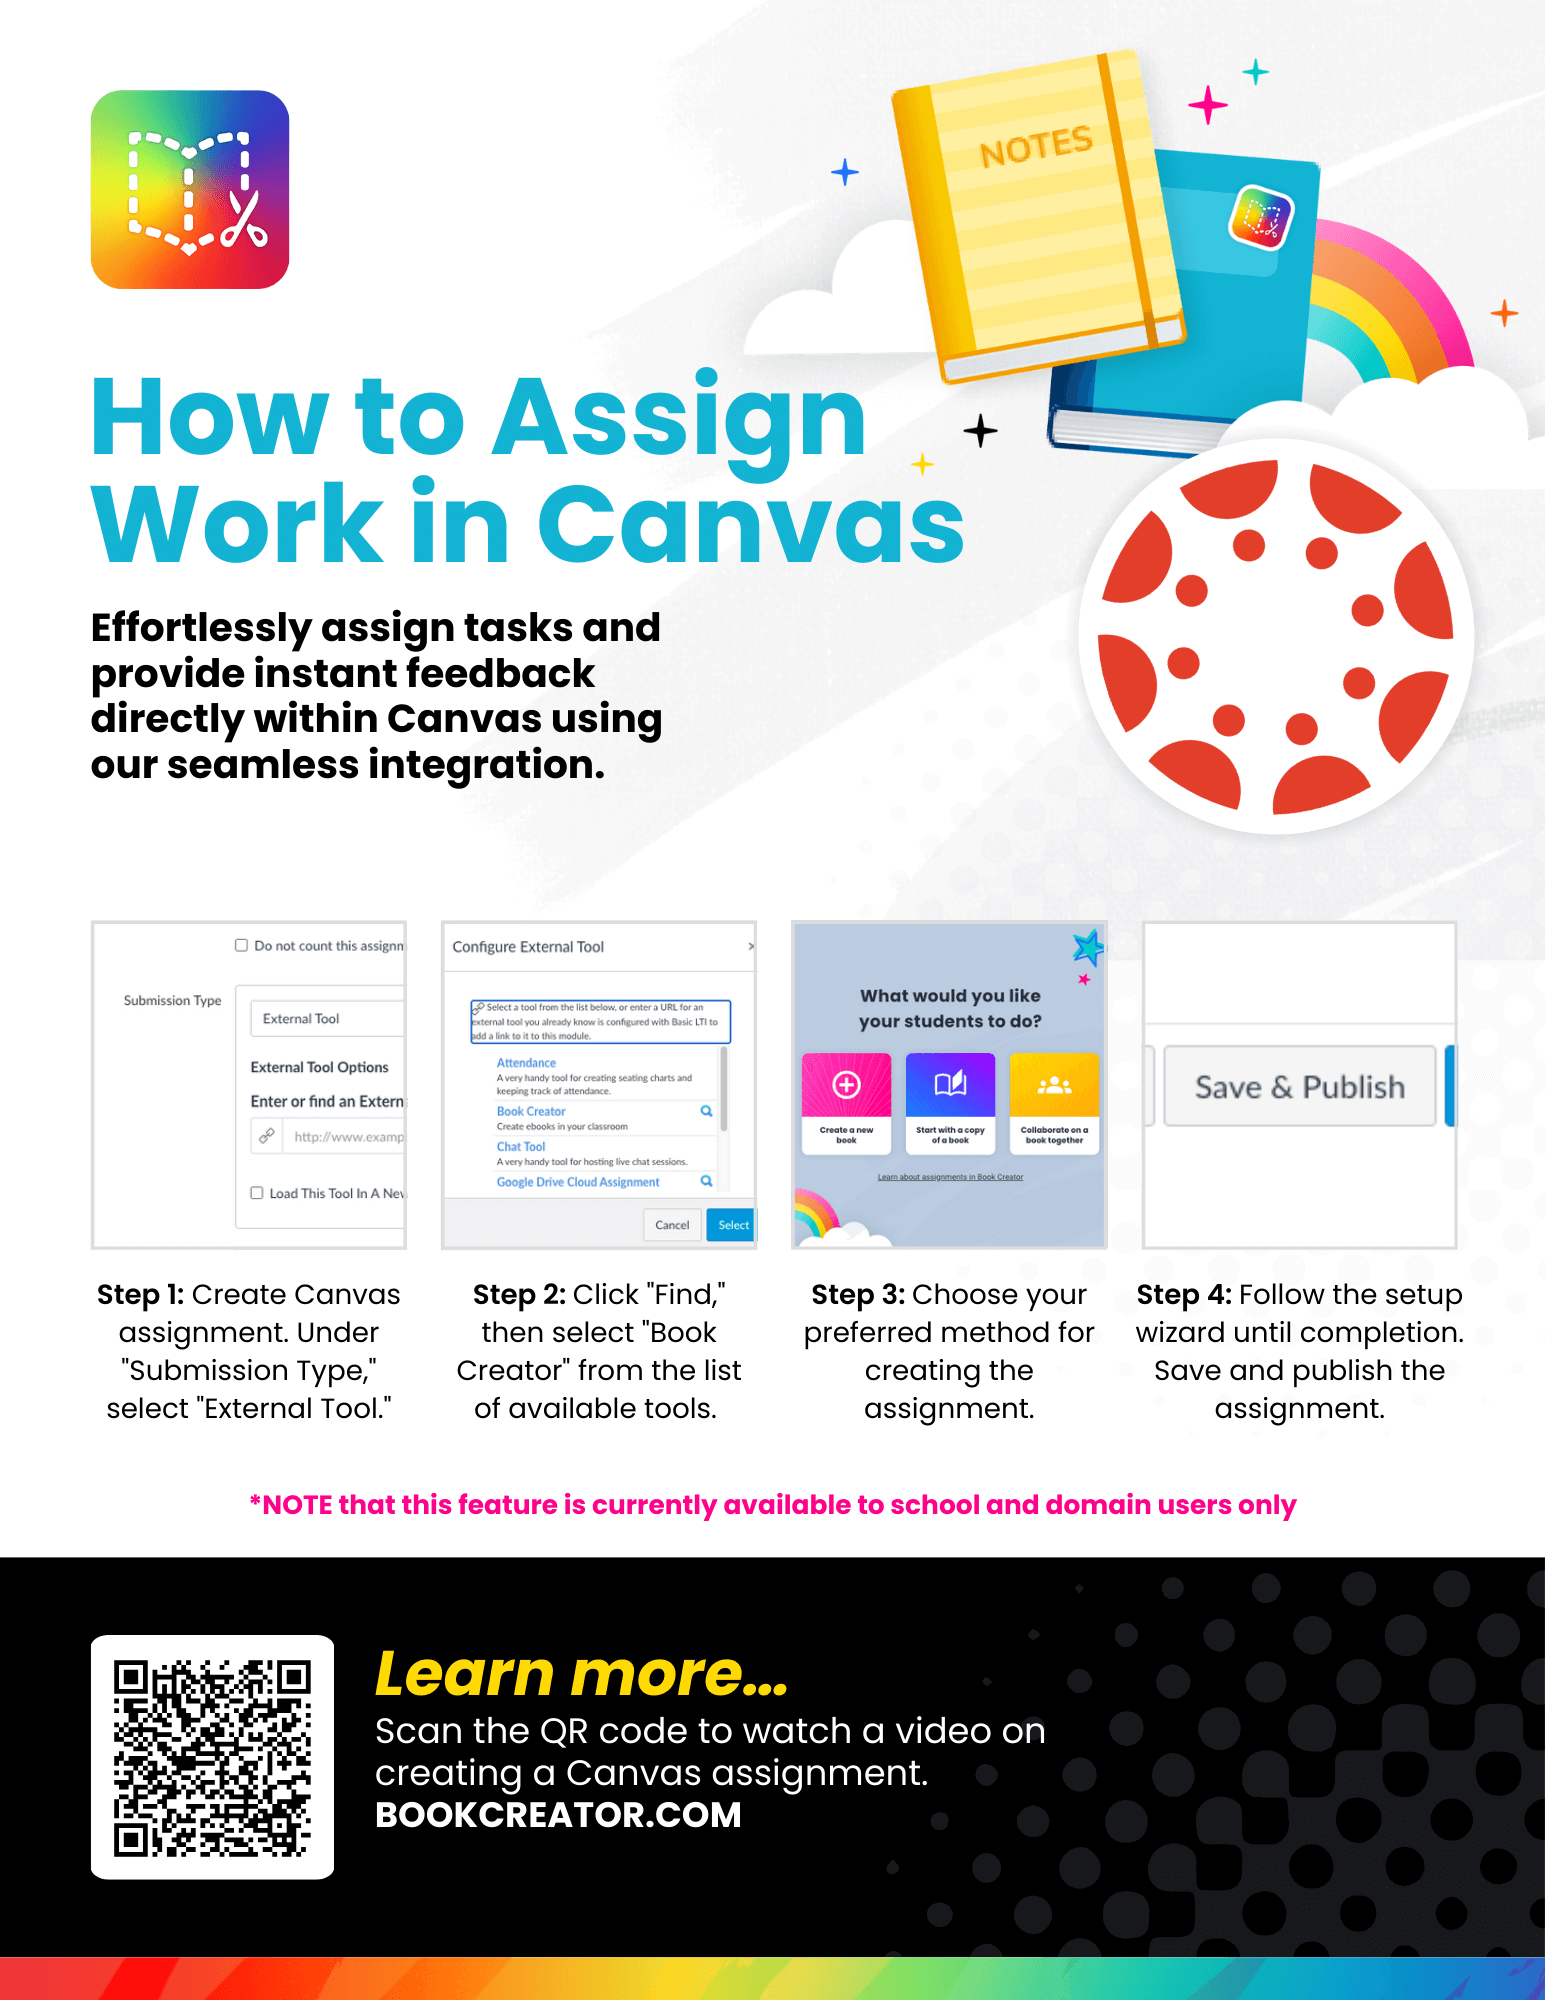
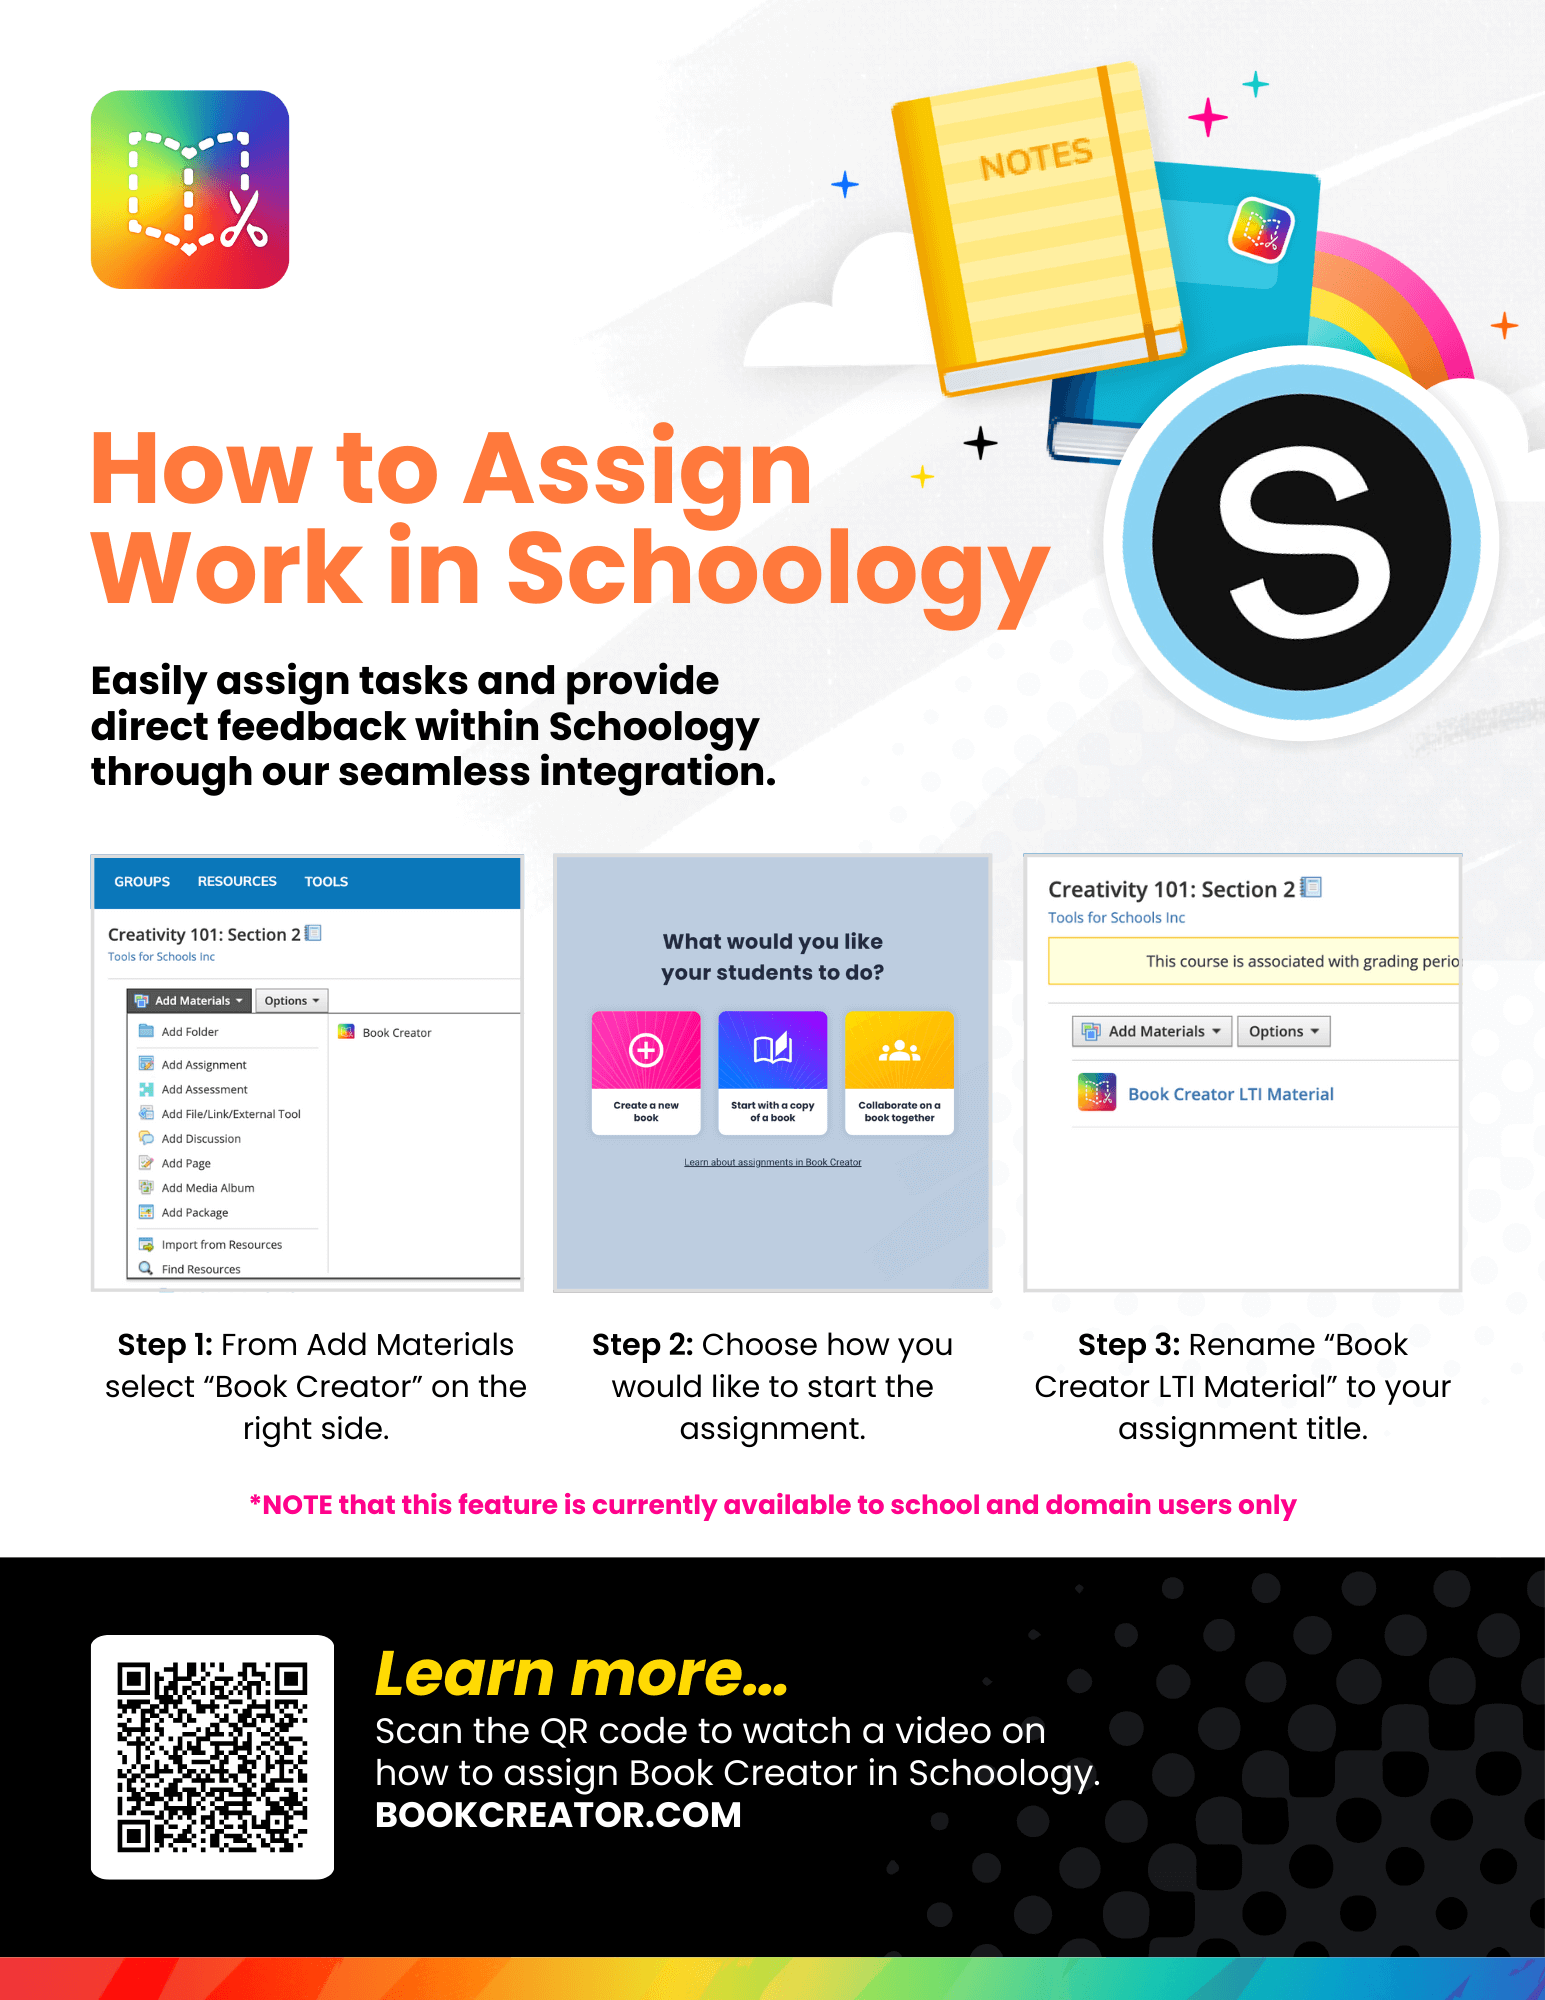
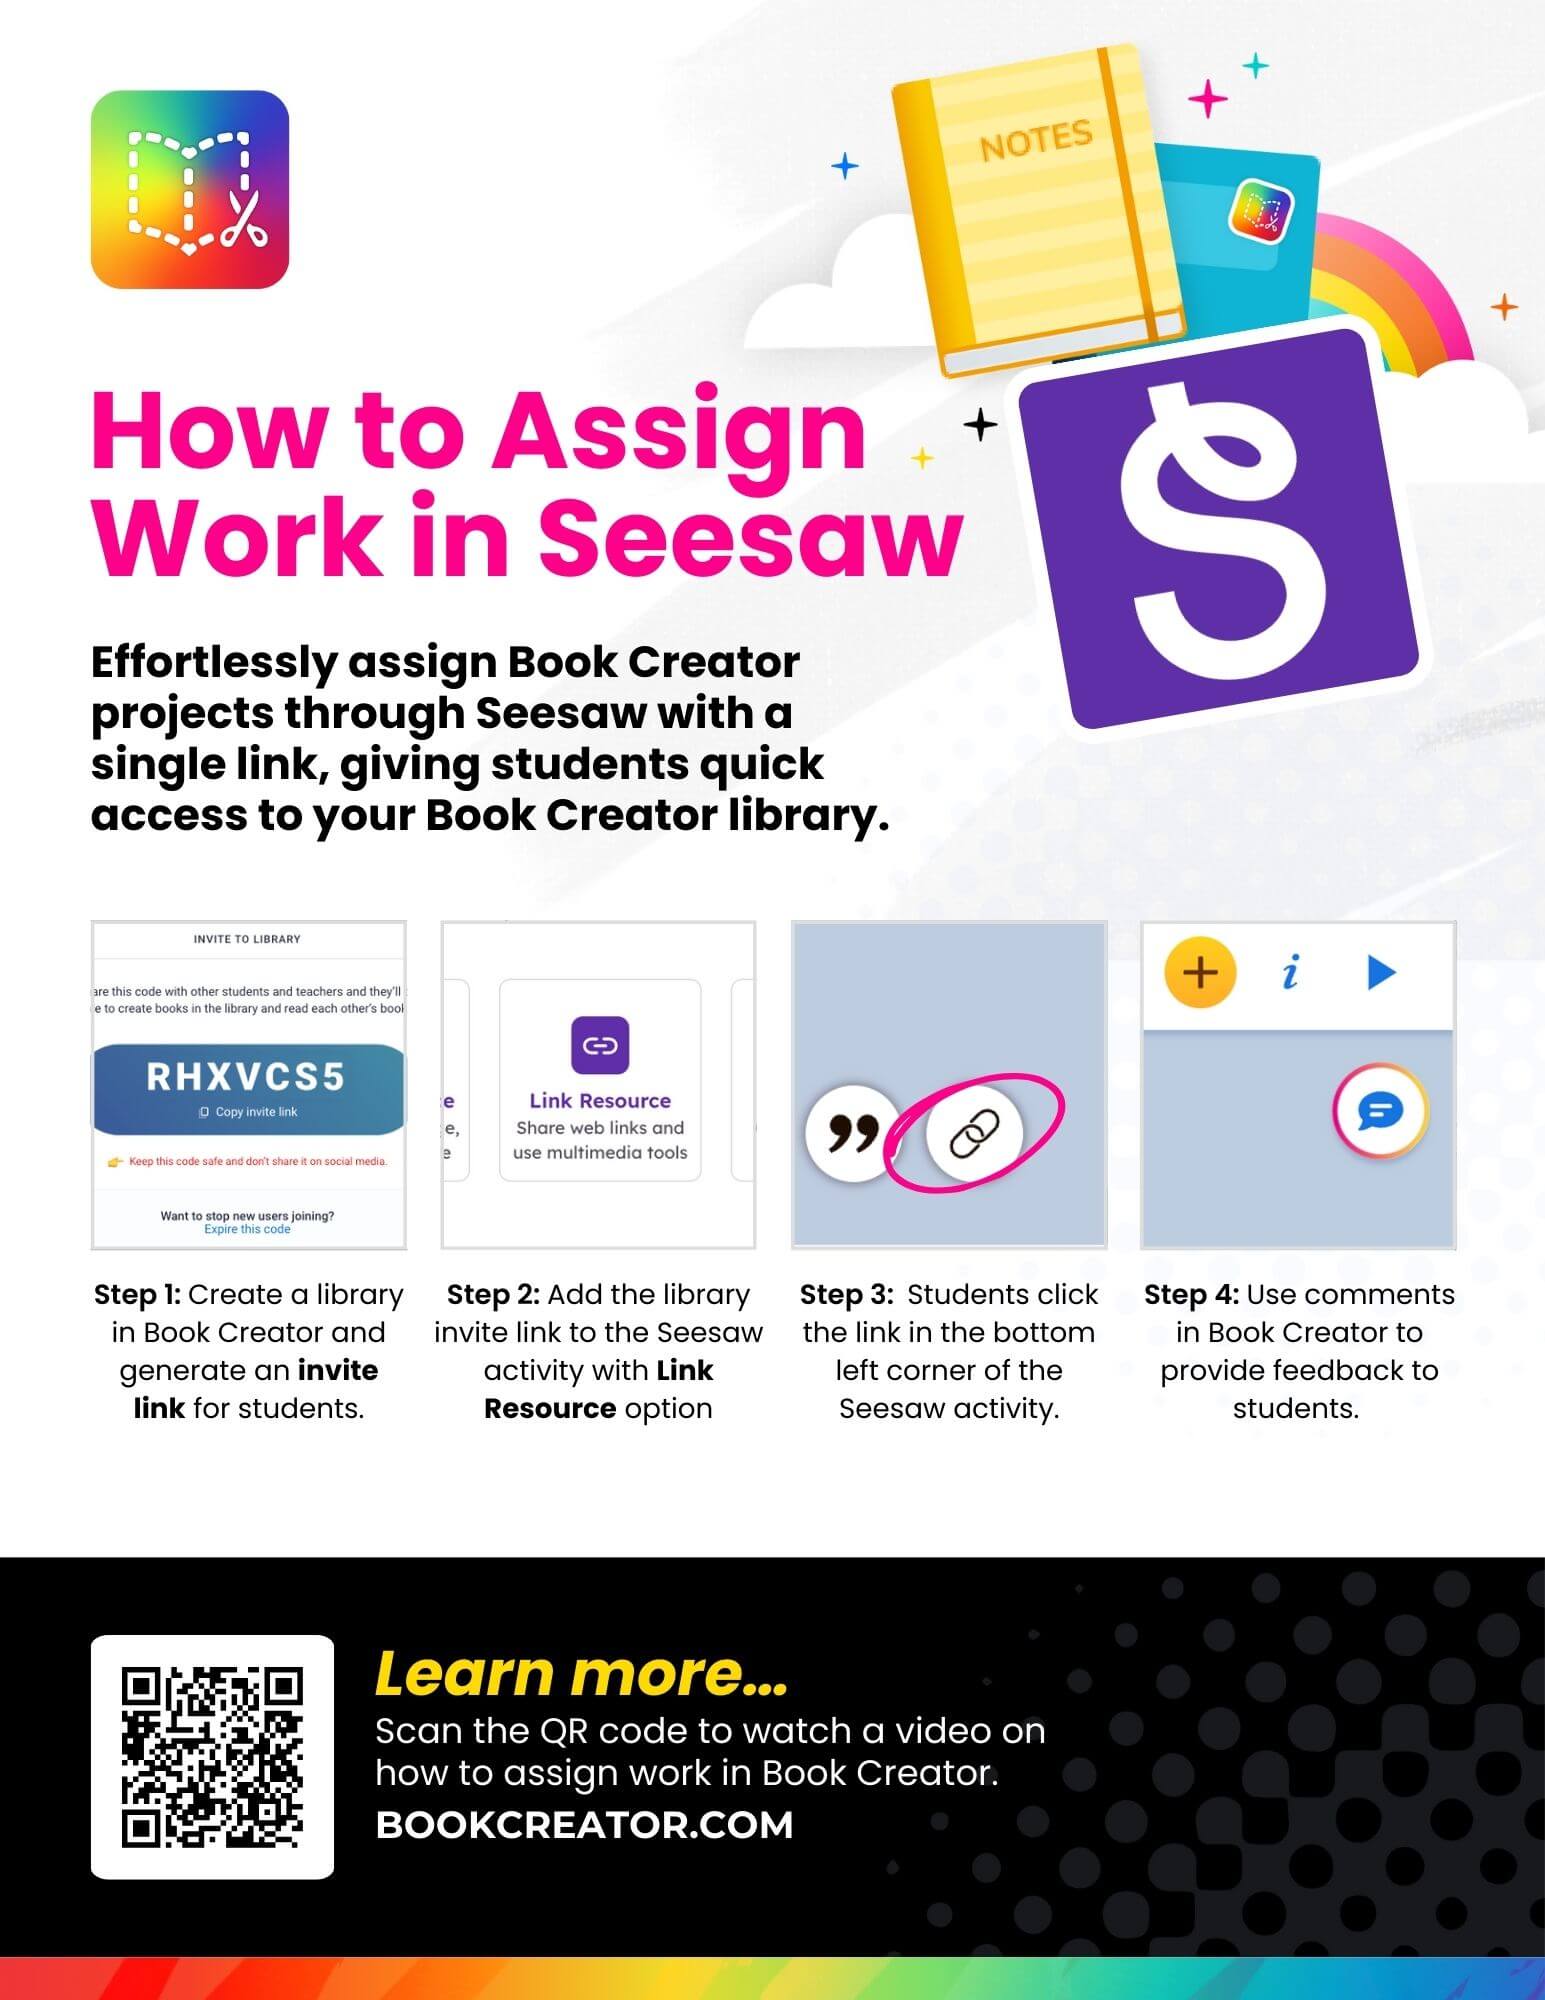
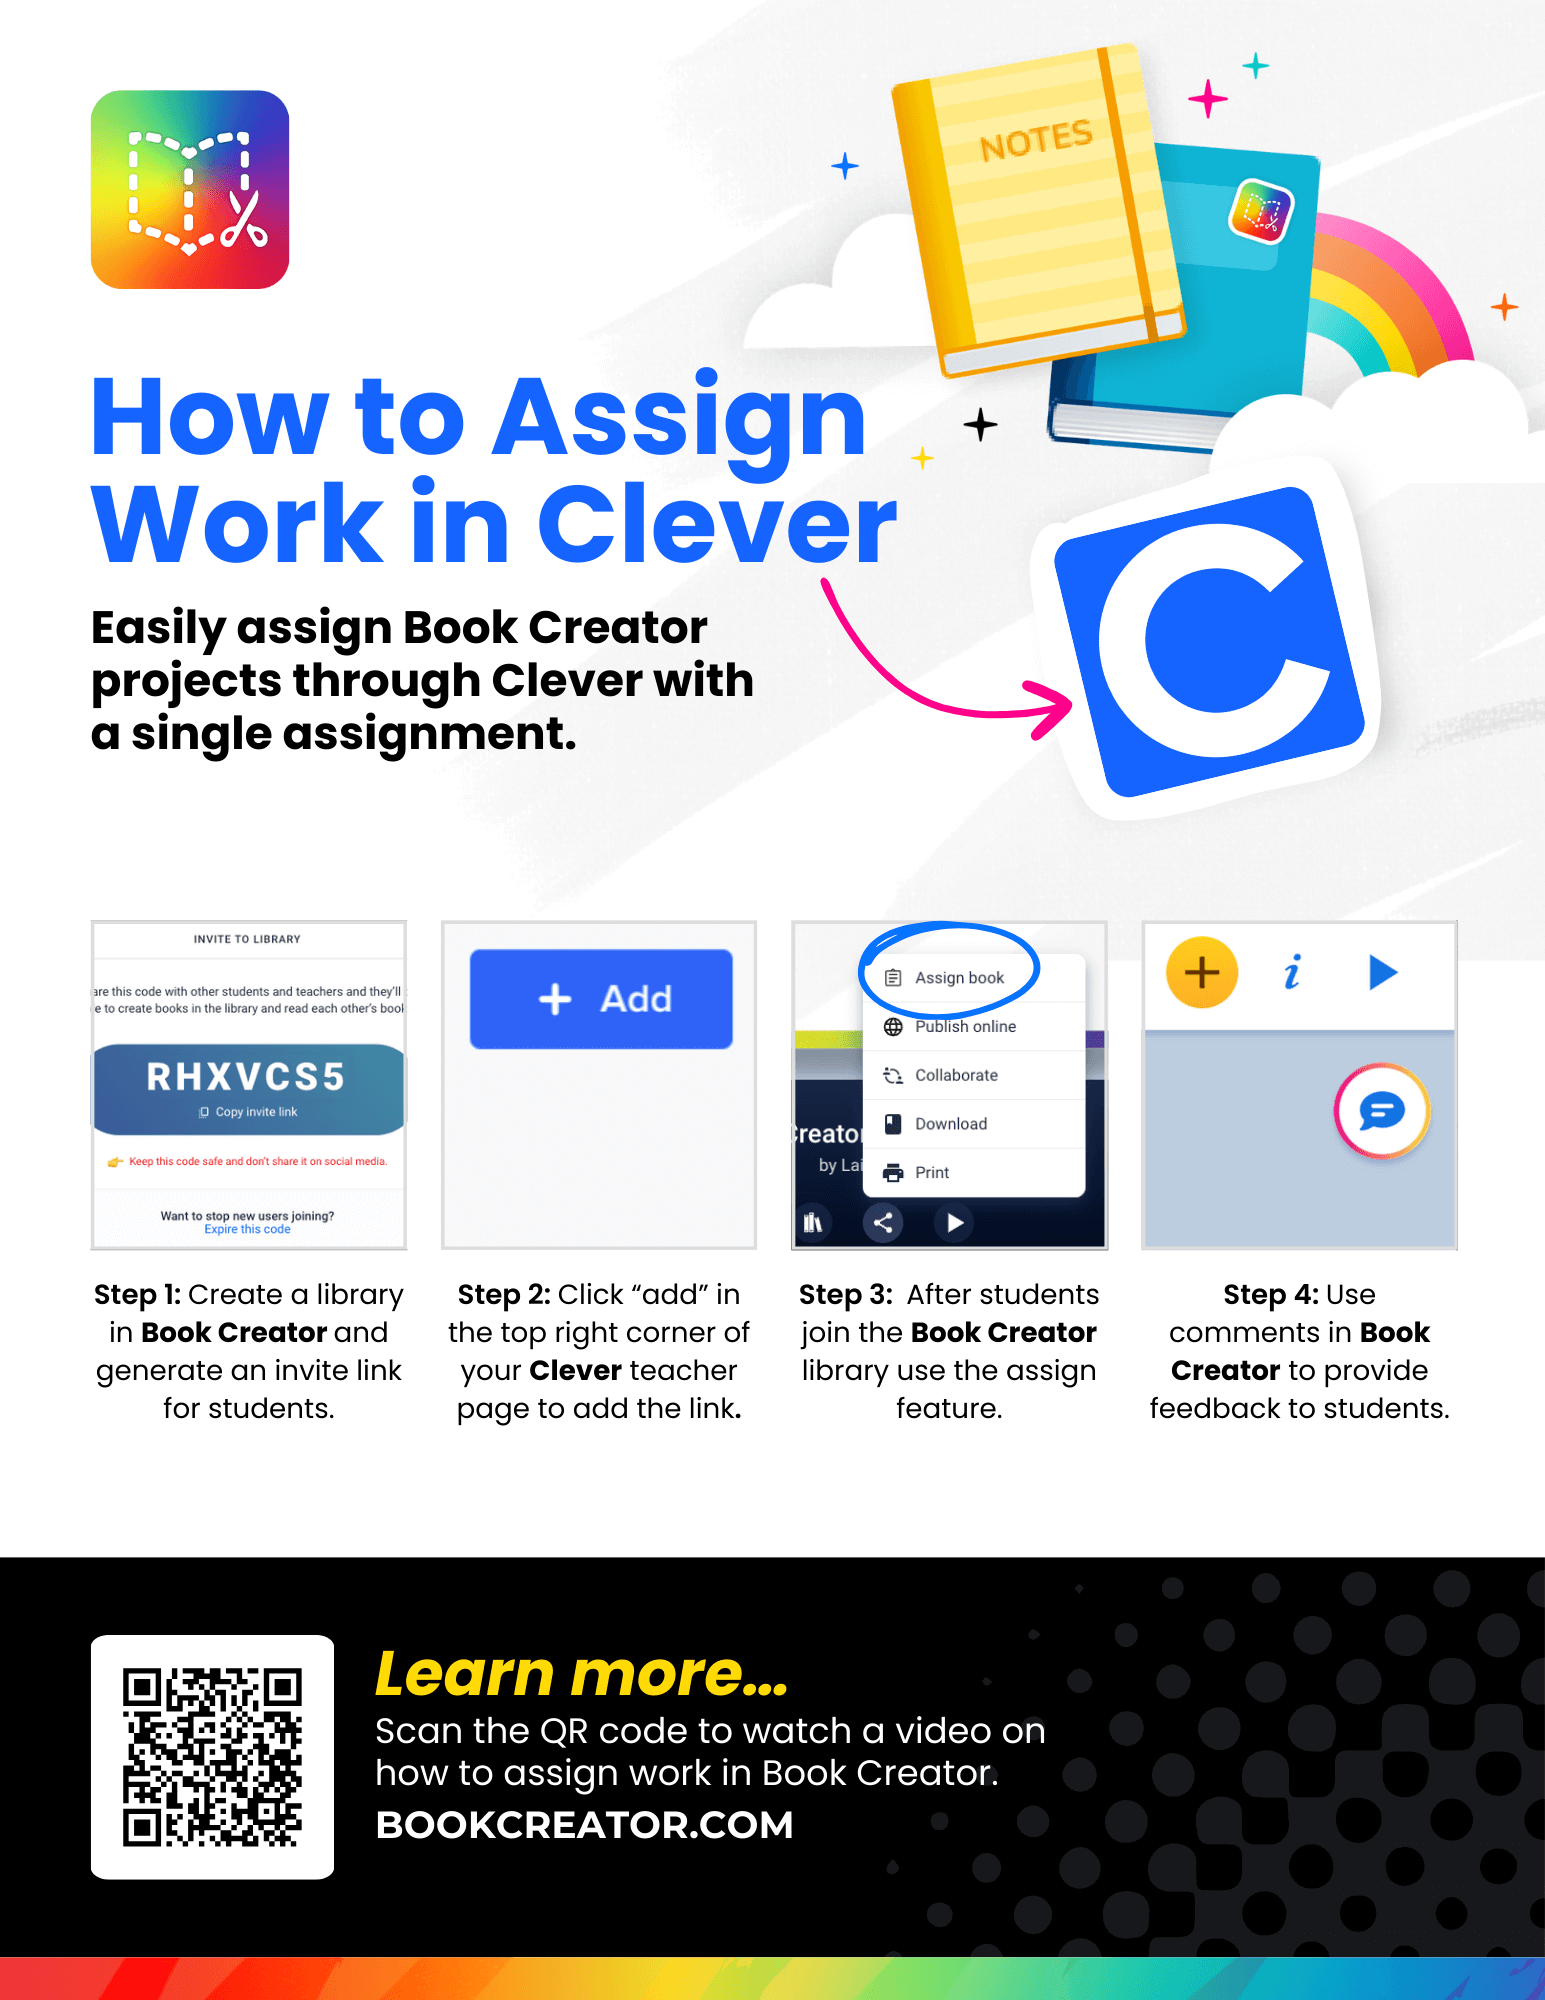
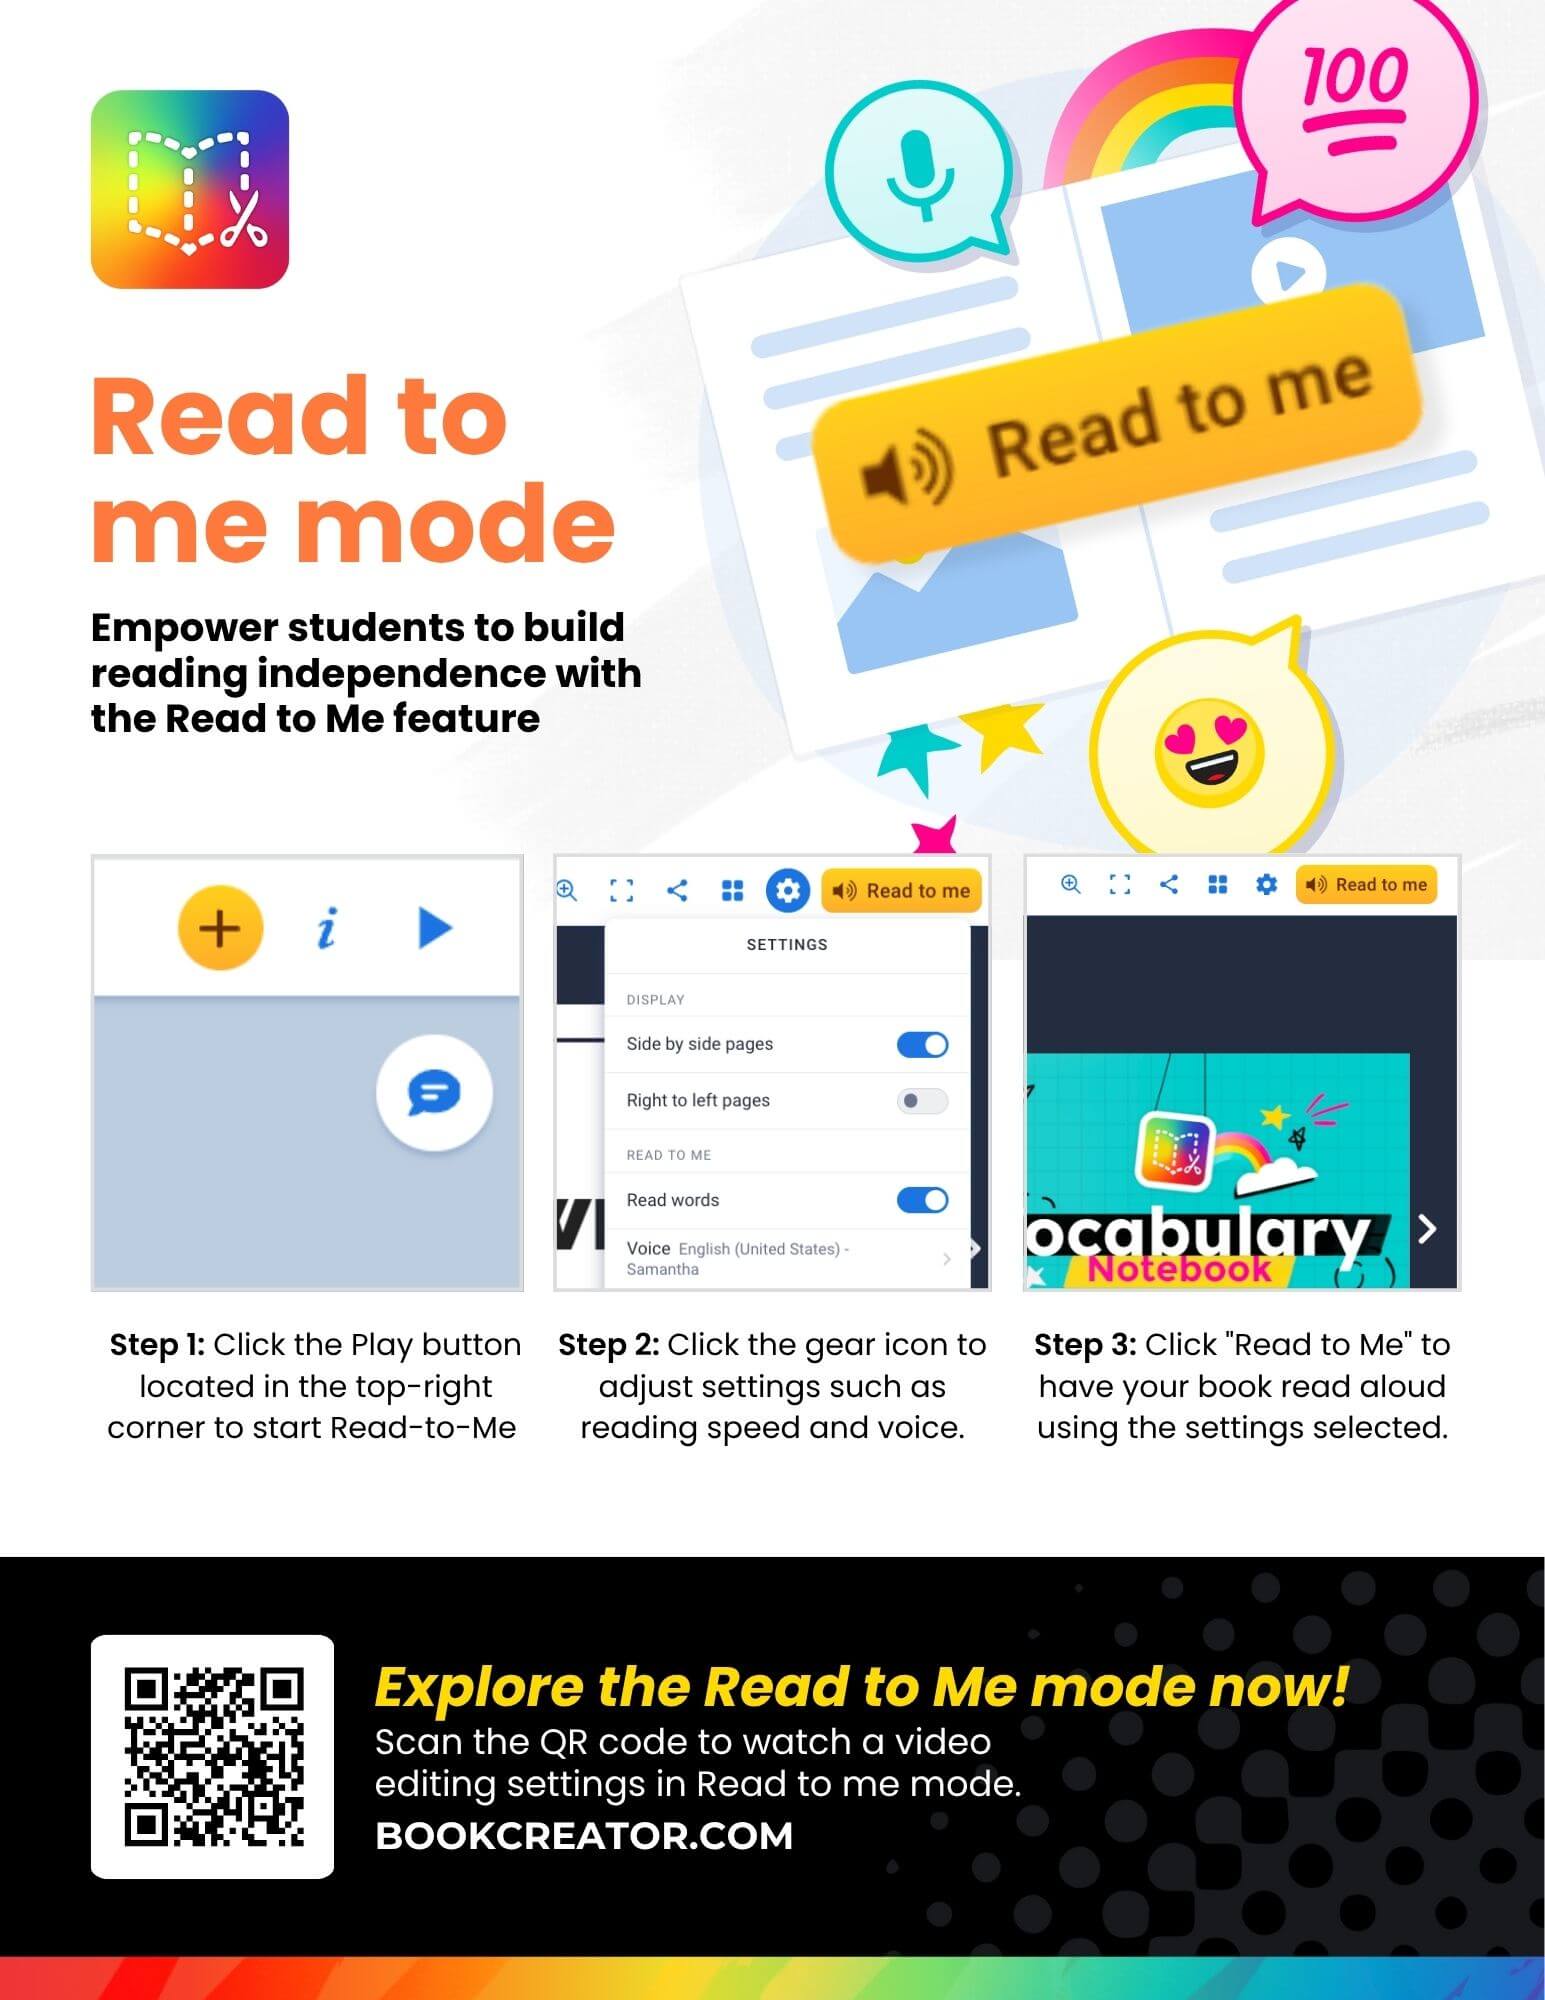
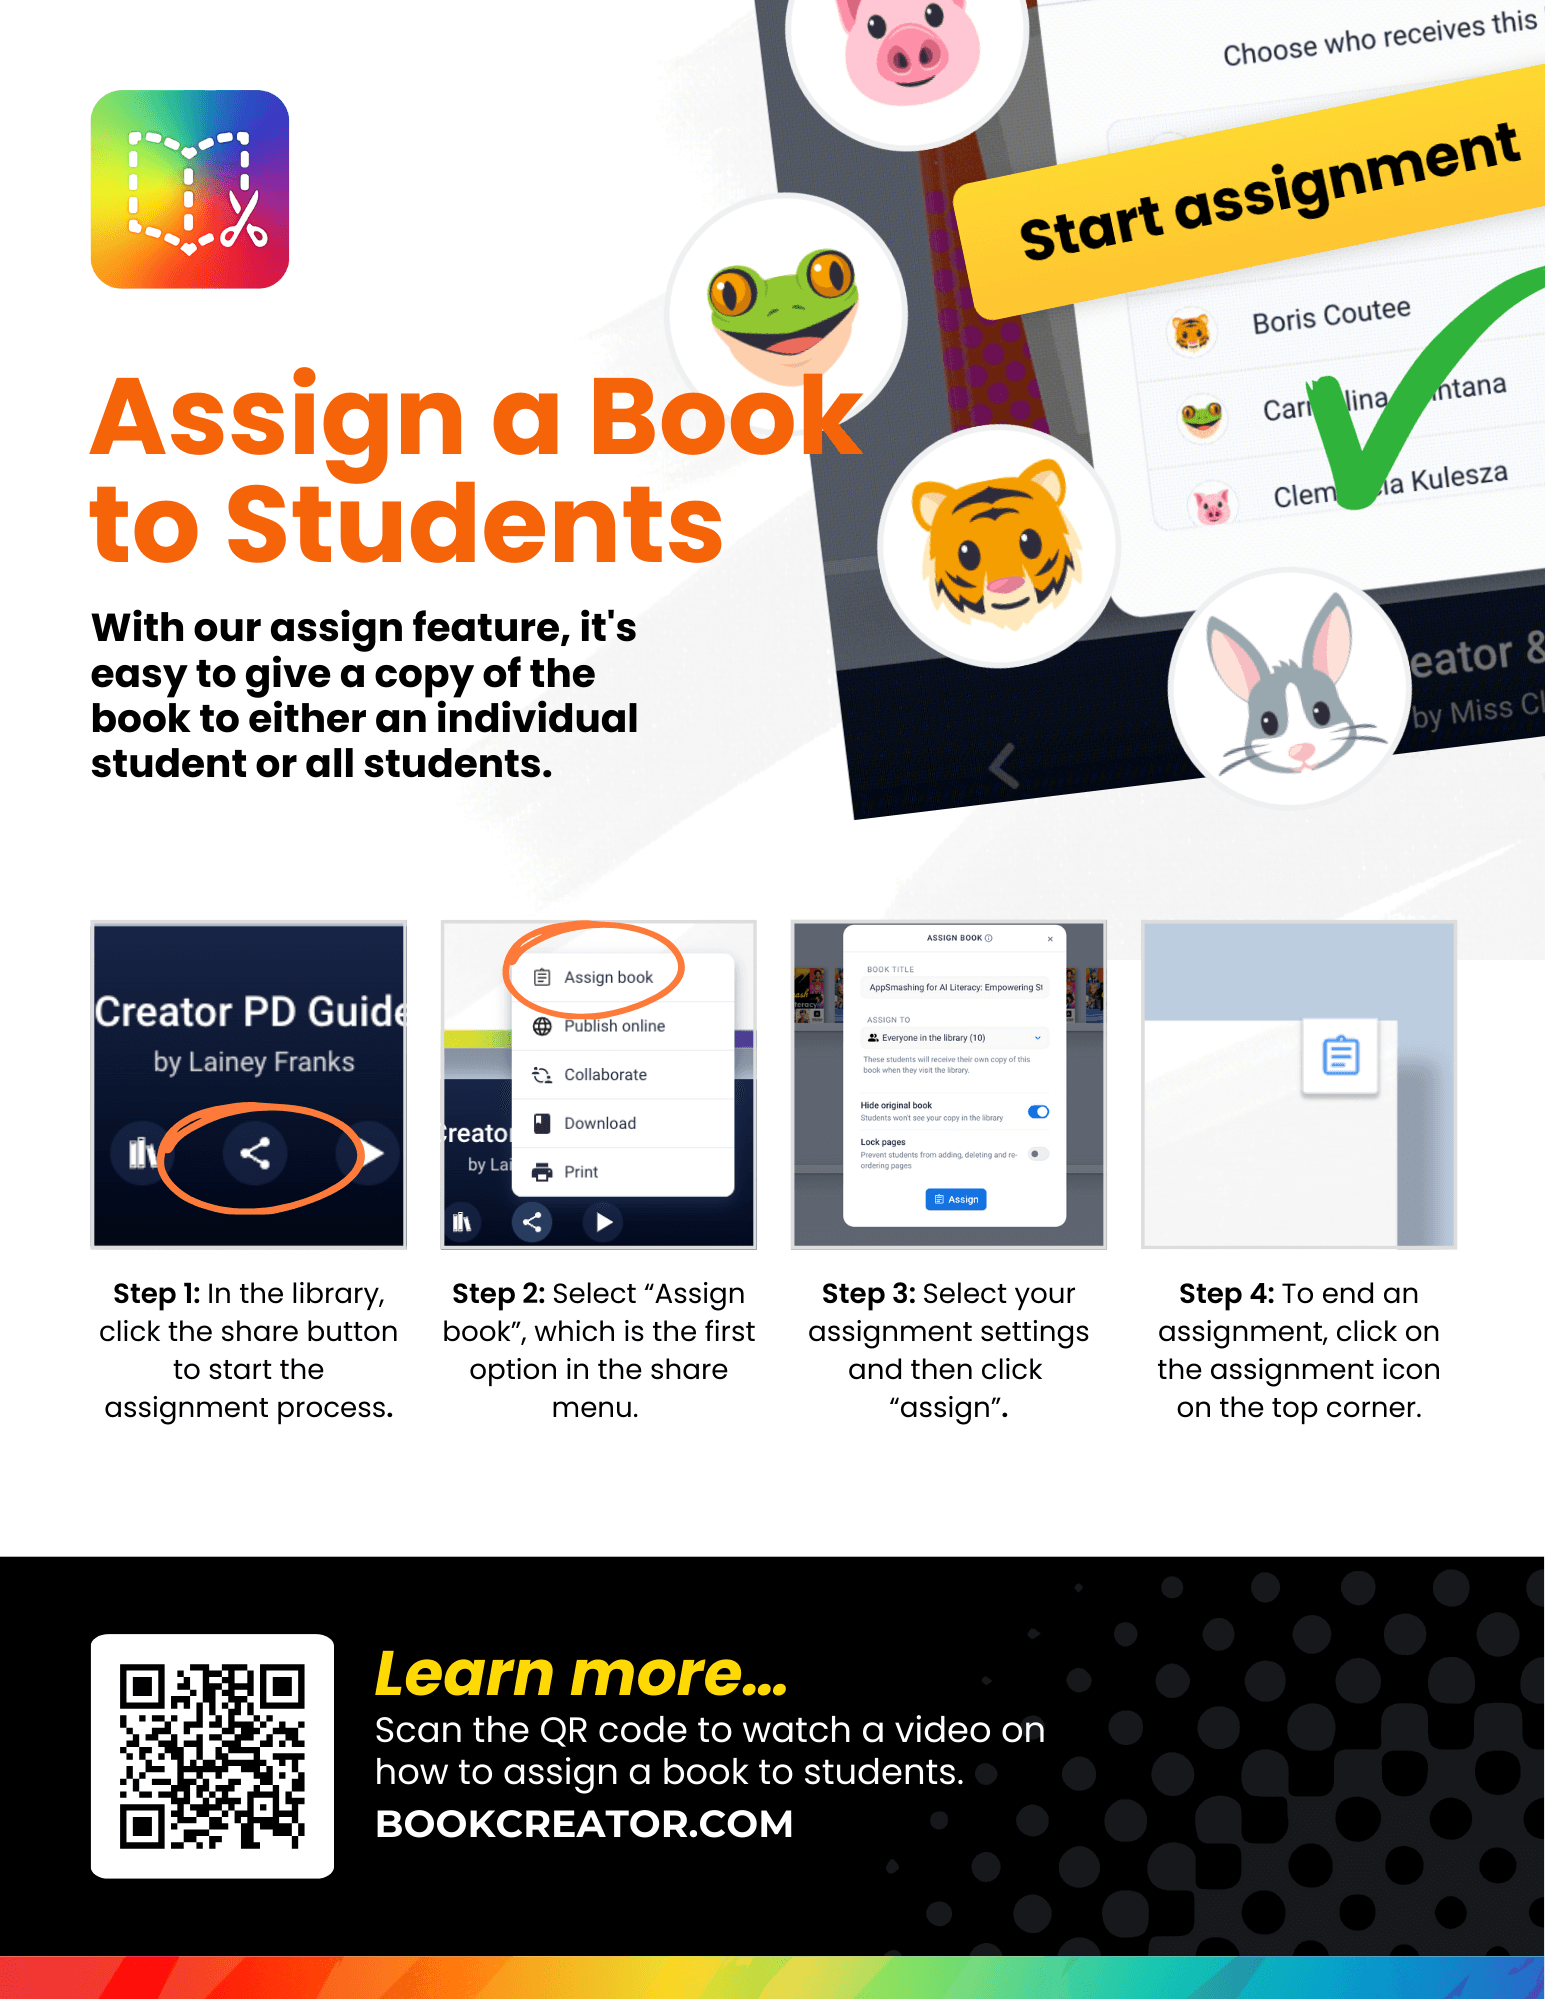
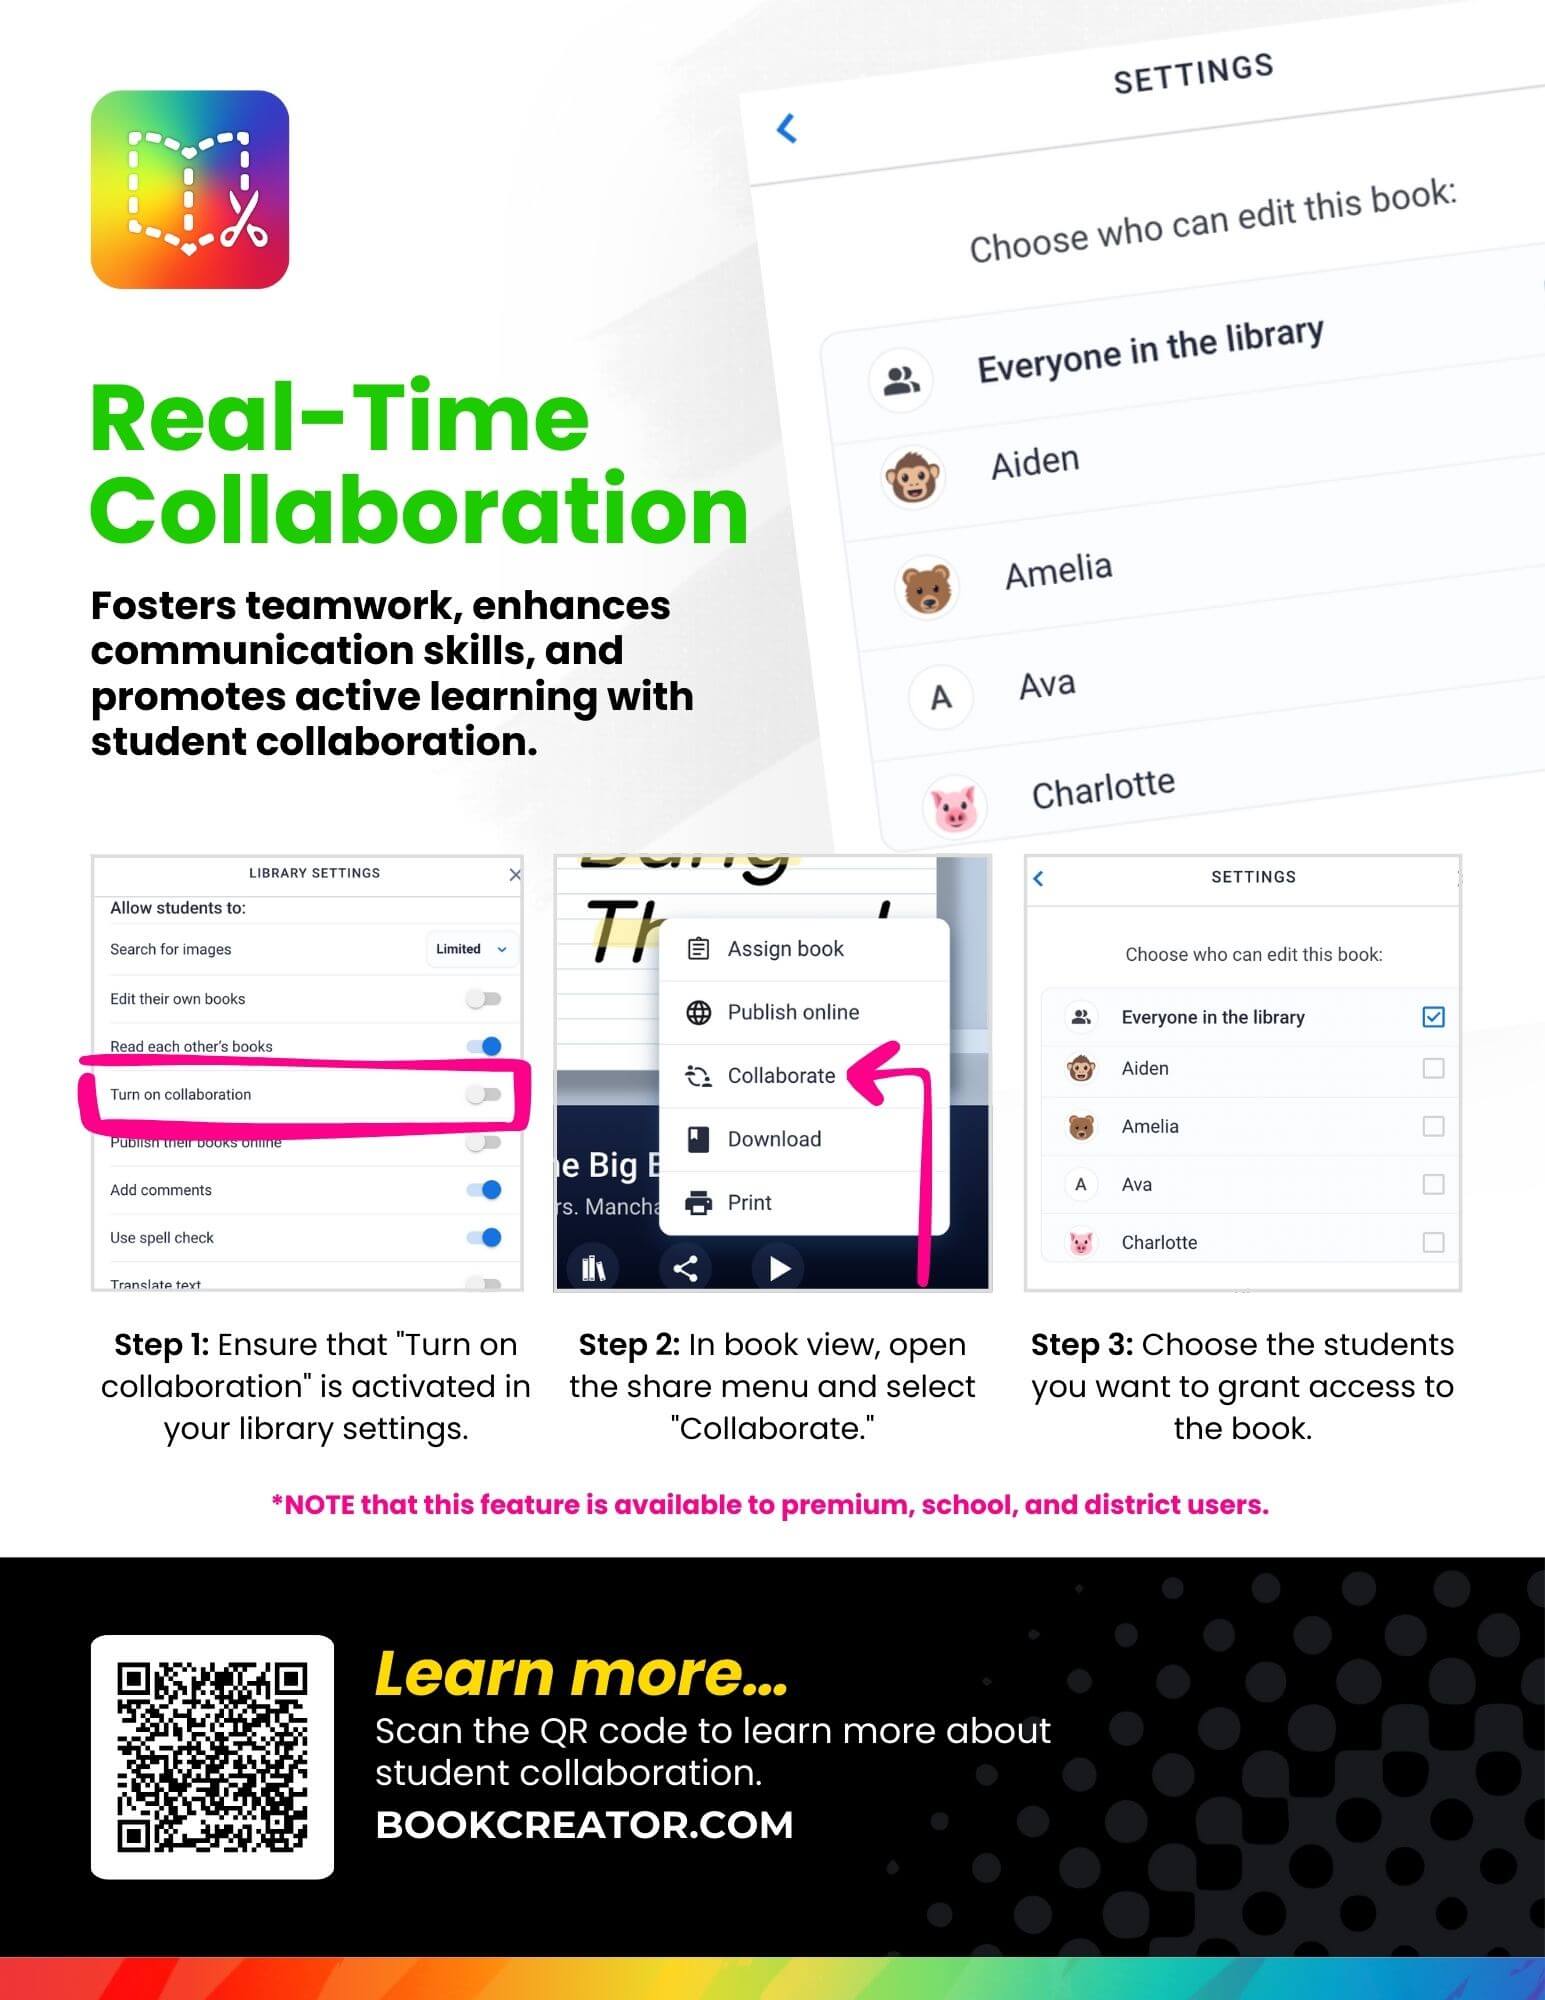
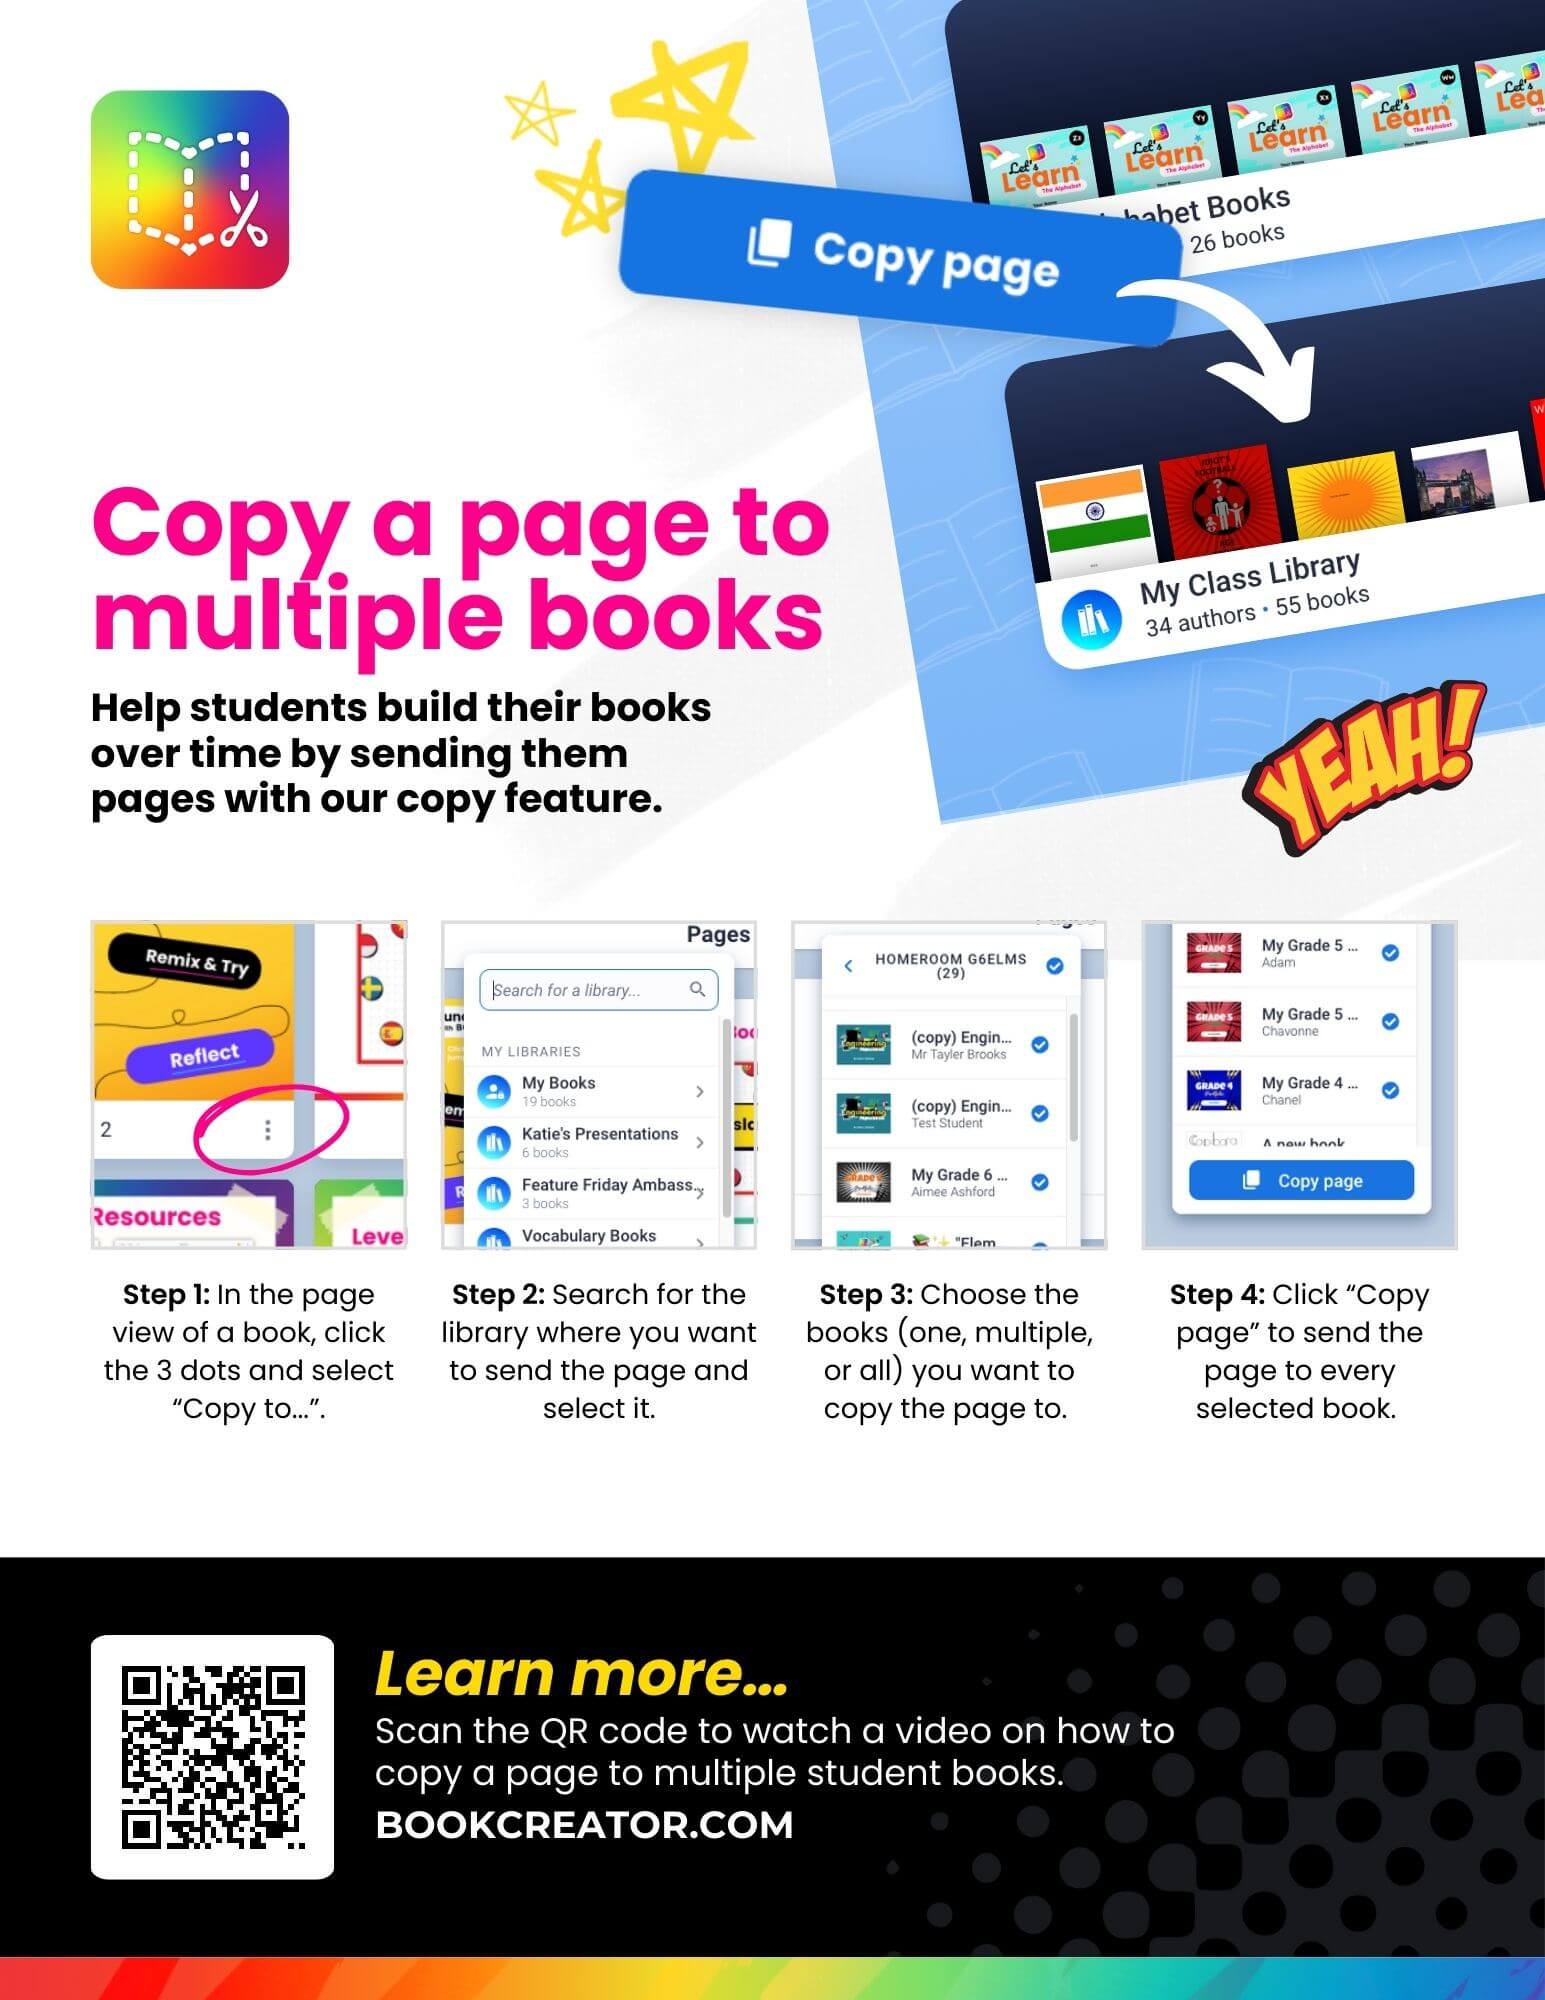
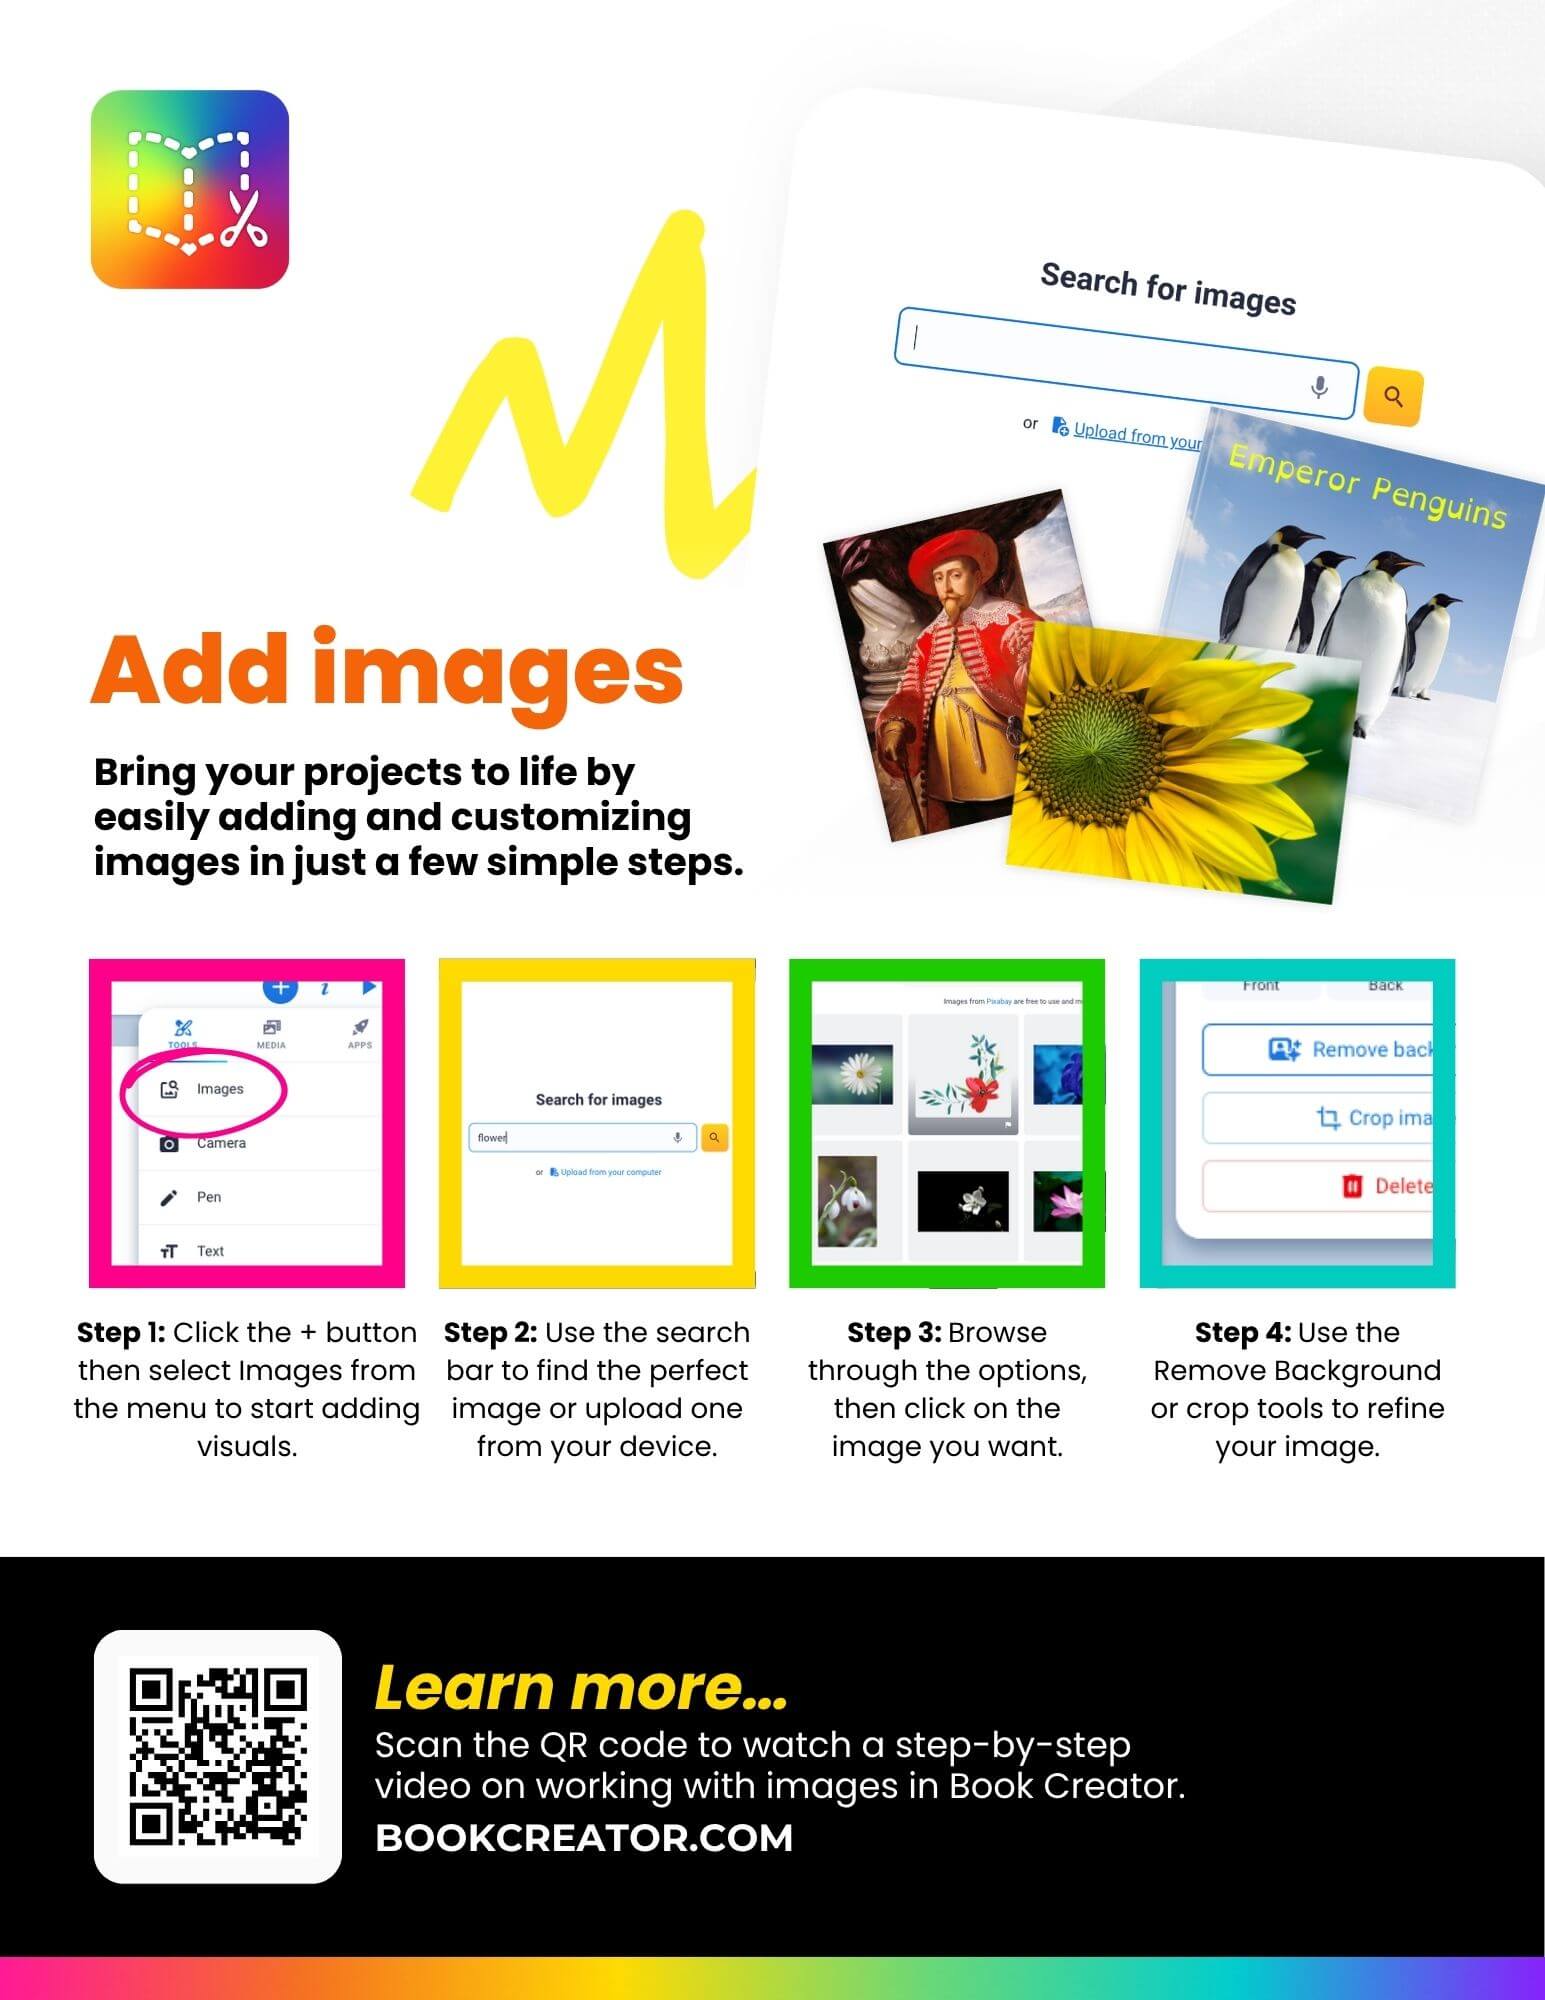
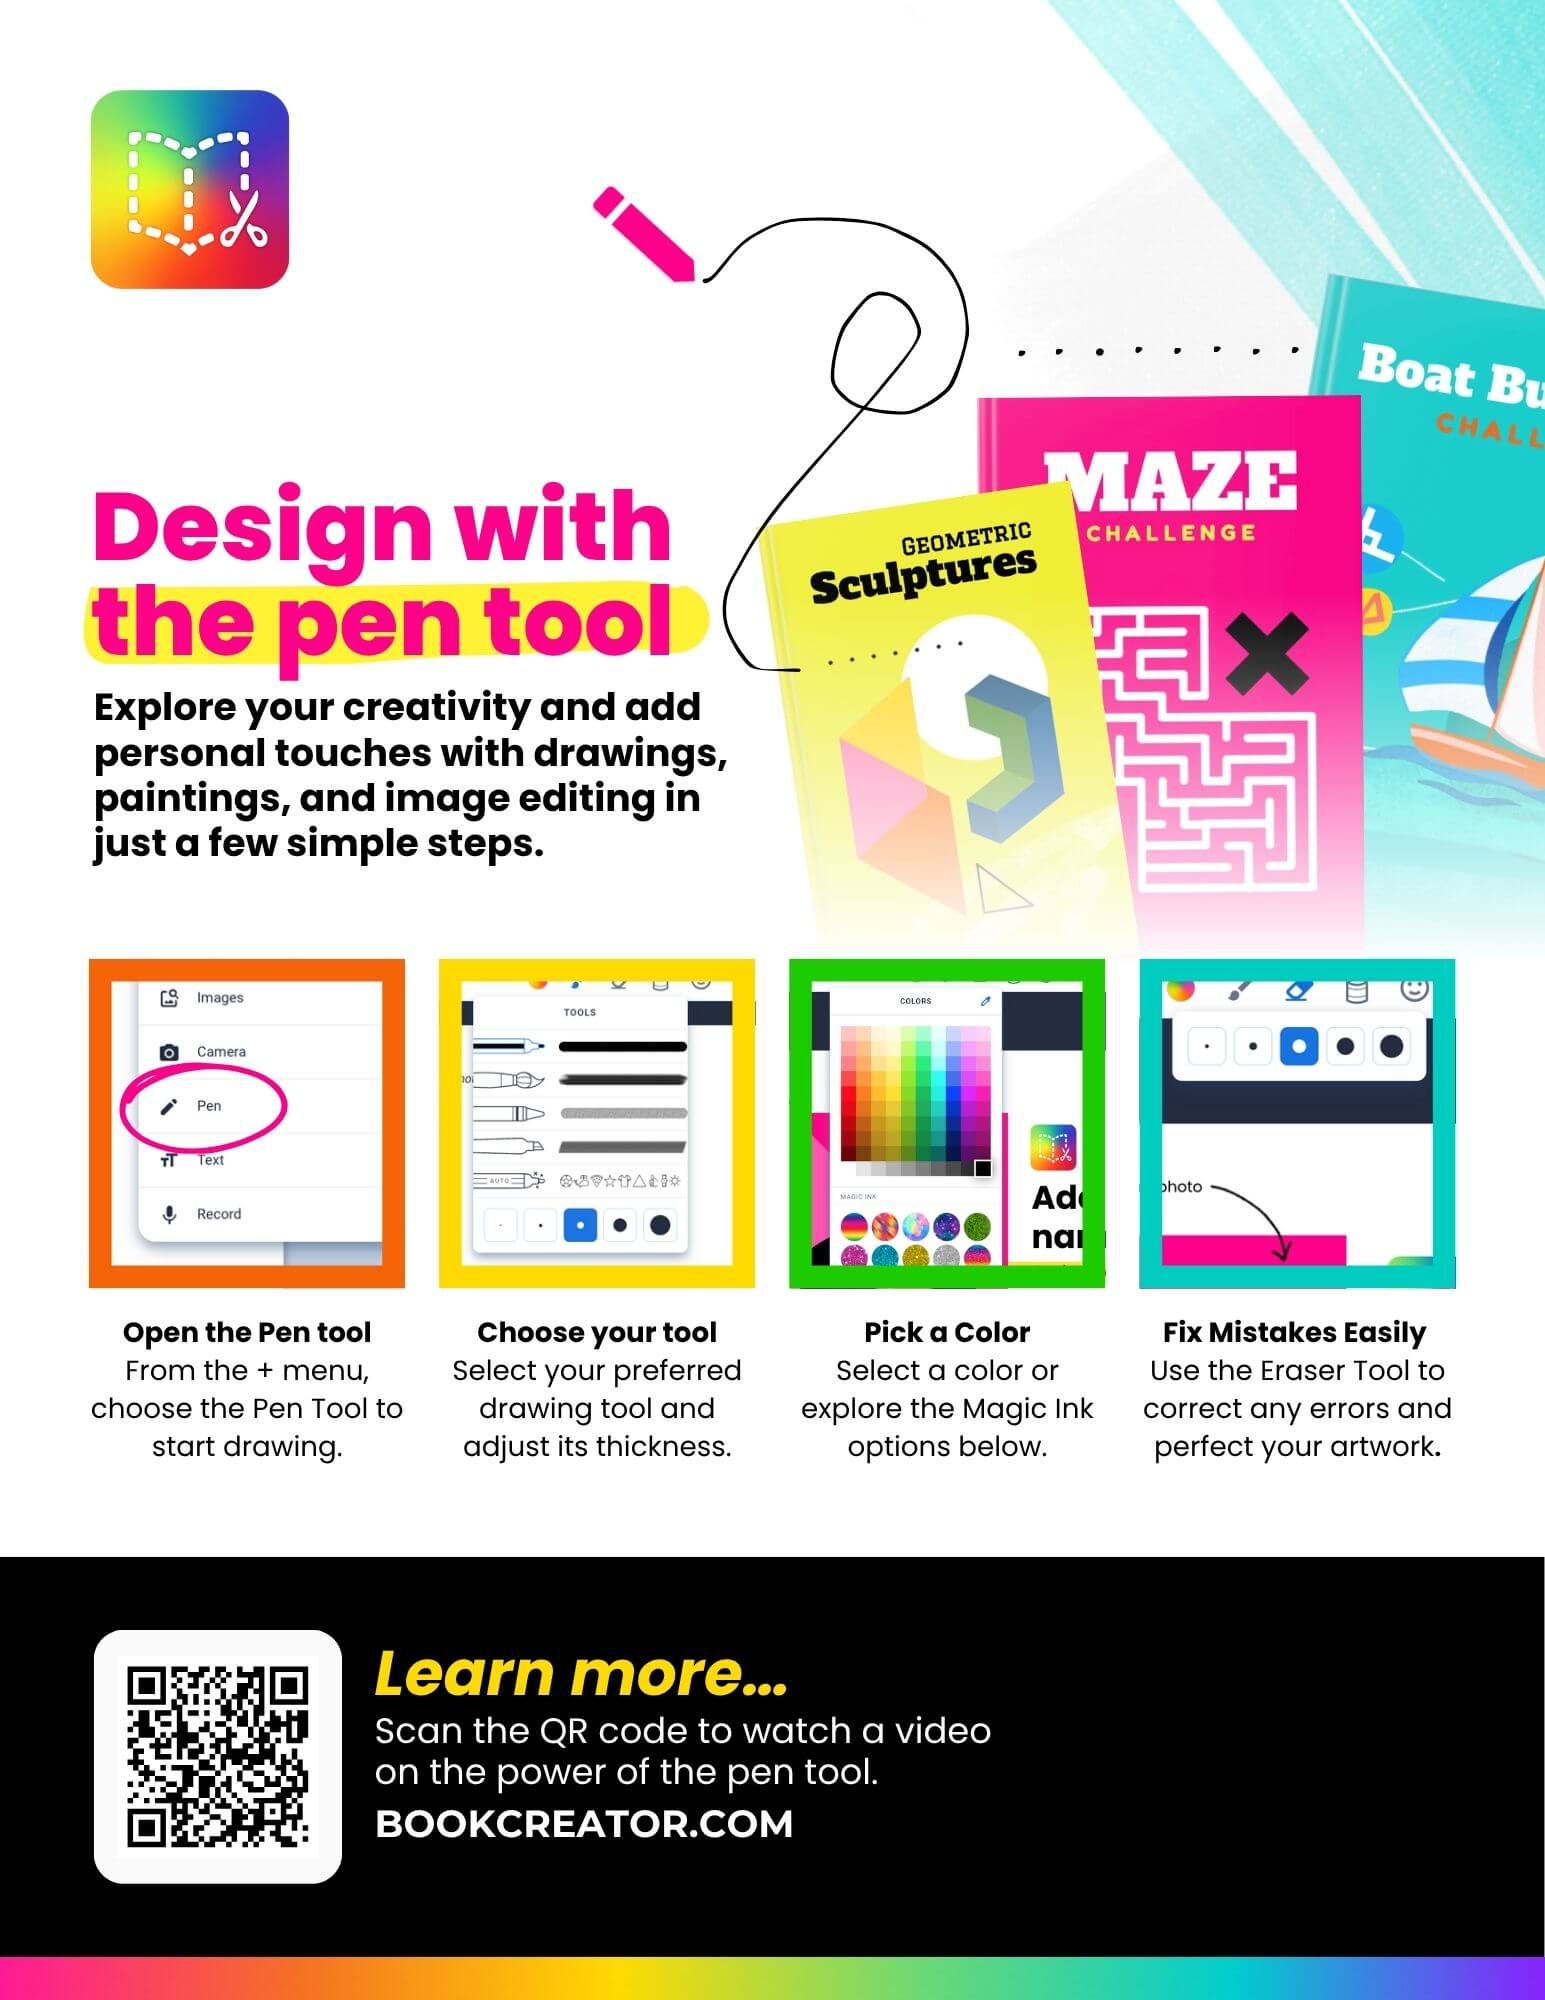
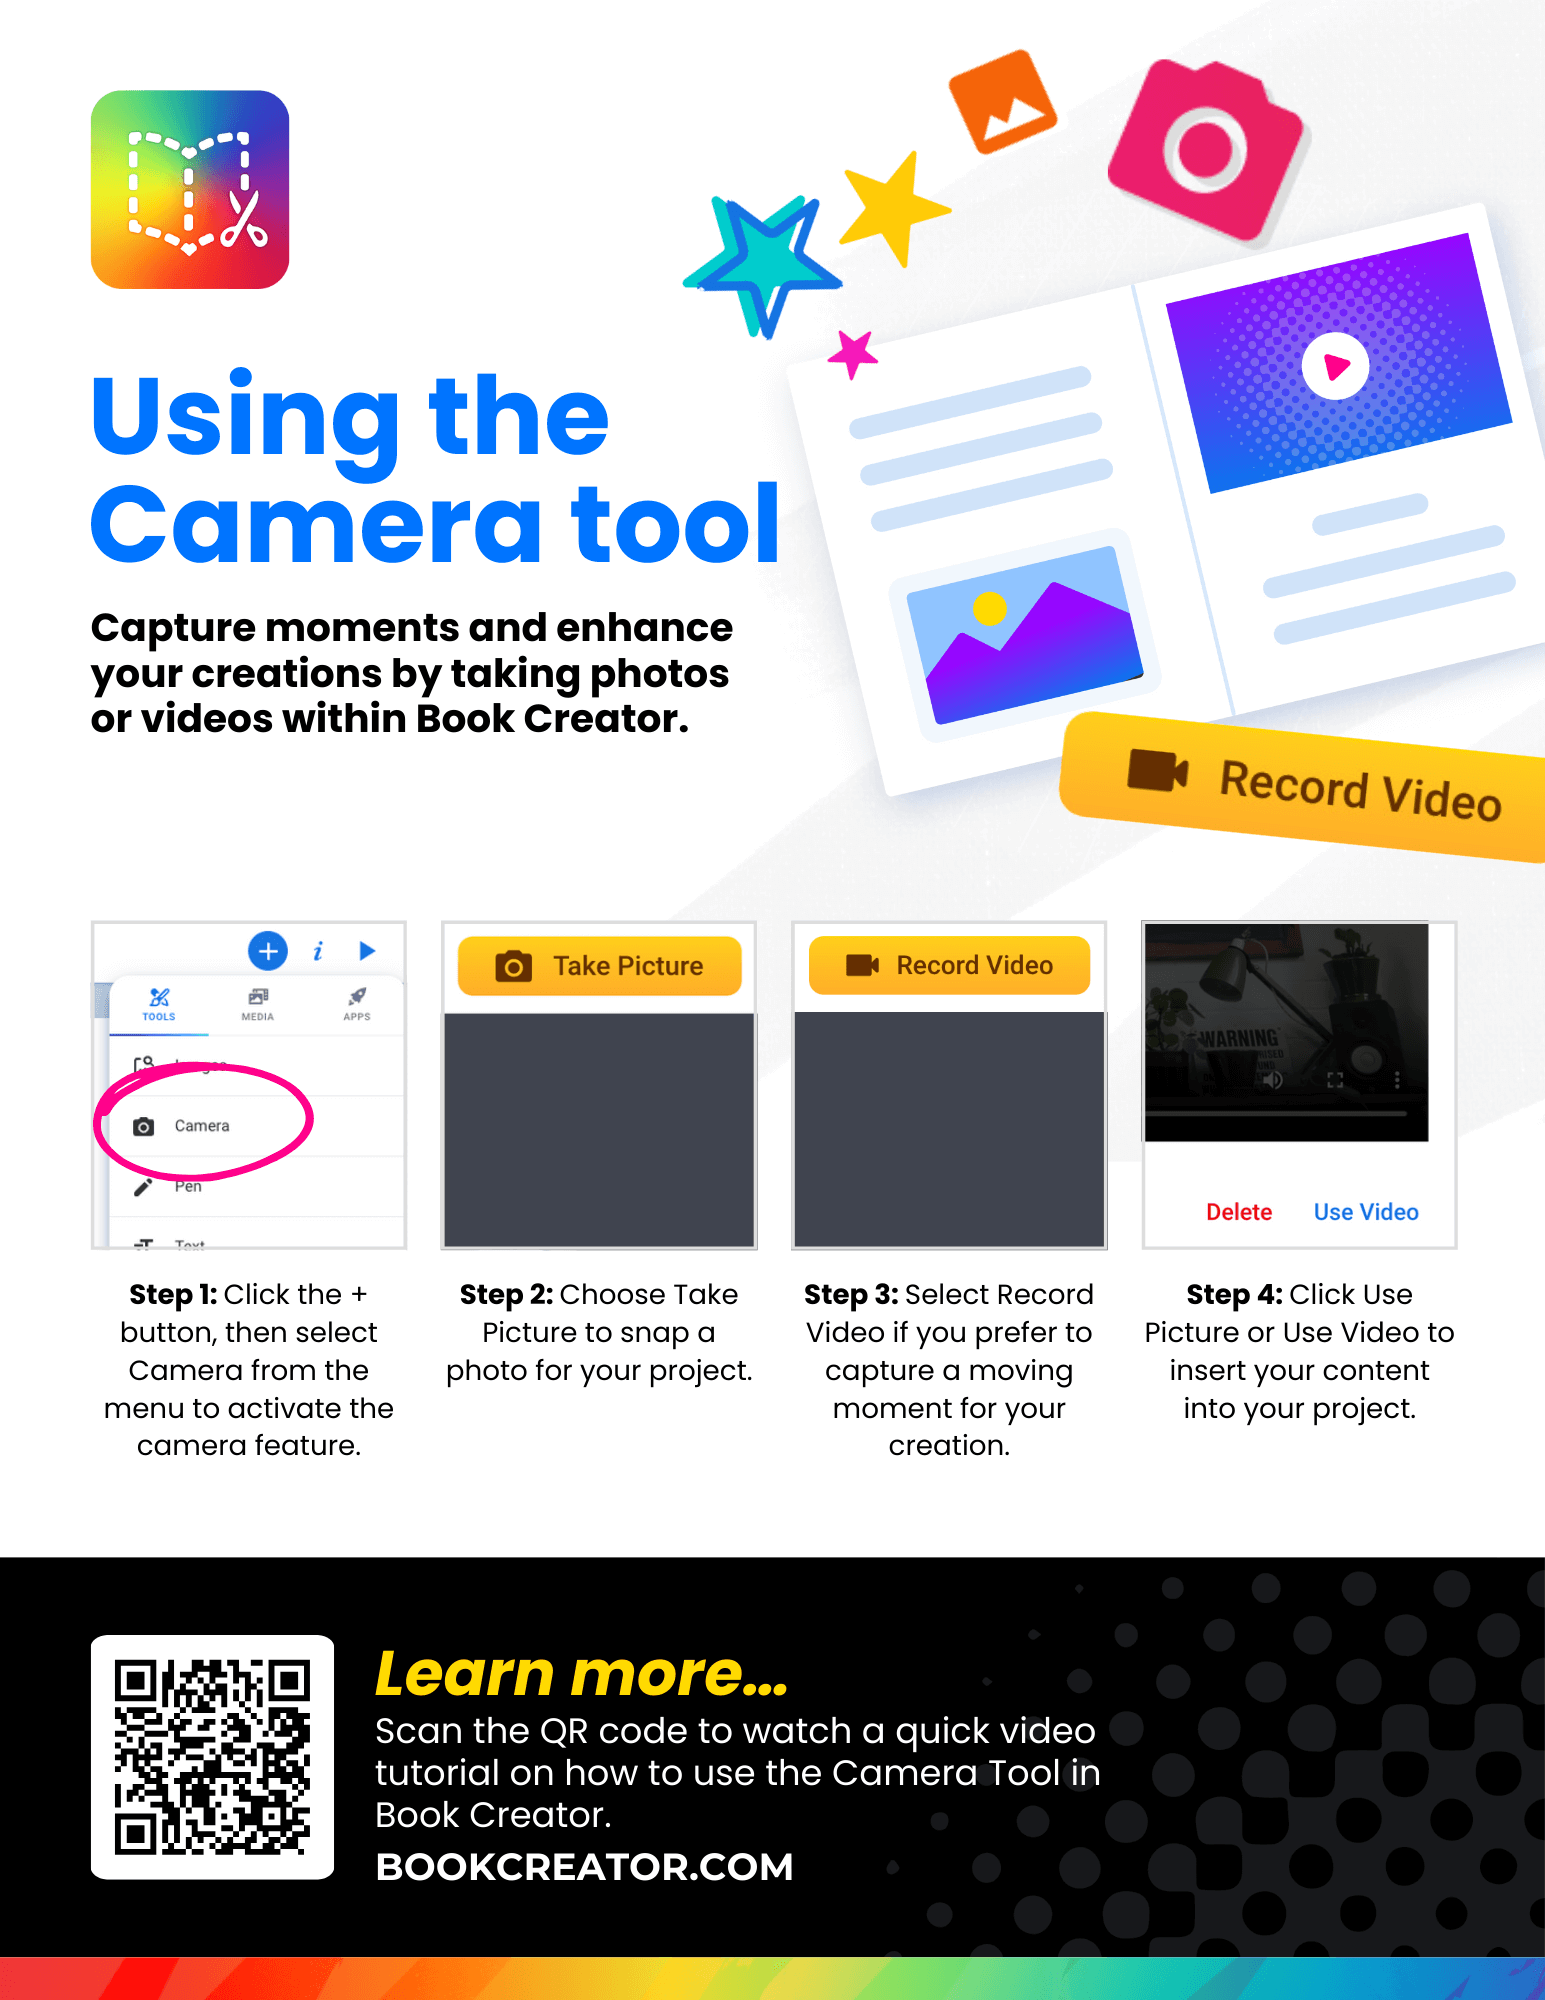
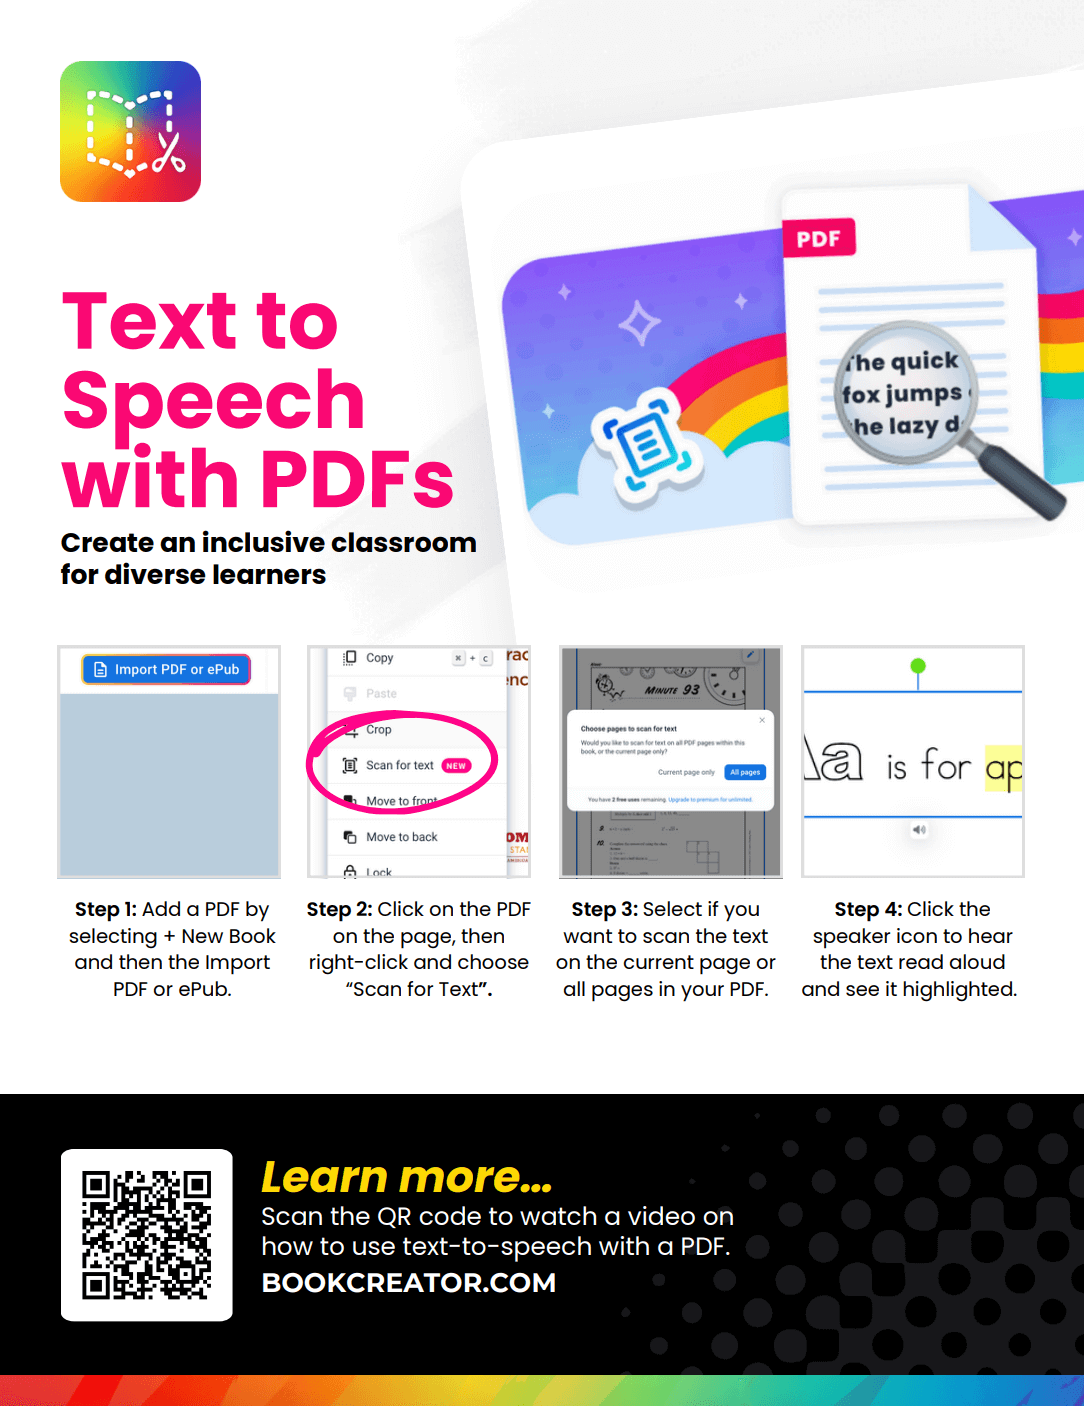
Simple one page highlights of what can be done in Book Creator. Share them online or print them for your staffroom!

Begin Your Journey with Book Creator

Essential Guides for New Users to Start Creating with Confidence
Promotional flyer for 'Getting Started with Book Creator: Teacher Edition.' The flyer explains how teachers can quickly create an account and set up their first library. Title: 'Get Started in Book Creator - Creating an account and starting your first library is quick and easy!' Steps: Choose 'Create a Free Account' at bookcreator.com. Select the login method (options include Google, Microsoft, email, or Clever). Provide details about your teaching and name your library (example: '3rd Grade'). The flyer features a colorful design with icons such as sunglasses, musical notes, and sparkles for a playful, engaging aesthetic. At the bottom, a QR code links to a video tutorial on getting started with your first library, along with the URL bookcreator.com.Visual guide showing how to use the Discover Library in Book Creator. Step 1: Select a remixable book from the Discover Library. Step 2: Click 'You can remix this book' in the pop-up. Step 3: Choose a destination library and select 'Copy to library.' Includes colorful graphics, star icons, and a QR code for further instructions.Invite students to a libraryPromotional flyer for the 'Add a Co-Teacher' feature in Book Creator. The title reads 'Add a Co-Teacher: Provide feedback, promote collaboration, and share teaching responsibilities effectively.' The flyer includes three steps: Share the library access code (example code shown as RHXVC55) with co-teachers so they can join. Elevate their role by promoting them to co-teacher using the 'Actions' menu. As the library owner, you can manage co-teachers, including removing them if needed. The flyer highlights that this feature is available to premium, school, and district customers. It also features icons like a pencil, ruler, and paperclip for a creative look. A QR code at the bottom links to a video tutorial on adding co-teachers, along with the URL bookcreator.comStep-by-step guide to publishing a book using Book Creator. Includes selecting 'Publish Online' from the library, adjusting publishing settings, sharing the book via link or QR code, and tracking readers using analytics. Features colorful icons and a QR code for additional instructionsAssign a Book to StudentsReal Time Collaboration One-PagerPage templates in Book CreatorCopy a page to multiple booksA colorful infographic titled "Customize with the Inspector." It features step-by-step instructions to personalize content in Book Creator by adjusting text size, color, font, and more using the Inspector Tool: Step 1: Click on the text or object you want to customize to activate editing options. Step 2: Tap the Inspector icon in the top-right corner to access customization settings. Step 3: Adjust text size, font style, color, and formatting to match your vision. Visuals include screenshots of customization options and tools, with a QR code linking to a video tutorial. The logo and URL, "BookCreator.com," appear at the bottom.An engaging infographic titled "Using the Camera Tool." It explains how to use Book Creator’s camera feature to capture photos or videos for projects: Step 1: Click the "+" button, then select "Camera" from the menu to activate the camera feature. Step 2: Choose "Take Picture" to snap a photo for your project. Step 3: Select "Record Video" to capture a moving moment. Step 4: Click "Use Picture" or "Use Video" to insert it into your project. Decorated with icons like cameras, stars, and colorful elements, it includes a QR code linking to a tutorial and the Book Creator logo and URL at the bottom.A bright infographic titled "Edit Page Templates" explaining how to customize over 800 templates in Book Creator: Step 1: Find the templates feature under "Media" in the "+" menu. Step 2: Select the text or object you want to edit. Step 3: Personalize the page with new colors, text, and graphics. The visuals include examples of templates (storyboards, checklists, diagrams) and a note indicating that free users have limited access to templates. A QR code links to a video tutorial, with "BookCreator.com" at the bottom.

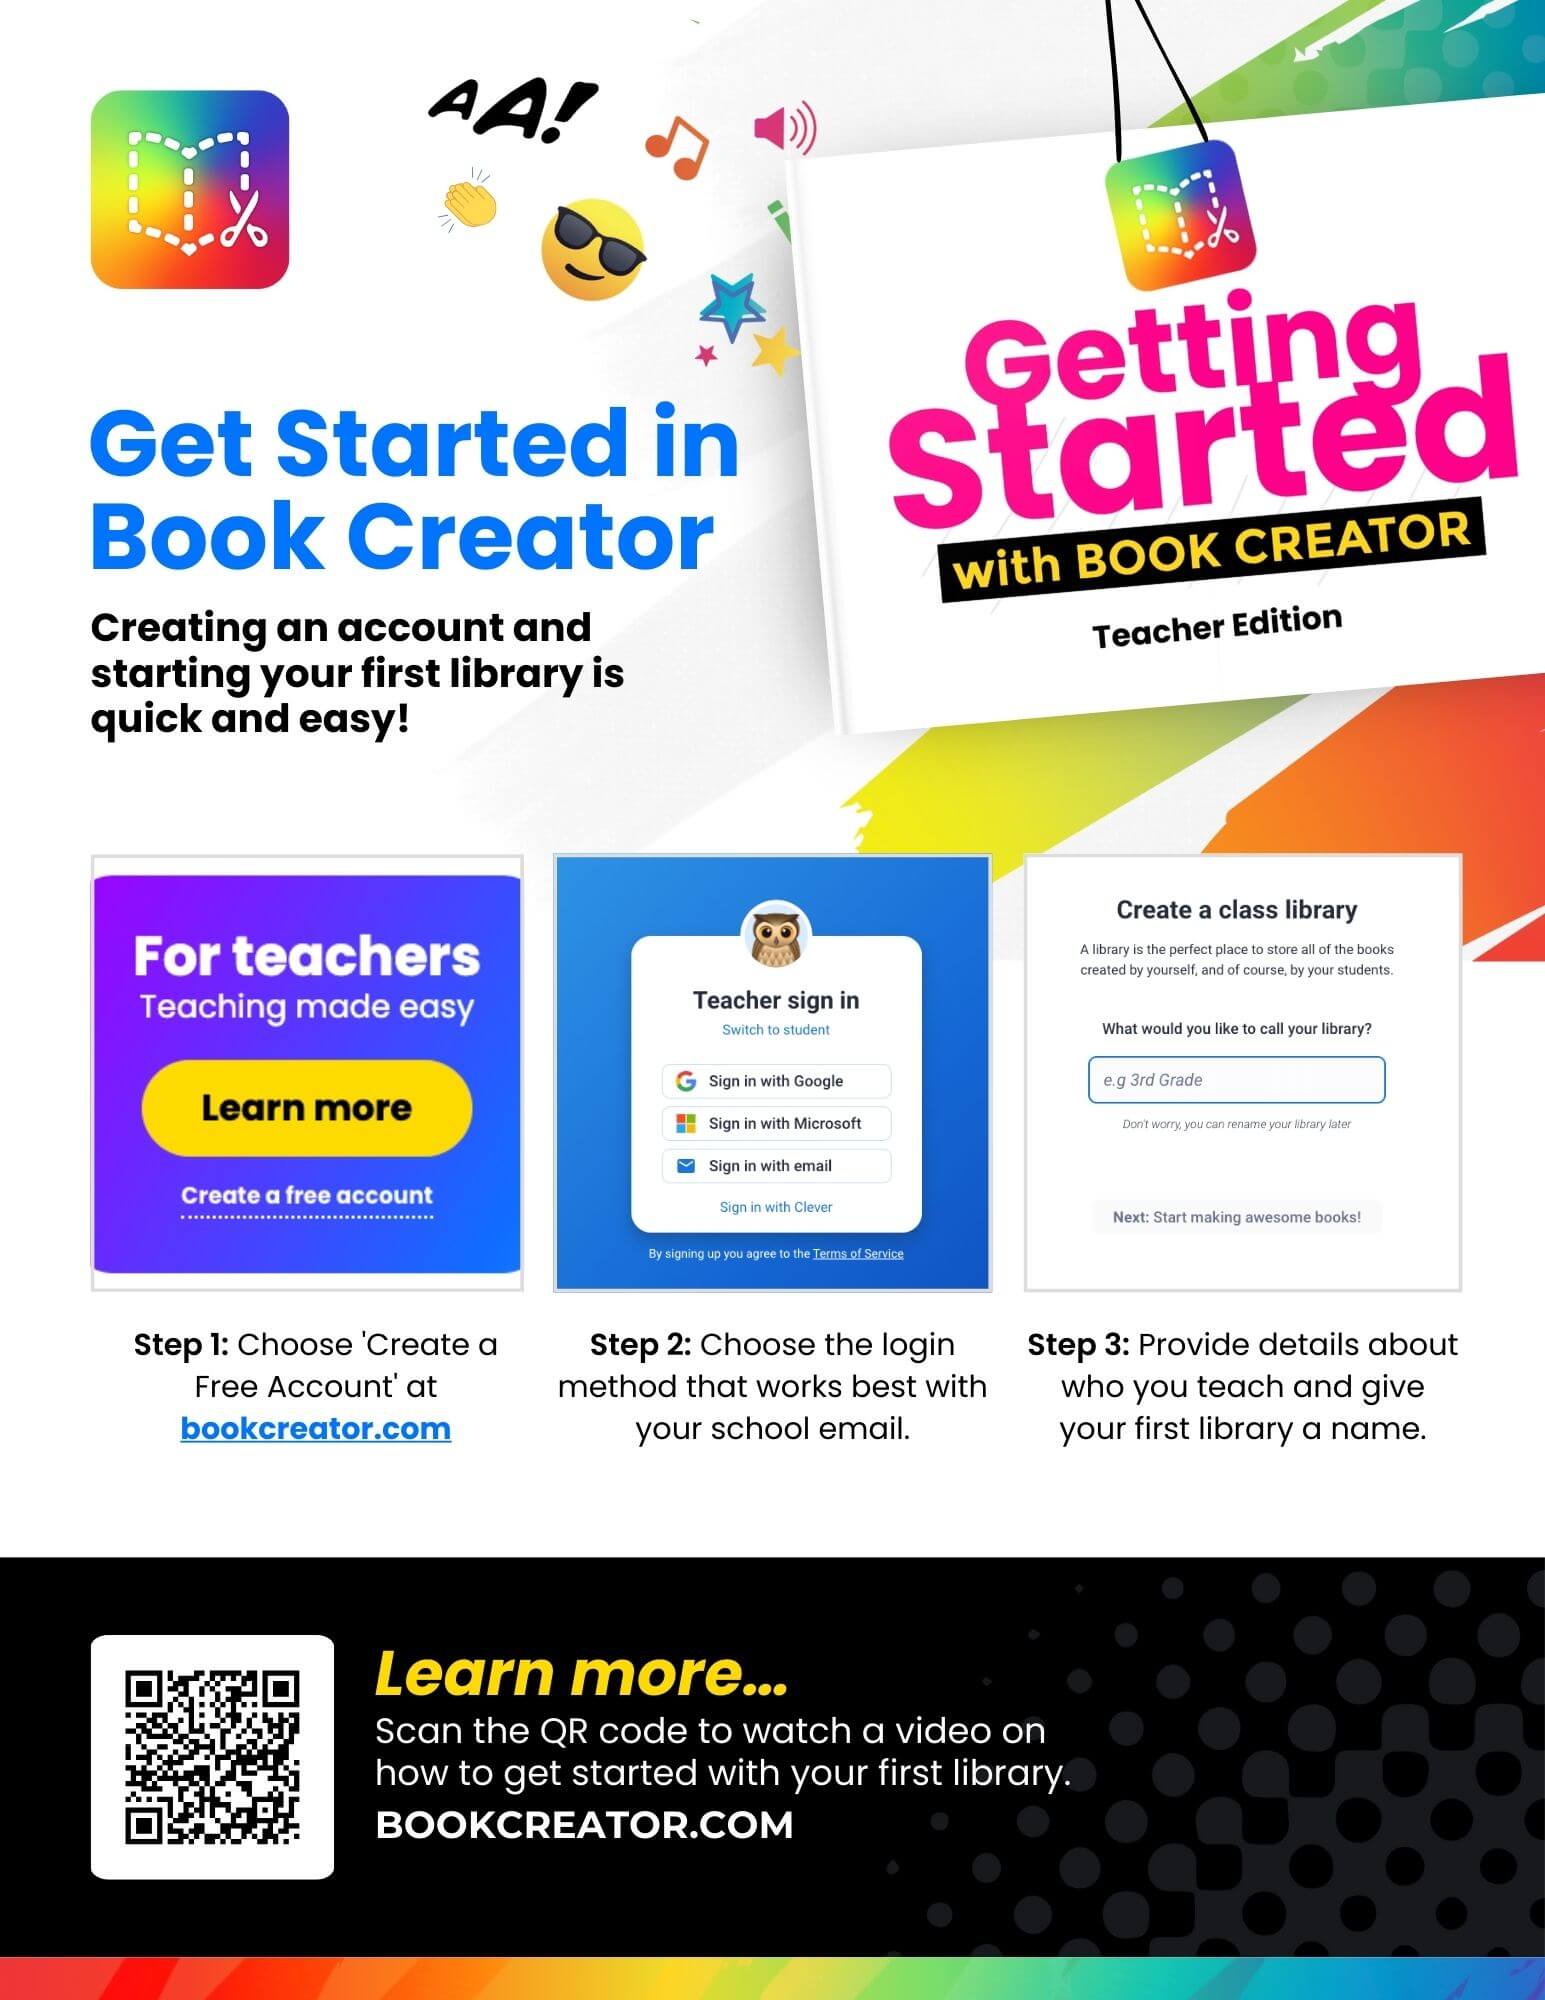
Level Up Your Book Creator Skills

These one pagers are perfect for a new user.
A colorful instructional graphic titled "Library Settings" guides educators on customizing classroom library activities in Book Creator using flexible settings. At the top, the Book Creator logo (a gradient-colored open book) appears on the left, with a vibrant background featuring a green, yellow, and blue gradient with a paintbrush stroke effect. The main content consists of three steps with accompanying screenshots: Step 1: Click the gear icon to open your Library Settings. (Screenshot shows a pink arrow pointing to the gear icon next to the "New Book" button). Step 2: Customize the permissions granted to students based on their needs. (Screenshot displays a settings panel with toggles for options like "Search for images," "Edit their own books," and "Create multiple books"). Step 3: When students' work is ready to be shared, publish the library. (Screenshot shows a "Publish library online" button). At the bottom, a black banner with yellow text reads: "Learn more..." Users are encouraged to scan a QR code to watch a tutorial video on customizing library settings in Book Creator. The website URL, BOOKCREATOR.COM, is displayed. The design is bright, modern, and engaging, using bold fonts and vibrant visuals.Student portfolios in Book CreatorLeaving feedback in Book CreatorTranslate a Book One PagerTeaching Vocabulary One-PagerStep-by-step guide to enabling apps for students in Book Creator. Step 1: Open the teacher dashboard and select 'Apps.' Step 2: Choose an app to enable for the student library. Step 3: Click 'Enable App' in the pop-up window. Step 4: Select the libraries to enable the app and click 'Done.' Features a rocket, globe, app icons (like Canva), and a QR code for additional instructions.A promotional one-pager for the Adobe Image Generator in Book Creator. The top section has a colorful background with the Book Creator logo on the left and the Adobe Express logo on the right. The title, "Adobe Image Generator", is in bold yellow and white text, followed by a tagline: "Try it today and watch your students transform ideas into stunning visuals!"This infographic explains how to assign tasks in Google Classroom using Book Creator: Step 1: Create a library in Book Creator and generate an invite link for students. Step 2: Share the invite link in a Google Classroom assignment. Step 3: Use comments in Book Creator to provide feedback to students. Step 4: After reviewing each student’s book, assign a grade in Google Classroom. At the bottom, there's a QR code labeled: "Learn more... Scan the QR code to watch a video on how to assign work in Google Classroom. BOOKCREATOR.COM." A note mentions that the feature is currently available only to domain users.This infographic explains how to assign tasks in Canvas using Book Creator's integration: Step 1: Create a Canvas assignment. Under "Submission Type," select "External Tool." Step 2: Click "Find," then select "Book Creator" from the list of available tools. Step 3: Choose your preferred method for creating the assignment. Step 4: Follow the setup wizard until completion. Save and publish the assignment. At the bottom, there's a QR code labeled: "Learn more... Scan the QR code to watch a video on creating a Canvas assignment. BOOKCREATOR.COM." A note mentions that the feature is currently available only to domain users.This infographic explains how to assign tasks in Schoology using Book Creator's integration: Step 1: From "Add Materials," select "Book Creator" on the right side. Step 2: Choose how you would like to start the assignment. Step 3: Rename "Book Creator LTI Material" to your assignment title. At the bottom, there's a QR code labeled: "Learn more... Scan the QR code to watch a video on how to assign Book Creator in Schoology. BOOKCREATOR.COM." A note mentions that the feature is currently available only to domain users. Let me know if further adjustments or details are needed!Illustration showing steps to assign Book Creator projects through Seesaw. Includes creating a library, generating an invite link, adding it to a Seesaw activity, and providing feedback in Book Creator.A colorful instructional graphic titled "How to Assign Work in Clever" provides a step-by-step guide for assigning Book Creator projects through Clever. At the top, a vibrant design includes a rainbow, books, a notepad, and the Clever logo. The Book Creator logo, featuring an open book with a gradient color scheme, is in the top left corner. The main content consists of four steps: Step 1: Create a library in Book Creator and generate an invite link for students. (Screenshot shows an invite code with the text "RHXVC5S"). Step 2: Click "Add" in the top right corner of your Clever teacher page to add the link. (Screenshot shows a blue “+ Add” button). Step 3: After students join the Book Creator library, use the assign book feature. (Screenshot shows the dropdown menu with "Assign book" selected). Step 4: Use comments in Book Creator to provide feedback to students. (Screenshot shows a yellow comment button). At the bottom, a black banner with yellow text reads: "Learn more..." Users are instructed to scan a QR code to watch a video on assigning work in Book Creator. The website URL, BOOKCREATOR.COM, is also displayed. The design uses a bold, modern, and engaging layout with a combination of bright colors, icons, and screenshots.