

The 2 Techie Teachers share their insight into making digital interactive notebooks, which they claim has revolutionised workflow and engagement in their classroom.
If there is one digital tool that’s become our go-to this school year, it’s been Book Creator. Last summer we were researching ways to incorporate digital interactive notebooks into our literacy blocks. All of our research kept pointing us back to Book Creator!
@iPadTeachers In love with @BookCreatorApp Planning to use it for interactive notebooks this year!
— Tiffany (@MrsCoppleSES) June 30, 2014
Originally we relied upon graphic organizers as our sole source of material for these notebooks, but the ways in which they have evolved has been amazing. With traditional interactive notebooks, students create hands-on pieces that involve a lot of coloring, cutting, and gluing.
The purpose is that their work becomes not only three dimensional in look and feel, but that the learning itself goes deeper. That’s exactly what we wanted to achieve with our digital versions. Simply annotating graphic organizers was not enough for us or our students.
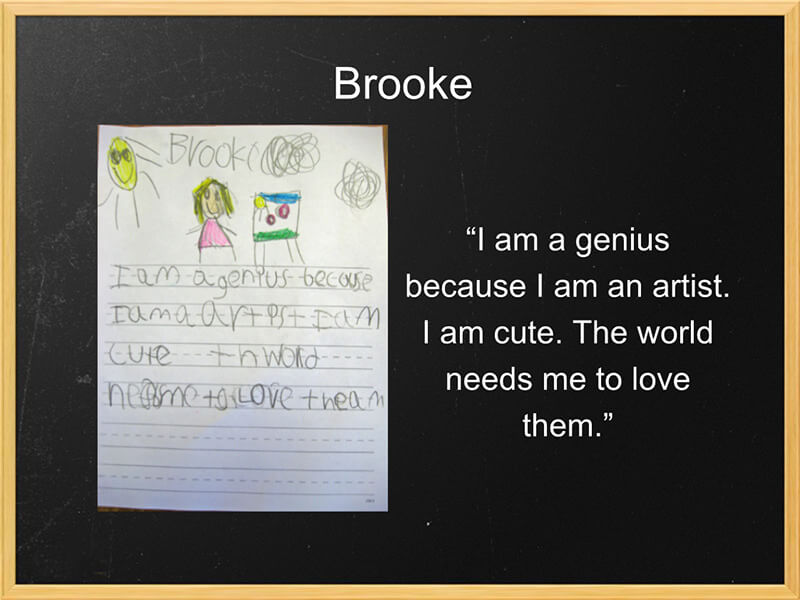
As the year has progressed, we began to incorporate more and more into our weekly notebooks. Students often inspired these additions as well as discovery of new apps to utilize. Students are now including photographs, images, etc. from KidRex, recording video of themselves completing fluency tasks, photographing station work, incorporating ChatterKid images, and much more.
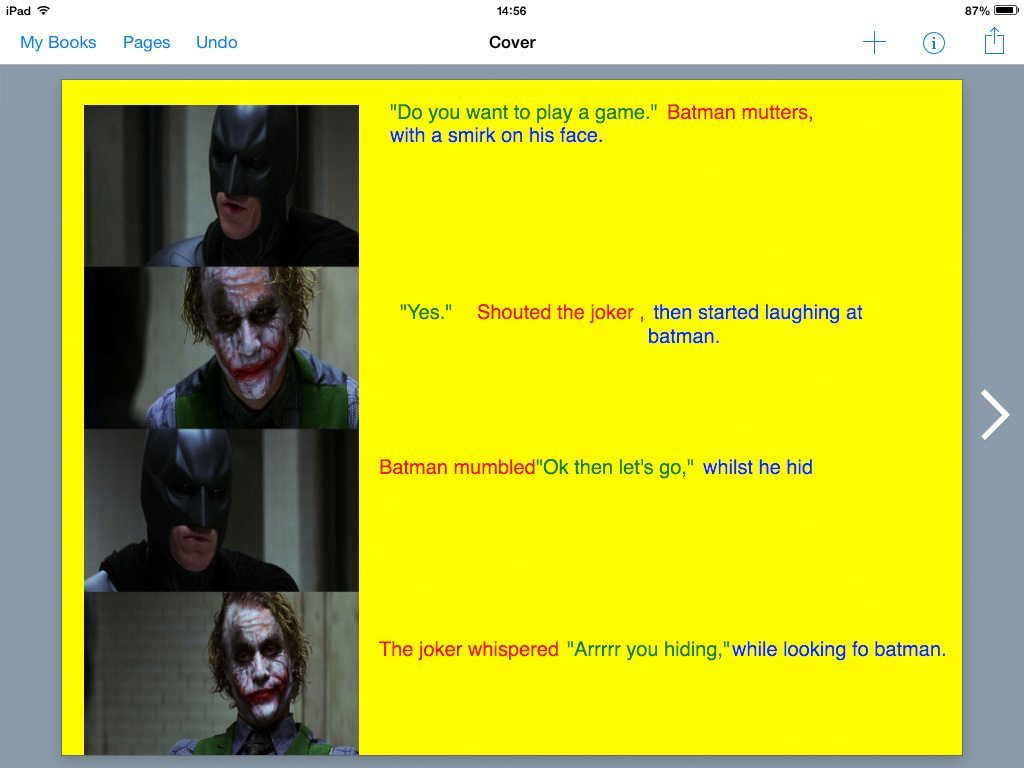
This is what a student page may look like before:
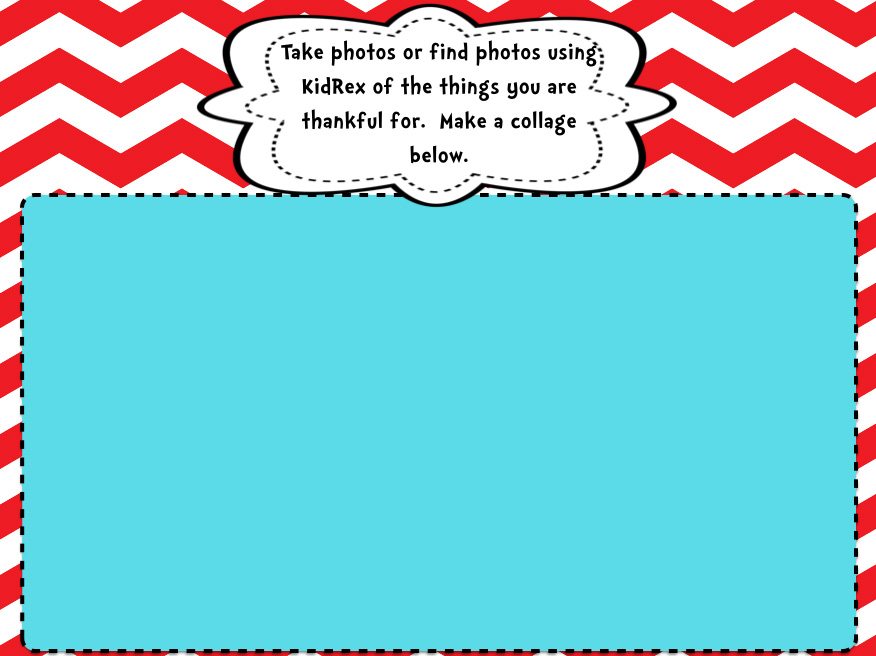
Any time students can find or take real-time photos, it connects themselves to the text in a meaningful way.


So how do we build these interactive notebooks? How do the students receive them? How do we check their work?
Building the notebook
We choose to build our notebooks from our laptops using Keynote, but whatever you may use (PowerPoint, Photoshop, etc.) will certainly work!
We build each slide using a variety of graphics that make the page pleasing to the student. Sometimes we choose to go full color, and other times we leave a little more white space for creation. This really depends on the project as well as the time limits we are working with!
Many of our pages are created from scratch at this point, but we also incorporate quality work we may find elsewhere such as Teachers Pay Teachers. Teaching is all about cheating, as they say… if someone has already done it well… why reinvent the wheel?
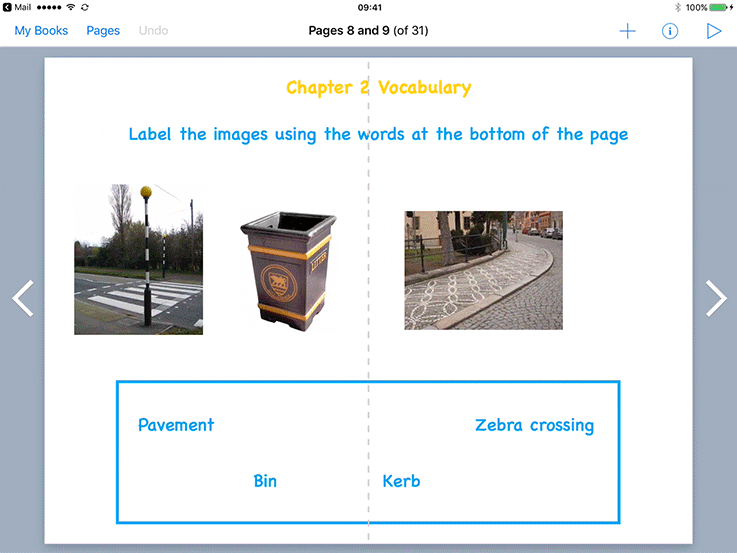
Each week we incorporate a variety of literacy tasks including, but not limited to:
- Fluency (have students read a passage while recording themselves)
- Comprehension (graphic organizers that utilize photographs, drawings, text, etc.)
- Vocabulary
- Text-to-self / world connections
- Station work
Once we have built the slides we want to add to their digital notebooks, we export the slides as images.
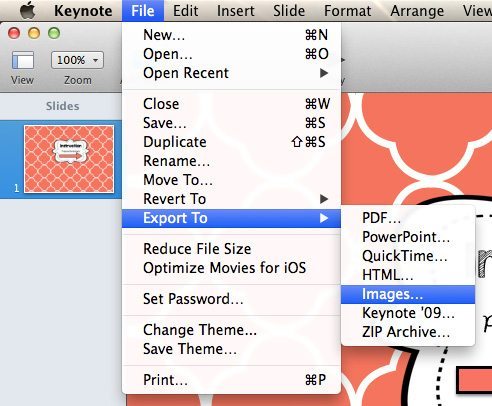 This is easily done by going to File then Export to… Select Images. This will prompt you to save your images.
In order to begin the next step, you will need to save your image files to a storage system easily accessible on your iPad. We like Google Drive, but you may also like other cloud-based apps like Dropbox.
You will need to open and save these image files to your Camera Roll on your iPad before beginning the next step.
Building the Book Creator book
- From your iPad, open the Book Creator app and select New Book.
- We prefer the Landscape format as it seems to fit our Keynote slide images perfectly.
- From here, creation is easy. On each page, click the + sign and choose camera roll. Select the image you would like the students to work on for each page of their notebook.
- Resizing is easily accomplished by dragging one corner of the image to fit the screen.


Once you have added all of your images, you are ready to share the book with your students!
Workflow
Tap the “share box” (as we call it – the box with the arrow shooting out of the top) to export.
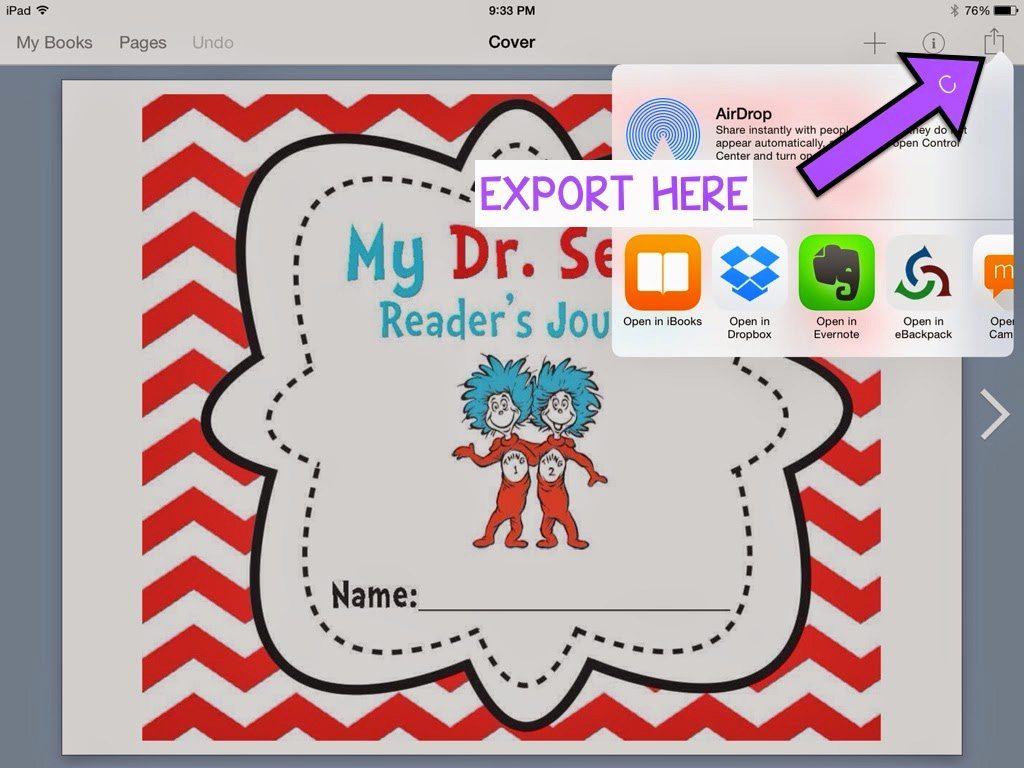
You should see what you typically use to share, expedite, or “push” files to students. Again, we use eBackpack. Note that iBooks is an option. This is great if you ever want students to publish their work for parents or beyond!
Book Creator will automatically save your creation as an .epub file. Note that size may become an issue if you have loaded your ebook with video files. Sometimes we incorporate learning videos from BrainPop or other sources for students to view.
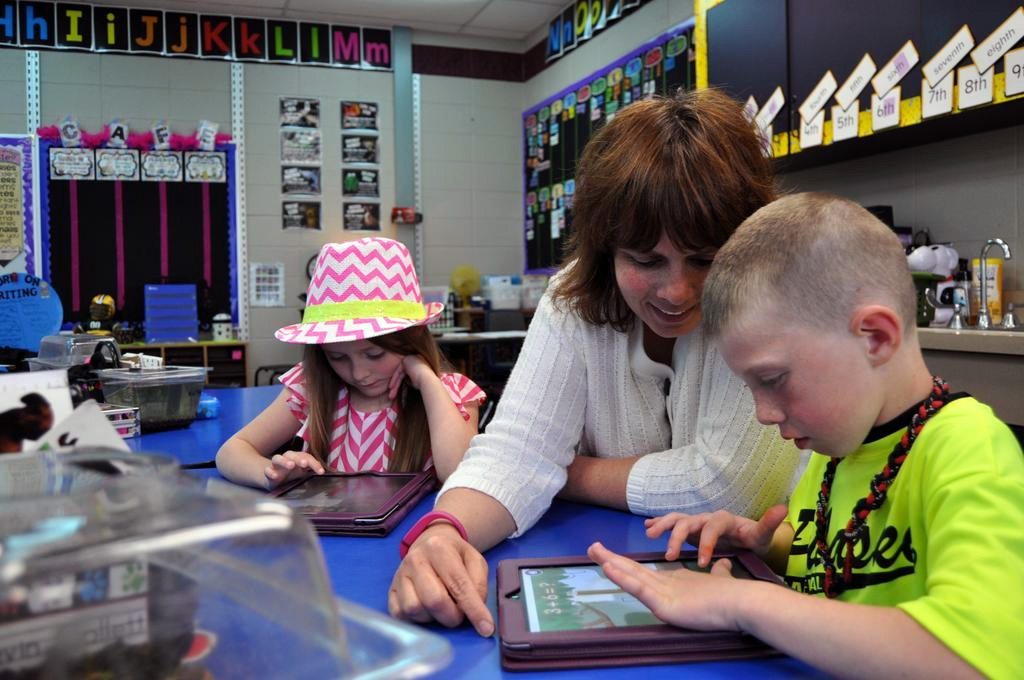
Students will open the file from your workflow app of choice (Google Drive, eBackpack, etc.) directly into Book Creator. When they have completed their work for the week, they will simply follow the same procedures you did above to send it back to you! We love the ease of checking their work quickly at week’s end by flipping through their digital notebooks!
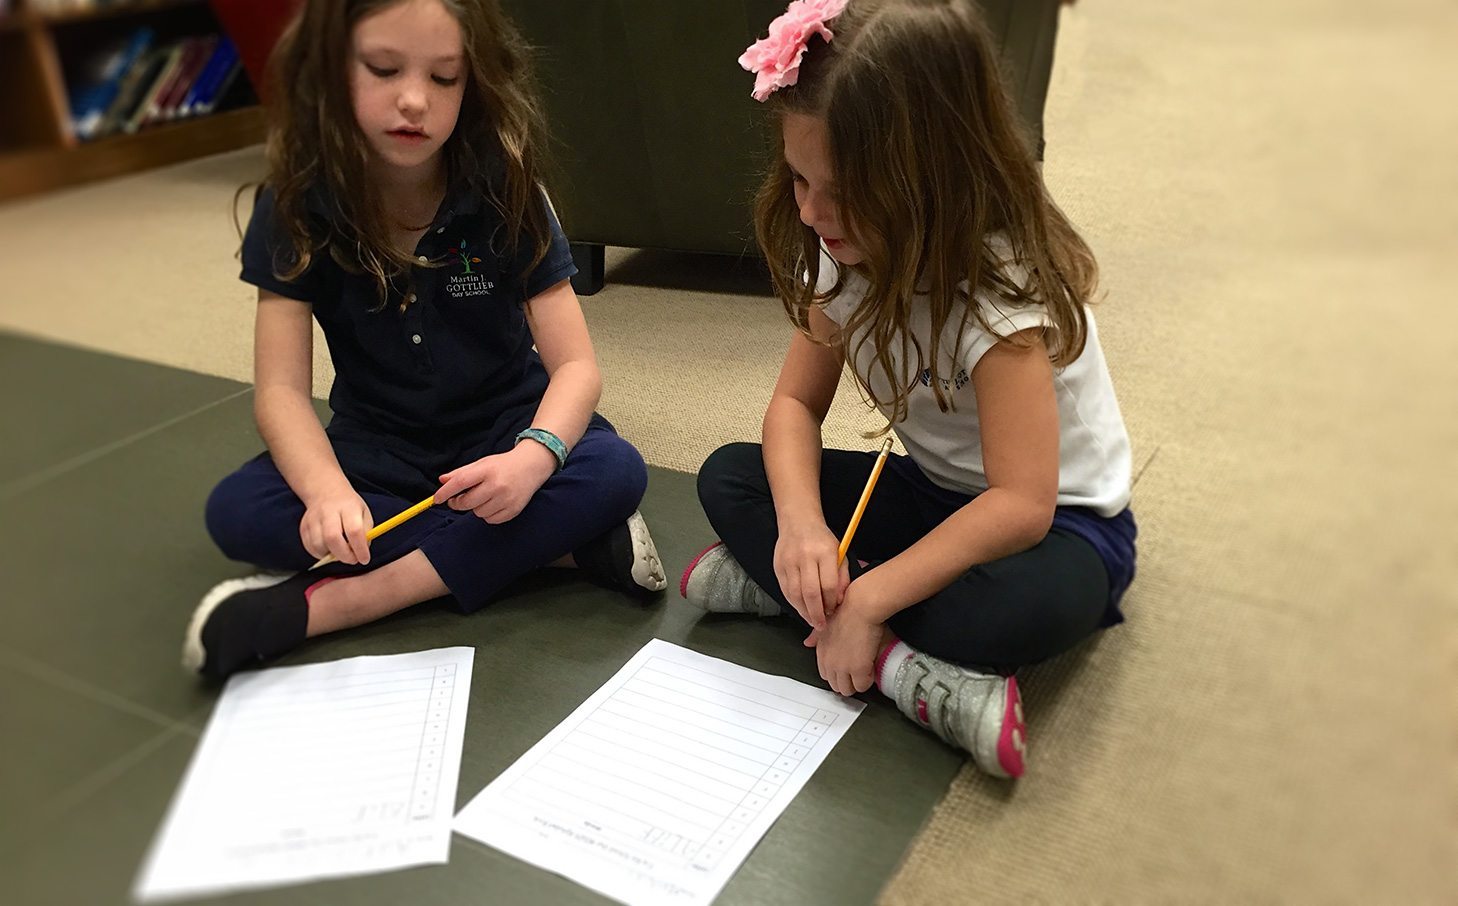
Student creation
We utilize these digital interactive notebooks throughout the literacy block.
Sometimes students add along as we create a class anchor chart (they can even take a photo and annotate with you!), use them during stations (anytime they can record themselves, it’s instant engagement), document fluency, and so much more!
As you use them more and more, you will discover new and exciting ways to engage your students in literacy tasks.


We hope that this post has inspired you to take a new look at the possibilities technology can bring to your literacy block through digital interactive notebooks. These have truly revolutionized both the workflow and engagement in our classrooms!
Brittany Banister is a kindergarten teacher at Vienna-Finley Elementary School in Scottsburg, Indiana.
Tiffany Copple is a 6th grade Social Studies and Digital Literacy teacher also from Scottsburg. Both work in a 1:1 iPad environment.
Both are Book Creator Ambassadors.
Related posts
-
 28 April, 2014
 -
 7 December, 2016
 -
 10 March, 2015
 -
 13 May, 2015
 -
 8 March, 2017
 -
 4 June, 2015
 -
 11 February, 2019
 -
 23 July, 2018
3 Comments on “Digital interactive notebooks with Book Creator”
Awesome way to use interactive notebooks on our Ipads, can’t wait to try it! Thanks!
I love this idea, but I have a question. students then use the template you create, to interact and fill the notebook. But how do you keep students from changing the template?
Hi Daniela – students get a copy of the template, rather than the original template.