

Mira Campbell shares the story of her latest Book Creator project. This journey really did have it all! Make sure you read to the end for the big reveal...
 Dan Kemp, Marketing Manager
Mira Campbell has taken on legendary status amongst the Book Creator team. There are very few other teachers out there that continually push the capabilities of Book Creator like Mira does. She first came to our attention in 2016 when she submitted an amazing entry to the comic book competition with her student, Debis - combining video and green screen to make a comic book that came alive.
She followed that up with a blog post later in the year about the interactive books she'd created where you could read the story from different perspectives. She expanded on that idea in 2017 with her Choose Your Own Adventure story created in Book Creator. And in 2018 she showed us how Book Creator was the centre-piece of her library book tasting sessions.
But this time, I believe she's set the bar even higher. Why do I think this is the perfect Book Creator lesson? Beyond the basic features of Book Creator, it seems Mira has incorporated the following elements:
- Real-time collaboration
- Combining individual books into one class book
- Providing teacher feedback (and third party feedback)
- App-smashing with Flipgrid
- Sharing published books/libraries online
- Printing the finished books as a hard copy
Now, I'll hand over to Mira to tell the story of this latest project.
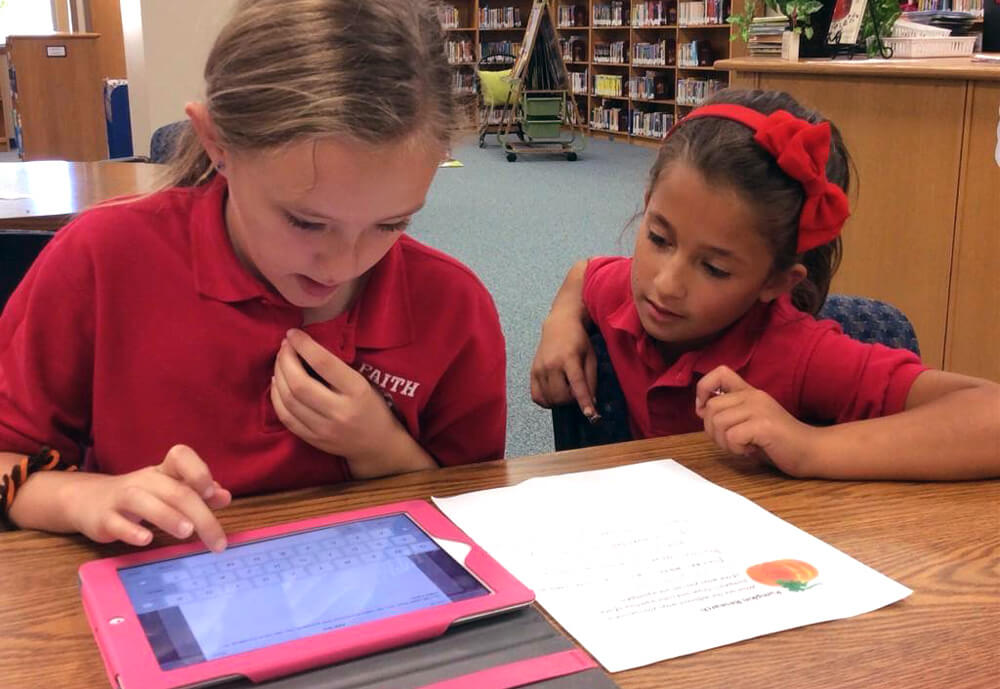
As many of my projects do, this one started small but gradually expanded and kept on expanding into an amazing journey for myself and the students. I am the special education teacher for a combined class of grades 4, 5 and 6 at FH Miller Junior Public School, in Toronto, Ontario. The classroom is designed through the Toronto District School Board's inclusive model, supporting all students in one space. We wanted to make sure that this project addressed the varied skills, interests and different learning styles in our classroom, allowing all students to be successful.
 Working with the class teacher, Chris Nock, we embarked on a creative writing project together. We started by reading some stories and brainstorming ideas as a class on a graphic organizer. We talked through some writing techniques such as plot diagrams, internal dialogue and "show, don't tell". Eventually we decided to use a writing prompt by Debbie Ridpath Ohi, from the Creativity Project book, by Colby Sharp. We have collaborated with Debbie in the past and she has always been generous with her time and a source of inspiration for our students.
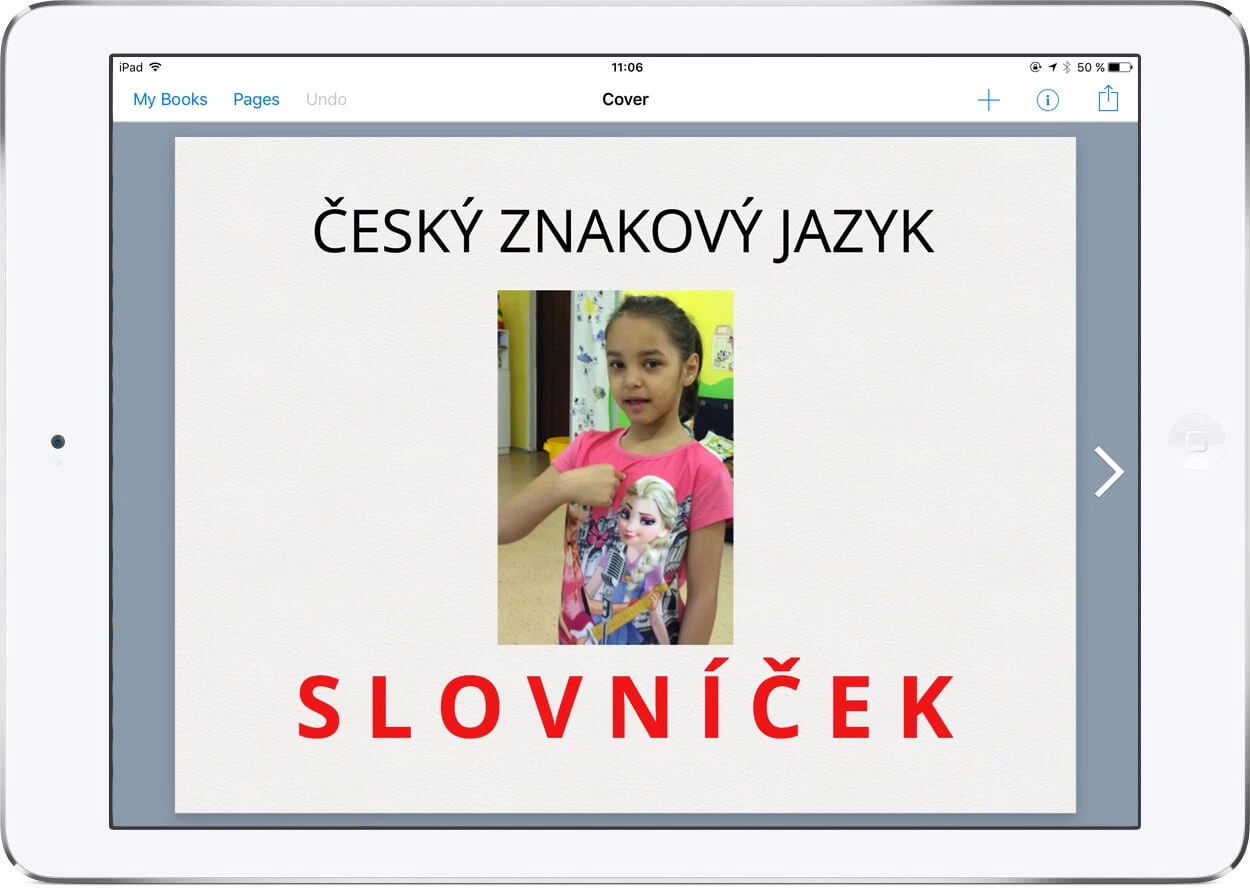
The next step was to draft our stories in Google Docs, then we were ready to move into Book Creator. Some of the students had used Book Creator in the past (during remote learning), but many hadn't. Personally, I've found that I've never needed to do a lot of coaching on using Book Creator, students generally seem to intuitively pick it up.
It was interesting to note that we started this project off in the classroom but had to switch to remote learning a couple of weeks in. It was such a relief to have a project that we knew could easily carry on with from home.
We knew that with such an ambitious project, there was a possibility that not all students would finish their books. We took our time with the creation process so it was unhurried, but having a cut-off point was necessary. Interestingly, no-one felt that they hadn't finished, they were all equally proud of what they had produced. I think it's important to have differentiation of expectation, to meet the needs of the learner. In the finished book, we labeled a section as "Under Construction" which allowed us to include their books too.
Finally, in January 2021, we had finished our books and we arranged a class reading over Zoom. We invited the principals and it was great that the students got to read their books to a wider audience. We thought that would be the big finish to our project - we were wrong!
Two things happened next, first, the author Debbie Ridpath Ohi reached out to me after seeing my tweets about the project, and secondly, Principal Wheeler was so impressed with the project that she insisted we print the books.
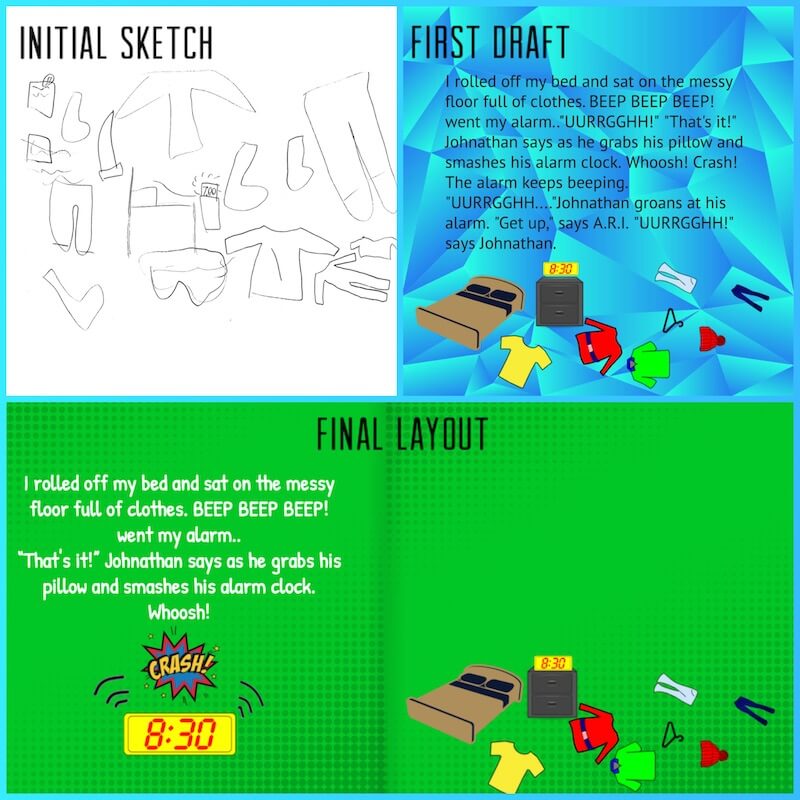
Students loved the process of creating books! They were creative in ways we hadn't expected. I loved seeing how they would use emojis in the book then use the pen tool to enhance the emojis and create their own characters. We had one student who literally dictated the book to me and I typed it. Using Book Creator allowed him to author a sophisticated and imaginative story by removing the obstacle of physically writing or typing the book. He even recorded story ideas as audio notes as we went along.
“I never thought that I would use Book Creator before, but really now it’s become my favourite tool.” —Imi, Grade 4
“It was fun to make a book and have my imagination run wild.” —Gompo, Grade 6
Because we had real-time collaboration enabled, we were able to keep in touch with students and post feedback in their books using "sticky notes" that we added onto their page. This was a great way to stay connected and help students improve their writing. We had a shared library in Book Creator which meant students could read each other's books and get inspiration from each other.
Ideas for leaving feedback in students' books
Flipgrid reflections
We had students use Flipgrid to record their reflections on the book creation process - what they learned, what strategies they employed for writing, and a question for Debbie. We embedded these to the end of their books in Book Creator. You can see the Flipgrid Mixtape here.
How to embed items in Book Creator
What was lovely is that Debbie responded to our students! She gave feedback on their books and answered their questions - reinforcing what they'd been taught ("Yes, professional authors also have to brainstorm with a graphic organizer!"). She told us that she reads her writing out loud to catch mistakes, does many revisions to her writing and sometimes spends a whole year working on one book. It was incredibly empowering for the students to have someone validate their work in this way.
Gr 6 Gompo created a visually captivating story based on @inkyelbows prompt (Creativity project by @colbysharp) He combined words, images, & sound effects to create a mysterious mood. He reflected on his story & shared w/ author Debbie Ohi w/ @Flipgrid 🎙 Sound On @BookCreatorApp pic.twitter.com/stkbGC5WqY
— Mira Campbell (@CampbellMira) February 19, 2021
For more information about author Debbie Ridpath Ohi's Virtual Visits, go to debbieohi.com/events/visits-virtual.
The printing process
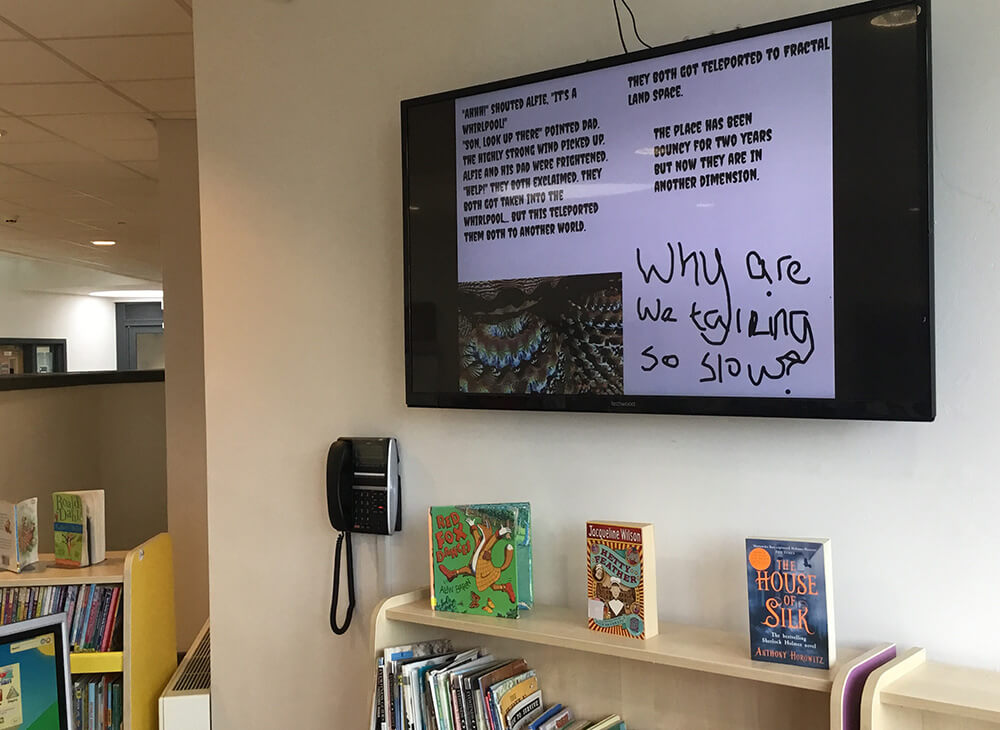
Our students love seeing their digital Book Creator books printed and available to read in our FH Miller Library. In fact, we have been printing them for many years.
“I didn’t think I would get my own book in my hand like get to feel an actual book. I thought it would just be online. I never had my own book made and I could hold it and just read it.” —Allan, Grade 6
“When our books were published and printed, it was like a dream!” —Tiago, Grade 4
Here are my top tips for printing from Book Creator:
- We almost always use the square comic book shape in Book Creator for our books. I like to use the square 8x8 shape because it is a standard size option for many printing companies.
- For this project, we chose softcover books to keep the cost down (and also took advantage of a promotional offer from the printing company).
- Make sure your students all choose the same book shape if you plan to combine into one collaborative class book.
- Before you start the project, tell your students that they need to keep images and text away from the edges of the book so they won’t get cut off when you print. You may still need to do some small adjustments at the end of the project, but it will be much less work.
- The class book was very large. I used shortcuts in Adobe Photoshop to speed up the process of cropping photos. I also numbered the saved photos in the order in which they needed to appear in the photo book.
- I usually save all my photos on the desktop in a folder to make them easy to find when uploading to the online printing website.
Here are the actual steps I took to prepare our books for printing:
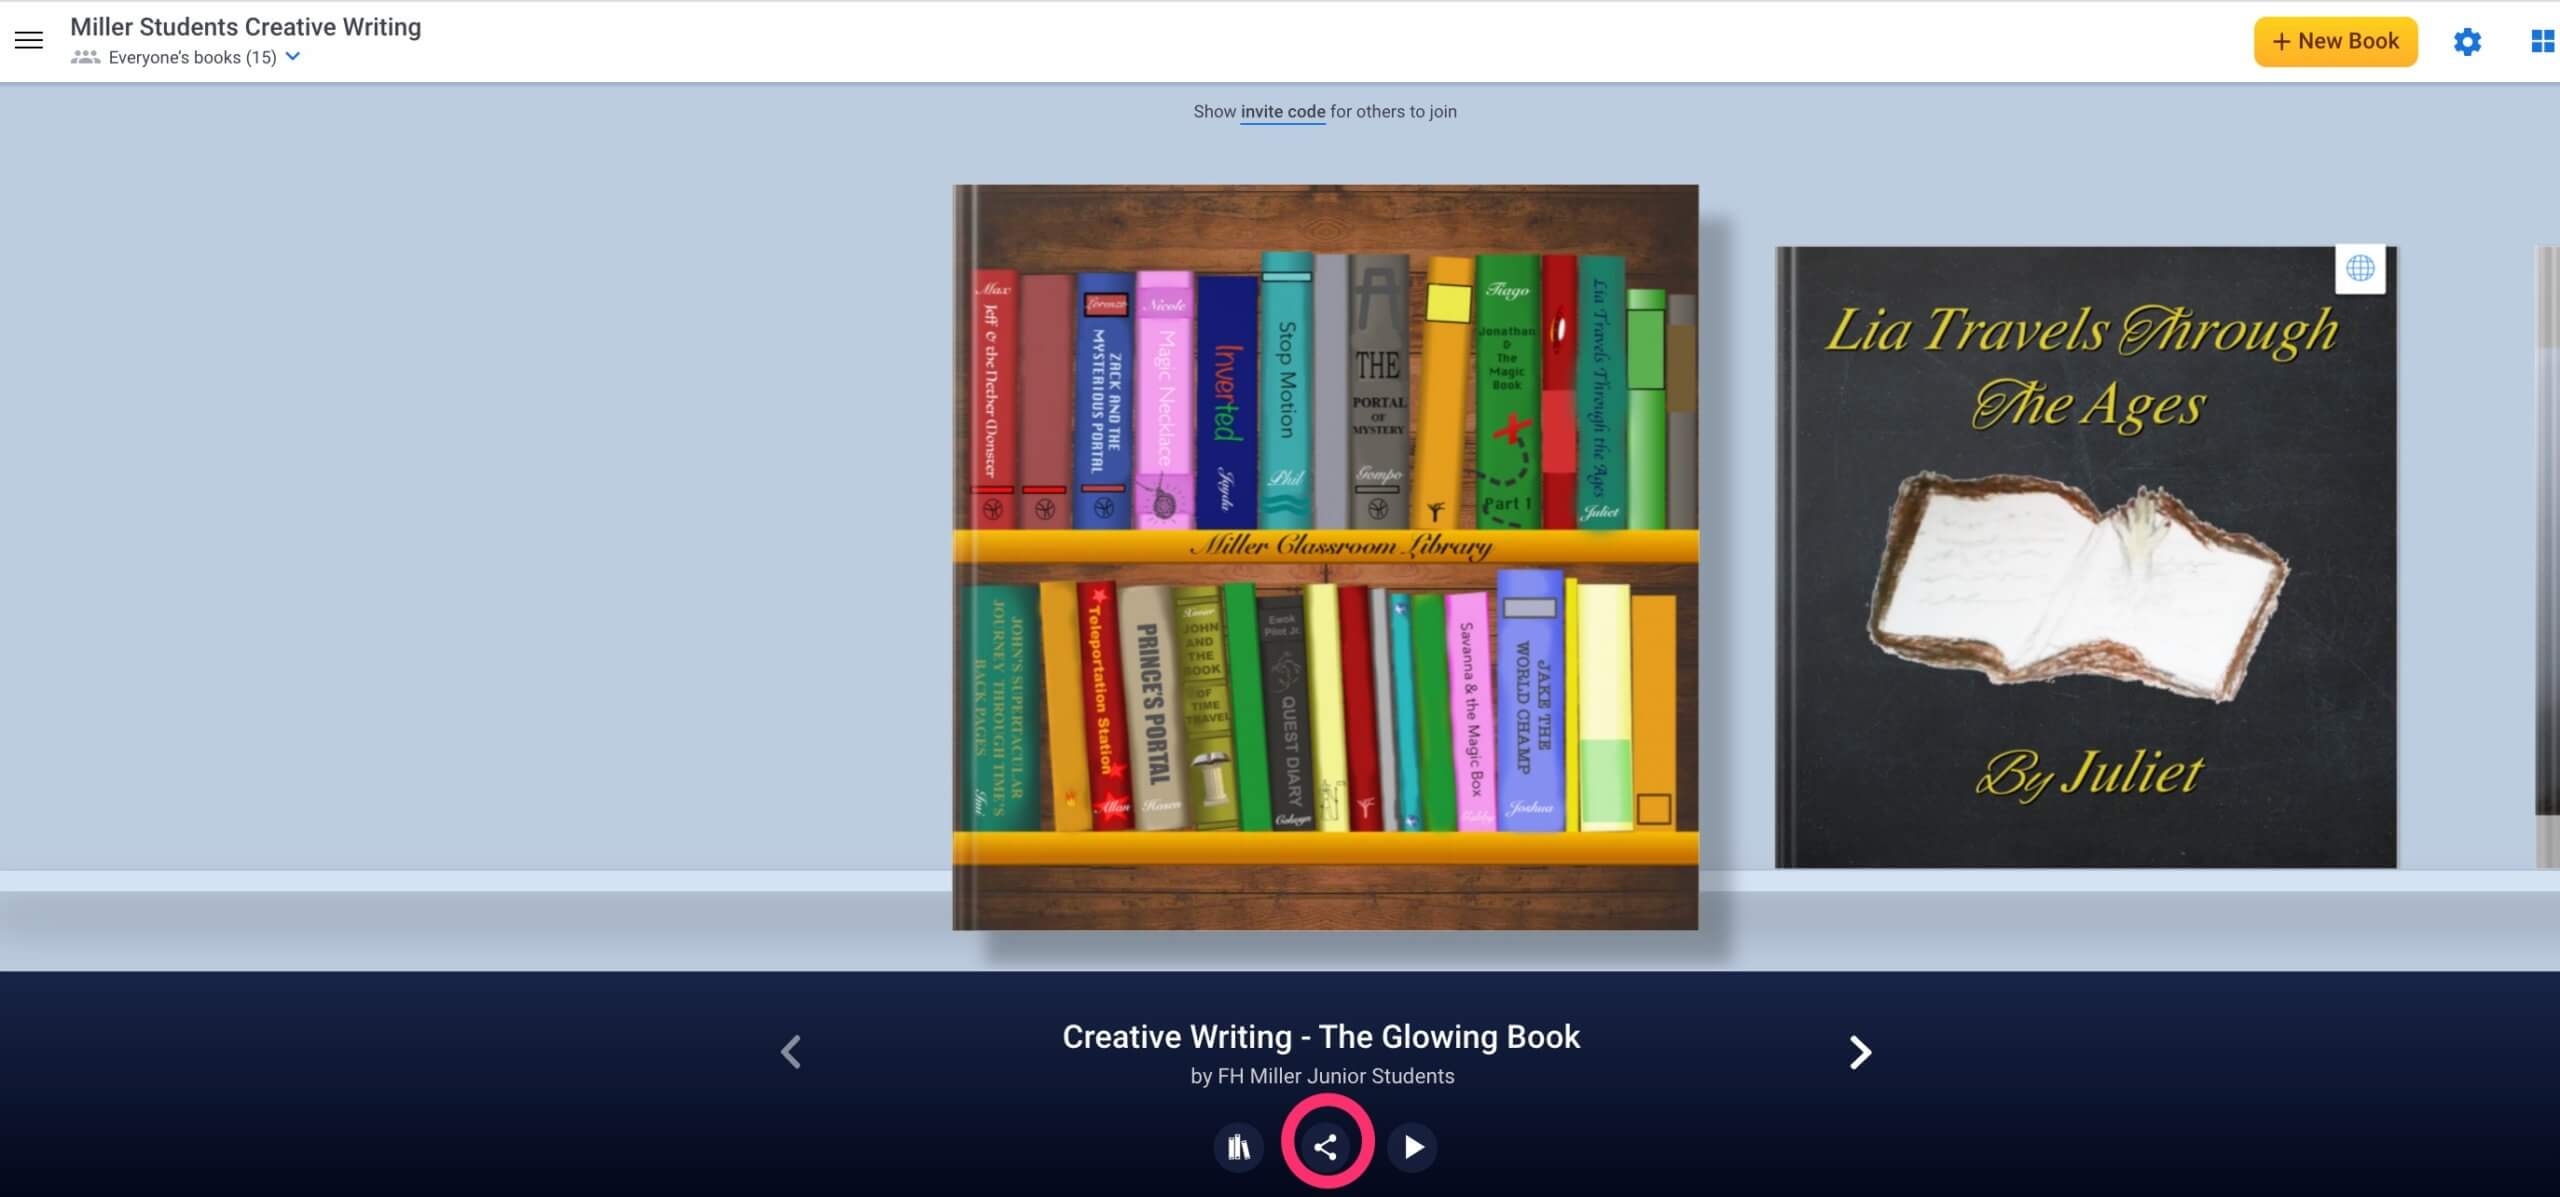
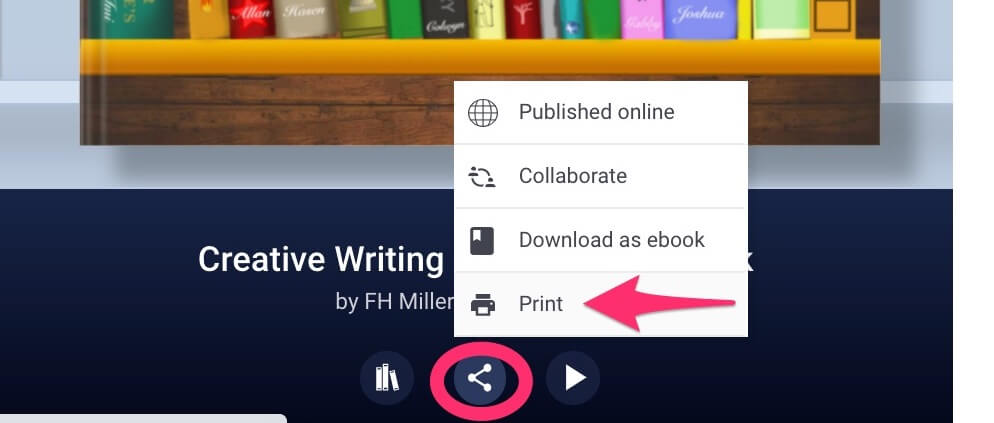
Step 1: From your library in Book Creator, click on the Share icon beneath your book.
Step 2: Choose Print. This will download a PDF version of your book (note, it might take a minute or two depending on the size of the book).
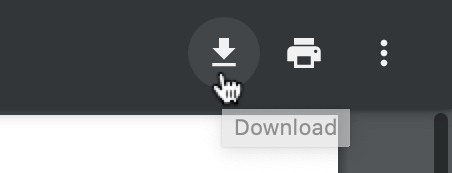 Step 3: The PDF will open in your browser. You need to download the PDF to save it to your computer. The download icon will be somewhere on the screen, but that will differ depending on what browser you're using.
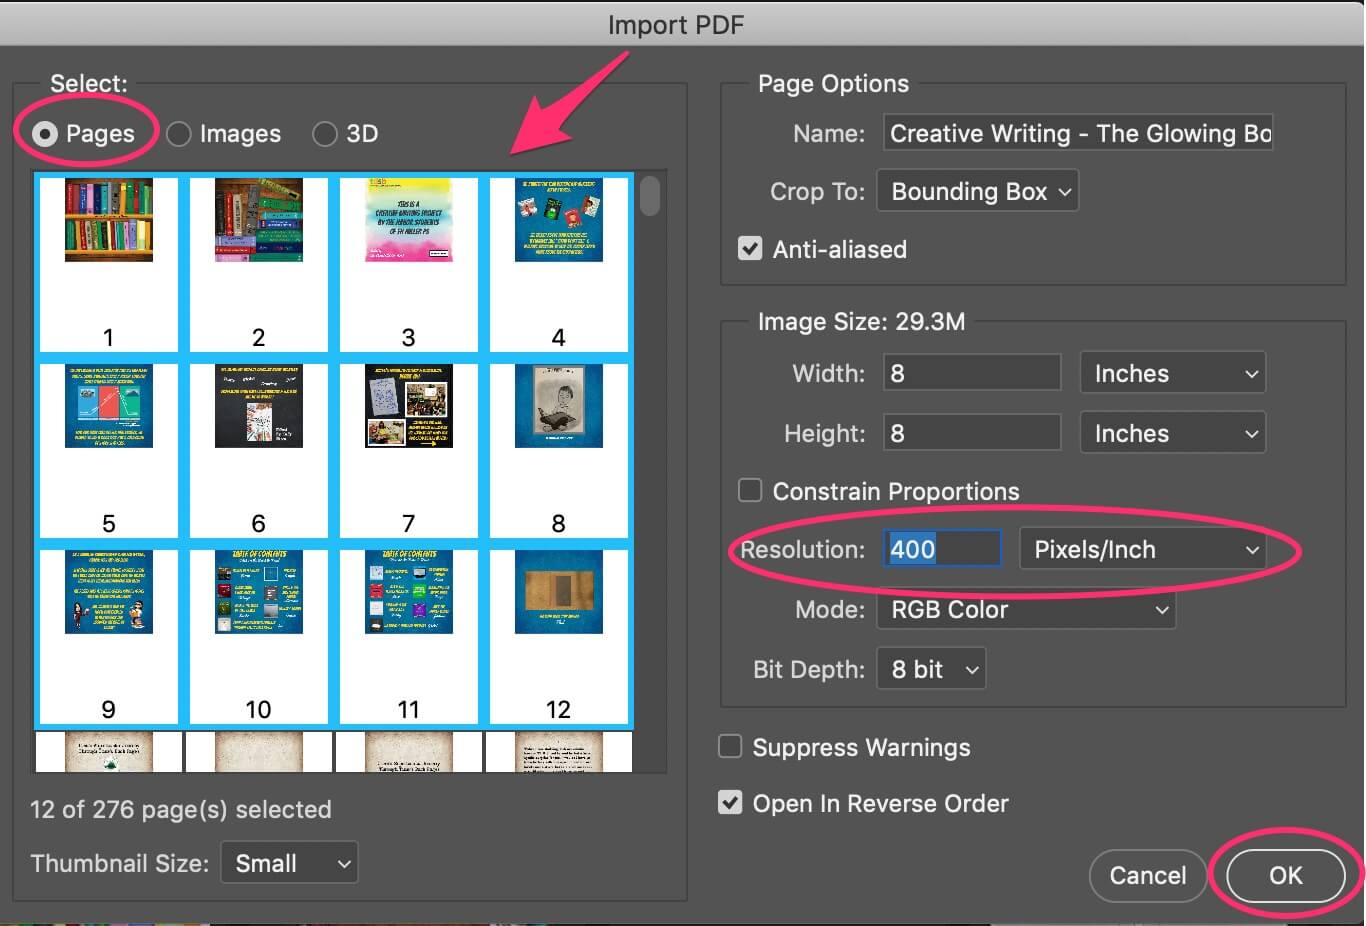
Step 4: Import the PDF file into Adobe Photoshop. I have a Creative Cloud subscription to Adobe, which I realise not everyone will have. The important thing is that you have an app that can convert and display the PDF pages as images. I originally tried taking screenshots of the pages in Book Creator but the resolution wasn't good enough that way. If you don't have Photoshop, you could try another product such as Affinity Photo, or Adobe even have a free online PDF to JPEG conversion tool you could try.
 If you are using Photoshop:
- Make sure to import the whole page and not individual images
- The resolution should be 400 Pixels/Inch which will result in high quality printing
- You can select one image at a time or select all at once
- Hit OK
Step 5: Crop each page. For this, I automated the process using File > Automate > Crop and Straighten Photos
Step 6: Save each page as a JPEG image
- Click File > Save or Command+S (Mac Shortcut)
- Change the Format to jpeg
- Before saving - name the file (Title, Page 1,…) which will make it easier to order pages when uploading in the photo printing website
- Click Save and OK
- Click File > Close File or Command+W (Mac Shortcut)
- Repeat these steps for each page of your book!
Step 7: Uploading your images to an online printing company
As we're based in Toronto, we used a local printing company called Pikto. They did an excellent job and were reasonably priced. Our average cost per book was $18.00 CAD, (including tax and shipping). On average, our books had 21 pages so your cost would differ depending on how long the books were. In the US you might try shutterfly.com or lulu.com for online printing.
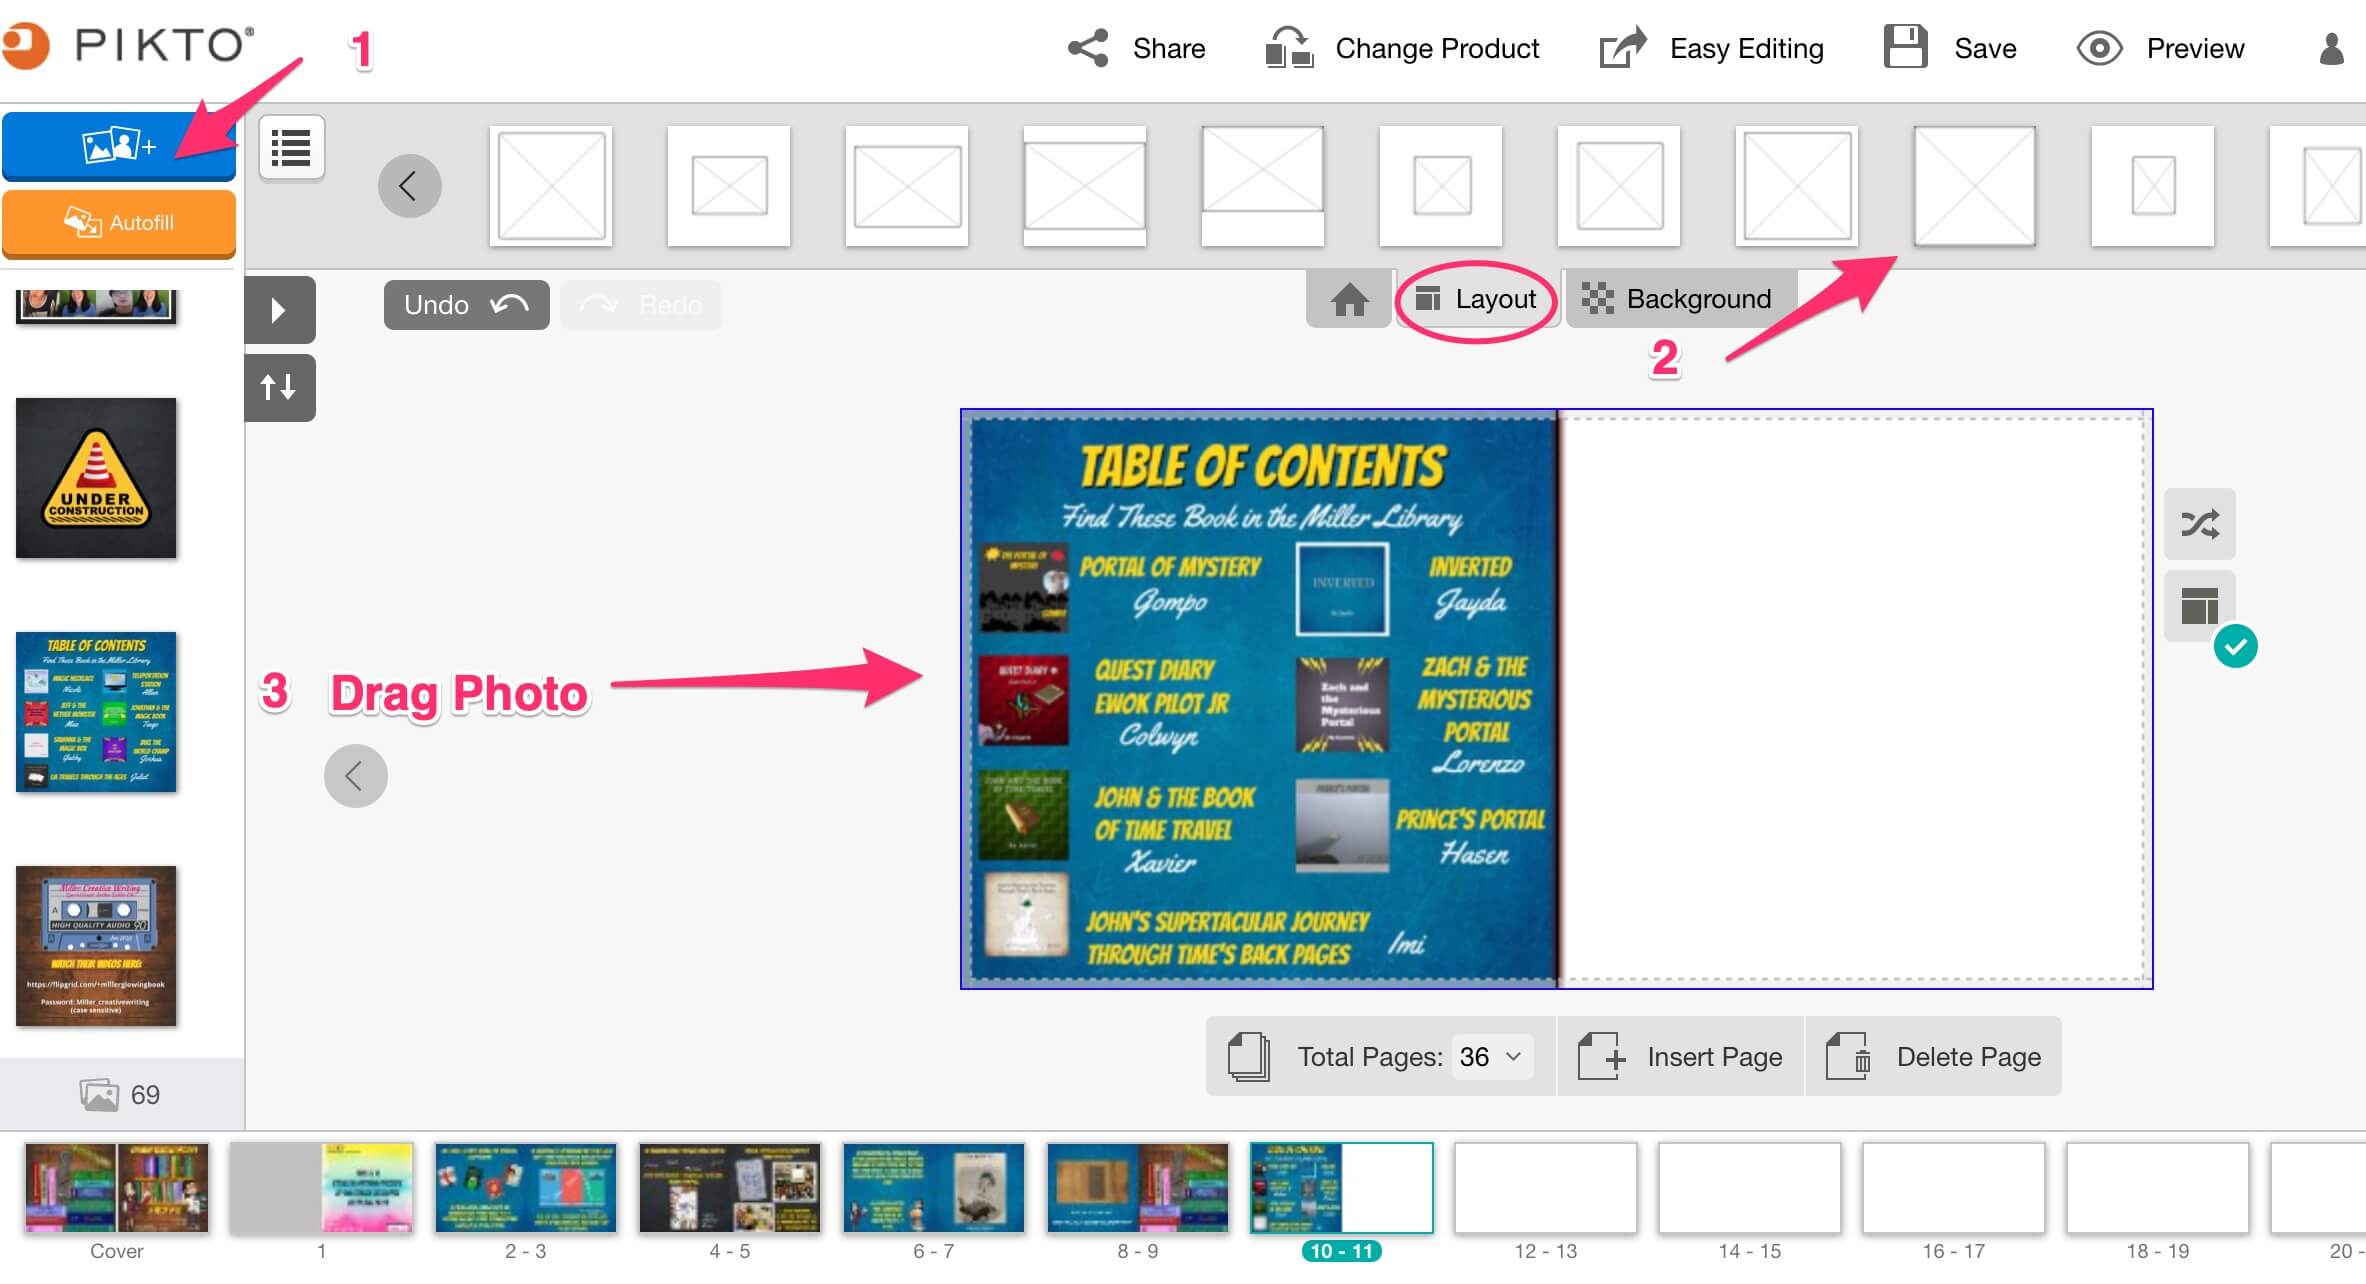
The Pikto uploading interface
Grand finale - the big reveal
So after making the decision to print the books, the grand finale to the project came when we were able to present the printed books to each student, in person. Watch the video below to see how it went! (Be prepared for goosebumps).
I'm in awe of educators like @CampbellMira, who continue to find creative ways to engage & support students. See thread below for more info + see my video giving closer glimpse at what she brought me on the wknd: https://t.co/jK62T6fO3F https://t.co/b2CsIoL9zK
— Debbie Ridpath Ohi (@inkyelbows) March 15, 2021
Mira Campbell has 18 years of experience as a Teacher-Librarian and Special Education Teacher with the Toronto District School Board (TDSB). She was part of their Digital Lead Learner program for 8 years and is a Book Creator Ambassador. She enjoys collaborating with teachers during Library Partnership projects and loves to celebrate students’ hard work with big reveals!
Related posts
-
 18 December, 2013
 -
 27 January, 2016
 -
 13 January, 2017
 -
 25 September, 2017
 -
 19 December, 2018
 -
 17 January, 2018
 -
 3 November, 2015
 -
 24 April, 2018
One Comment on “Is this the perfect Book Creator project?”
Mira is one in a million, she is inspiring to all who work with her and to all the students she has worked with. Together with Mr. Nock (Chris), you couldn’t wish for a better team to move the student to this high level of learning. Every day that I worked with these students and teachers reminded me of the importance of our role and how much of an impact great teachers can have on our students. I am so proud to have shared this journey with them and I can’t wait to see what will come next!