

Mira Campbell is back with another innovative project idea to help students apply the social emotional skills they had learned throughout the year in a fun hands-on way!
 Co-author: Anna-May King is a Primary Teacher at F. H. Miller. This will be her 3rd year at F.H. Miller. Prior to that, she spent some time teaching at the Canadian International School in Vietnam. She is an experienced teacher of 13 years with the TDSB. Her mission is to instill a love for learning (specifically reading and writing) in her students.
The past few years have been difficult for many students. The uncertainty and sudden changes to their routines left many feeling unsettled or even anxious. We know that social-emotional learning (SEL) is connected to academic achievement as well as social, behavioural and emotional wellness. Furthermore, it helps students to develop skills they need to be successful throughout their life. (School Mental Health Ontario)
💡 Teacher tip: School Mental Health Ontario has a range of Mental Health Literacy Resources including elementary lesson plans that can be applied to any classroom.
After remote learning, many teachers noticed a dramatic increase in the need to explicitly teach positive ways for students to express and manage their emotions. One of these teachers was Anna-May King, a Grade 1 classroom teacher and my colleague, who came to me to brainstorm our next library partnership project. She has been working on calming strategies in her classroom and wanted a way to reinforce them while also creating a special keepsake for students to take with them to use in the future.
The idea behind the project
I had recently attended a workshop with Teacher-Librarian (TL) Tina Zita (Peel District School Board) who often incorporates flat lay photography into her teaching.
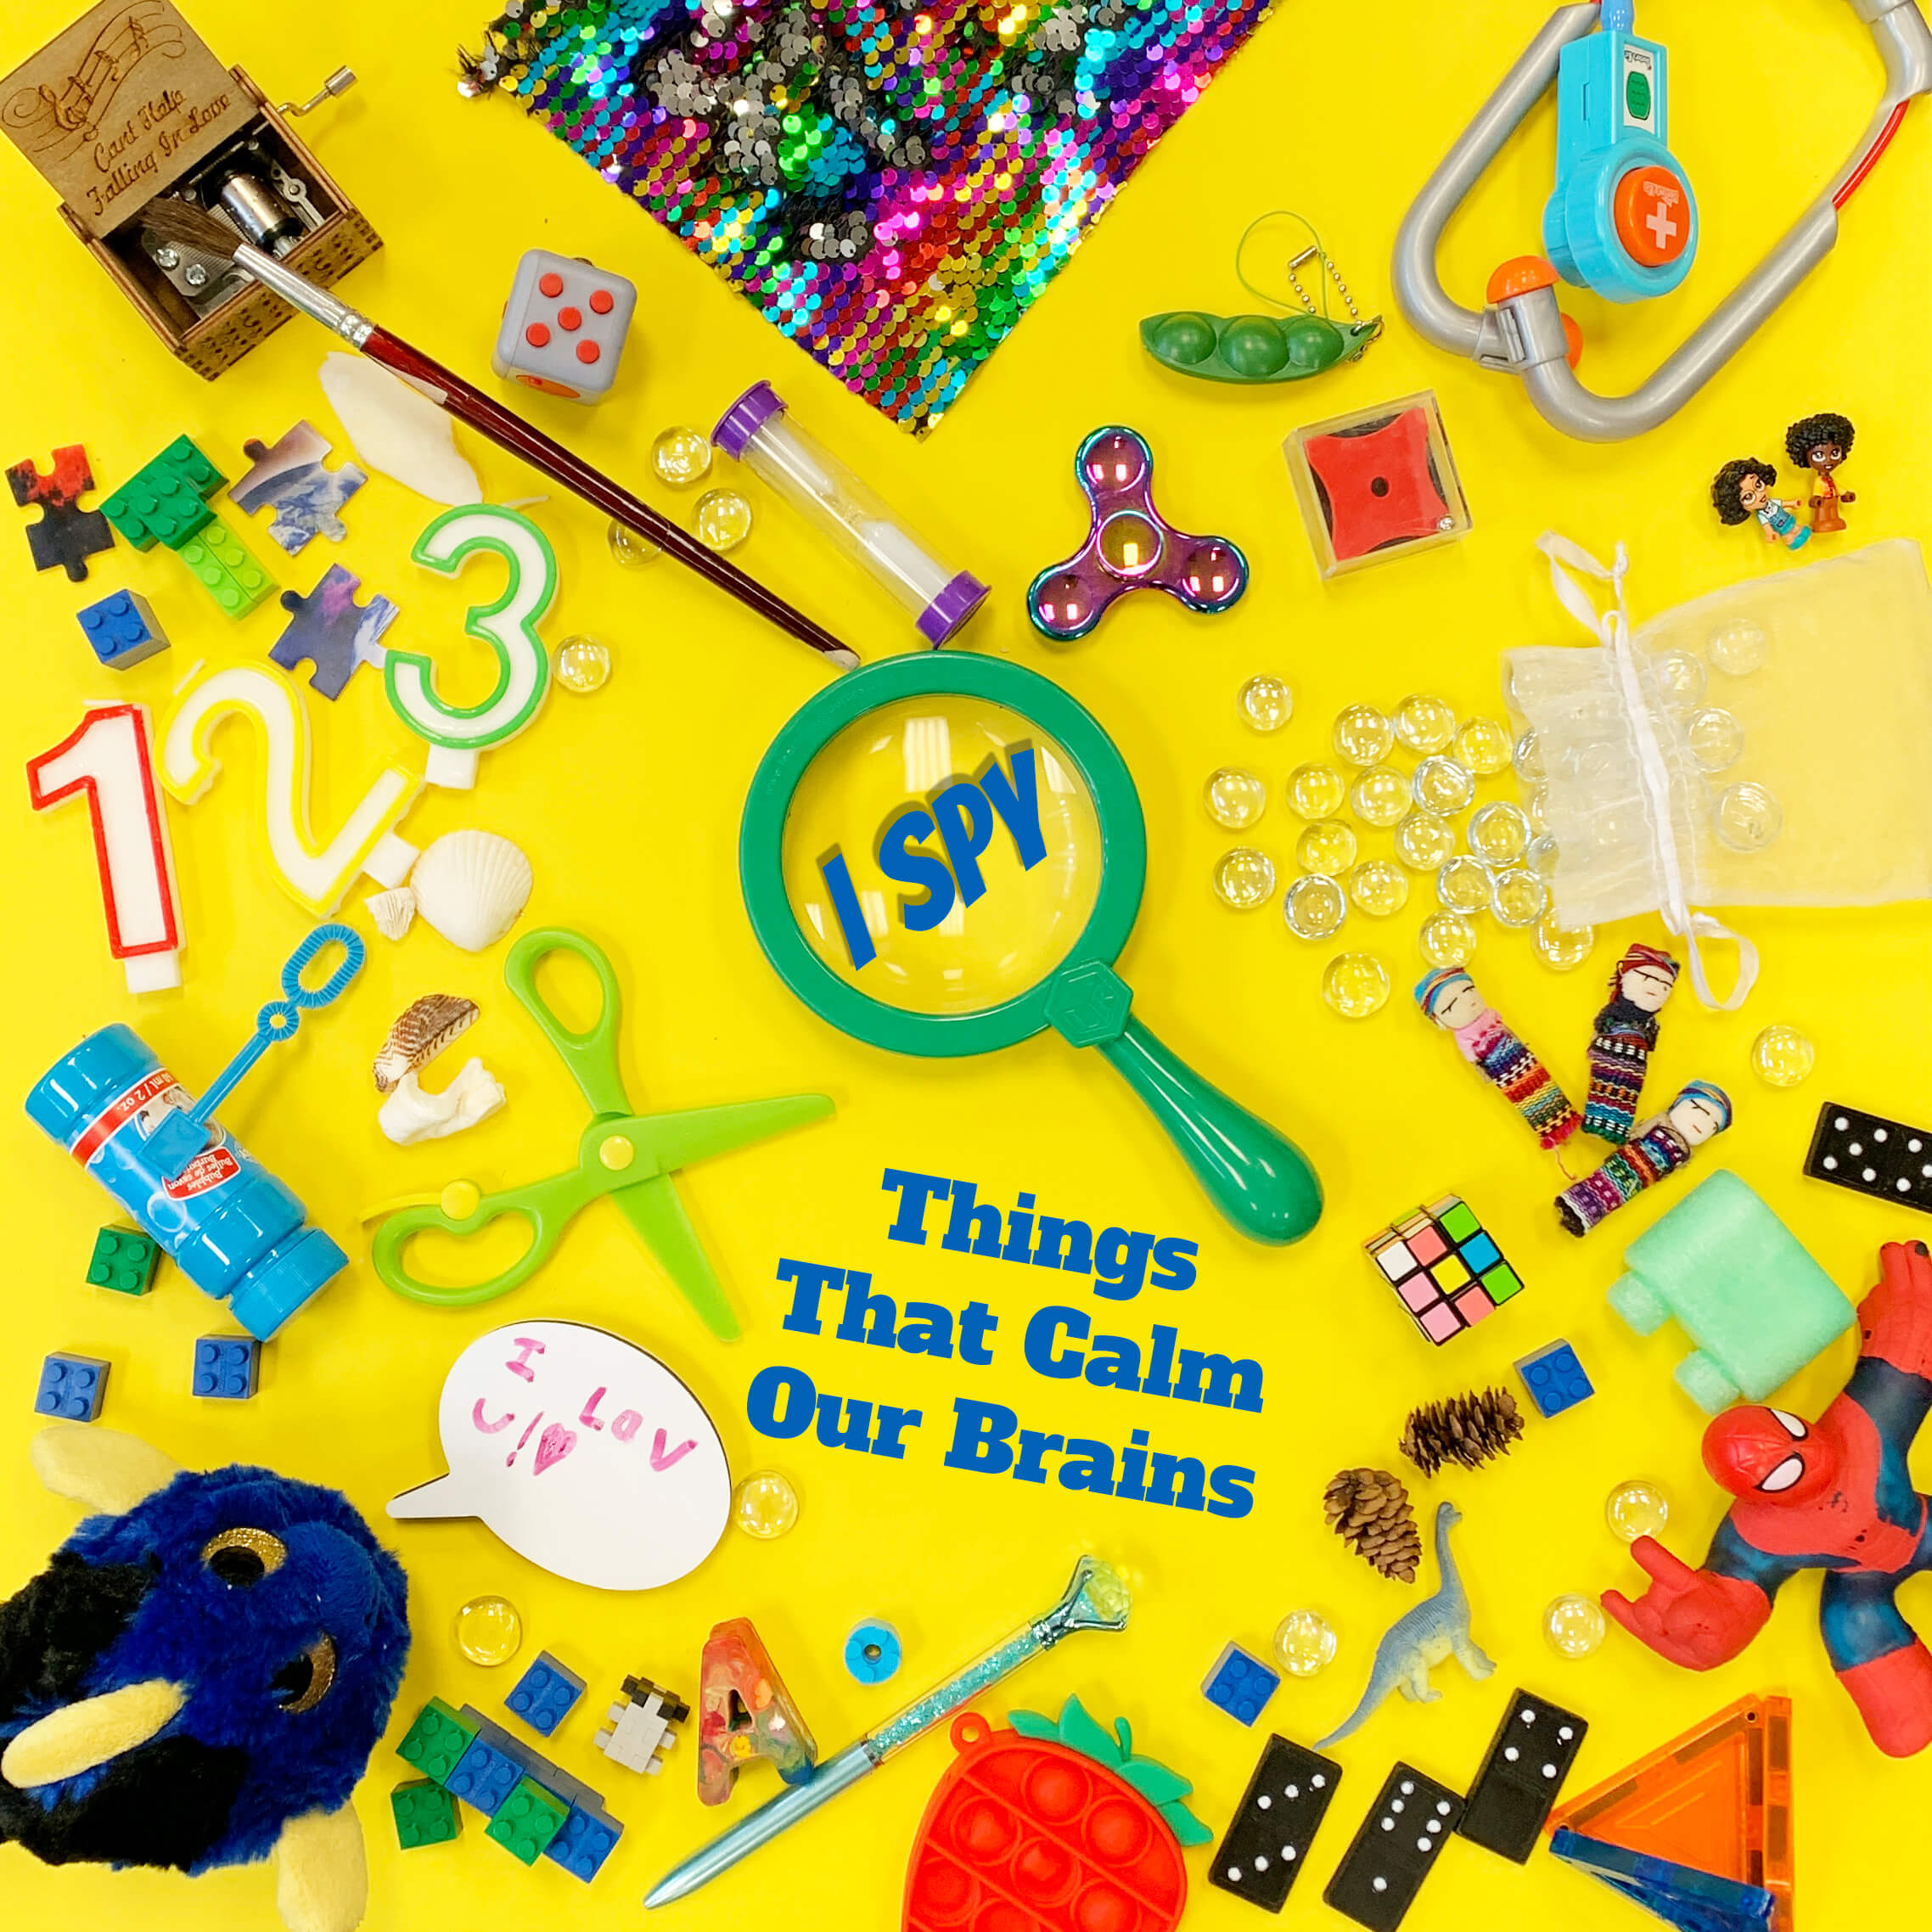
Anna-May and I decided this would be a perfect fit for our mindfulness project. We also knew that her Grade 1 students were huge fans of Water Wick’s I Spy book series which gave us an idea. We decided to combine these activities and make an “I Spy Ways to Calm Our Brains” class book that would be composed of flat lay photographs of the student’s objects accompanied by a riddle. To say this was an ambitious project for Grade 1s is an understatement!
Before we dive in, here is some background information on her Grade 1 elementary class in Toronto. There were 20 students from diverse backgrounds with different lived experiences. We wanted to honour their strengths and interests (e.g., hands-on activities and sharing their feelings), while also being inclusive of all the students’ different learning needs (e.g., autism, English Language Learner, ADHD, speech language delays and behaviour).
Over the school year, Anna-May King had created a nurturing and inclusive classroom where they felt safe to share. One of their favourite areas was the calming station, a cozy corner in the class equipped with objects and materials that promote mindfulness and reflection. 💭
Here is Grade 1 student Matthew to explain further:
As the end of the year approached, we wanted a project where the students could apply the social emotional skills they had learned in a fun hands-on way!
Together we planned this project, creating flat lay photos (steps outlined below). We did this with the needs of our learners in mind, providing different options to express their ideas through objects, photographs, video and/or audio recording so that all students would be successful.
As you will read, it was a multifaceted learning task that challenged our students in many ways. We especially loved how each flat lay photograph is unique to the individual student.
Part 1: Creating the flat lays
Step 1
Our Inspiration: YouTube video by TL Tina Zita
We introduced the concept of flat lay* photographs to the Grade 1 students. We told them we wanted them to each create a flat lay photo of items that calm their brains.
* A flat lay is simply an image shot direct from above (bird's eye view) of carefully arranged objects.
Students had previously created a list of ways to calm their brains in their homeroom class. As a group in the library, we brainstormed a list of tangible items that students could bring in to represent these ideas.
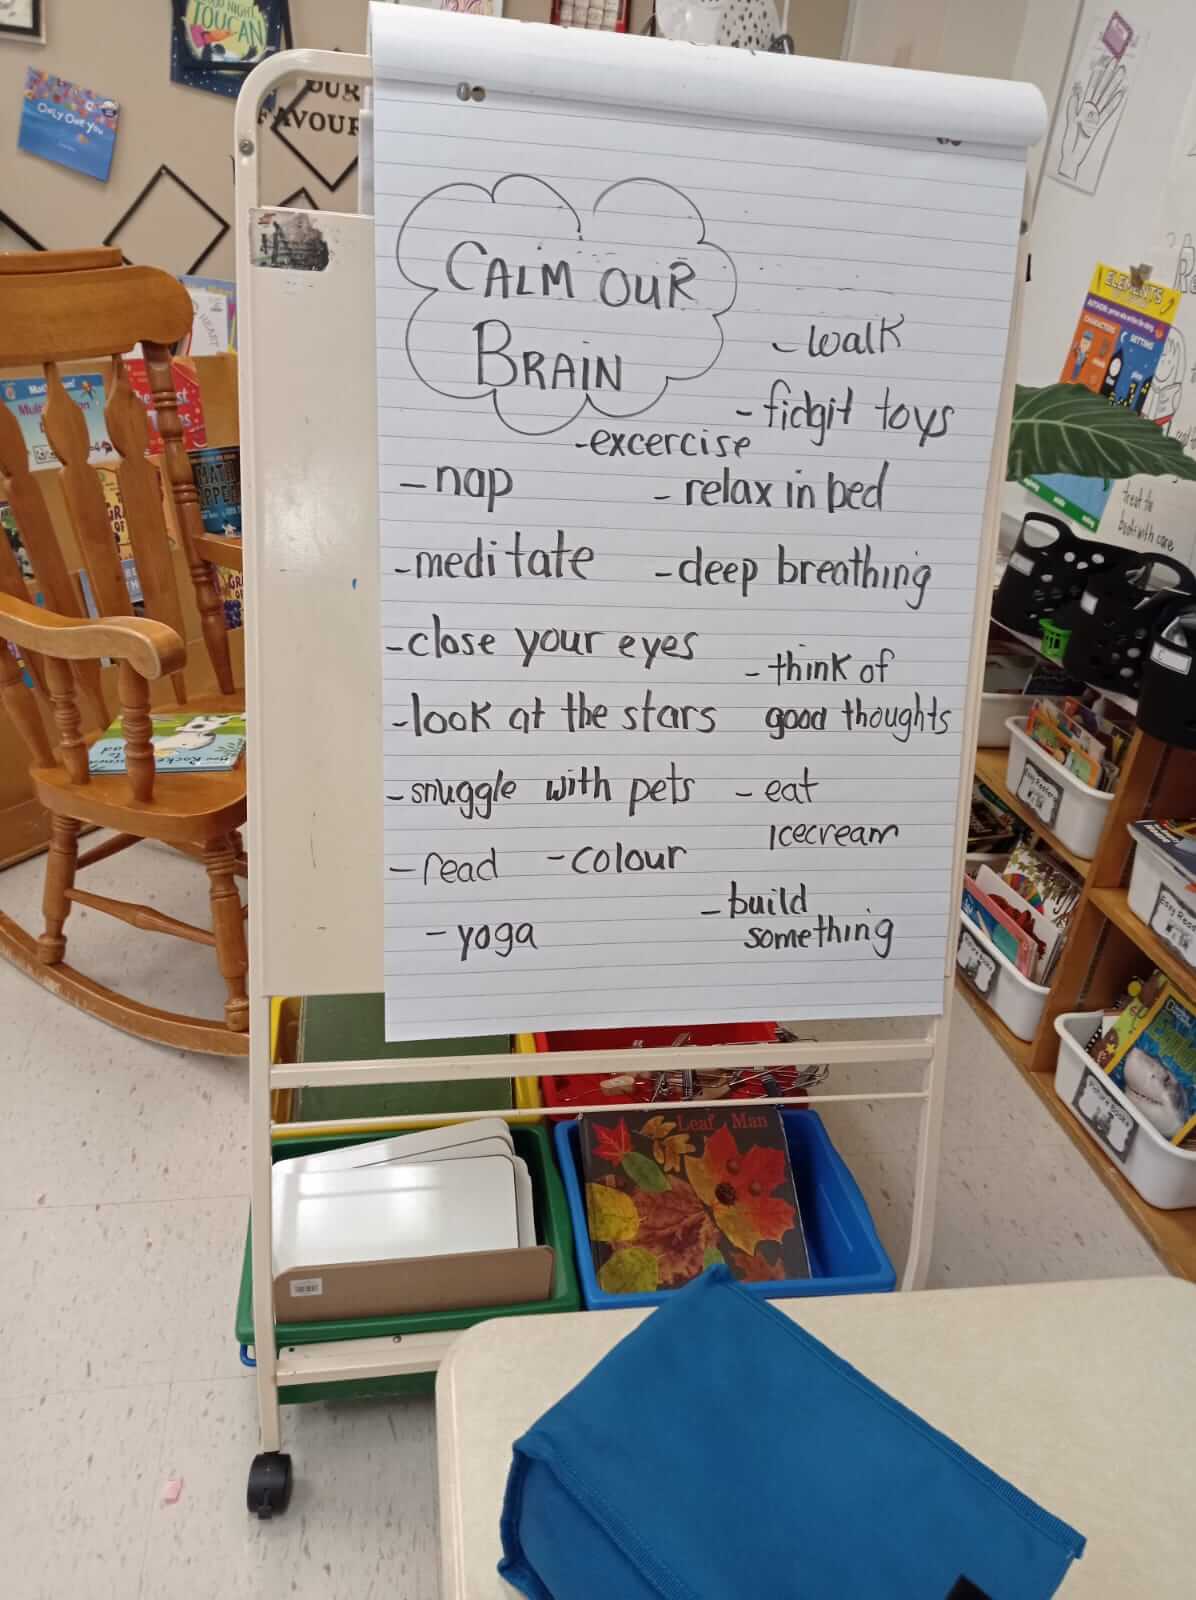
Anchor chart of a classroom discussion on ways to calm the brain completed prior to the start of the project
Step 2
We introduced the project right before March break so our students would have the week to look for items at home. We sent a letter to parents about the project and gave them an empty ziplock bag to fill with objects that helped to calm their brains when they are sad, mad or feeling frustrated.
They were encouraged to choose a variety of small objects as well as multiples of the same object. This was also a great way to involve our parent community in the project.
We knew that students might not bring enough items, so we also had a bin of items in the library that they could use.
Some students had meaningful items they wanted to include that were too large. We photographed those objects on our green screen so we could easily remove the background and digitally shrink them to add to their flay lay photograph. I never pass up an opportunity to use our green screen! 💚
Step 3
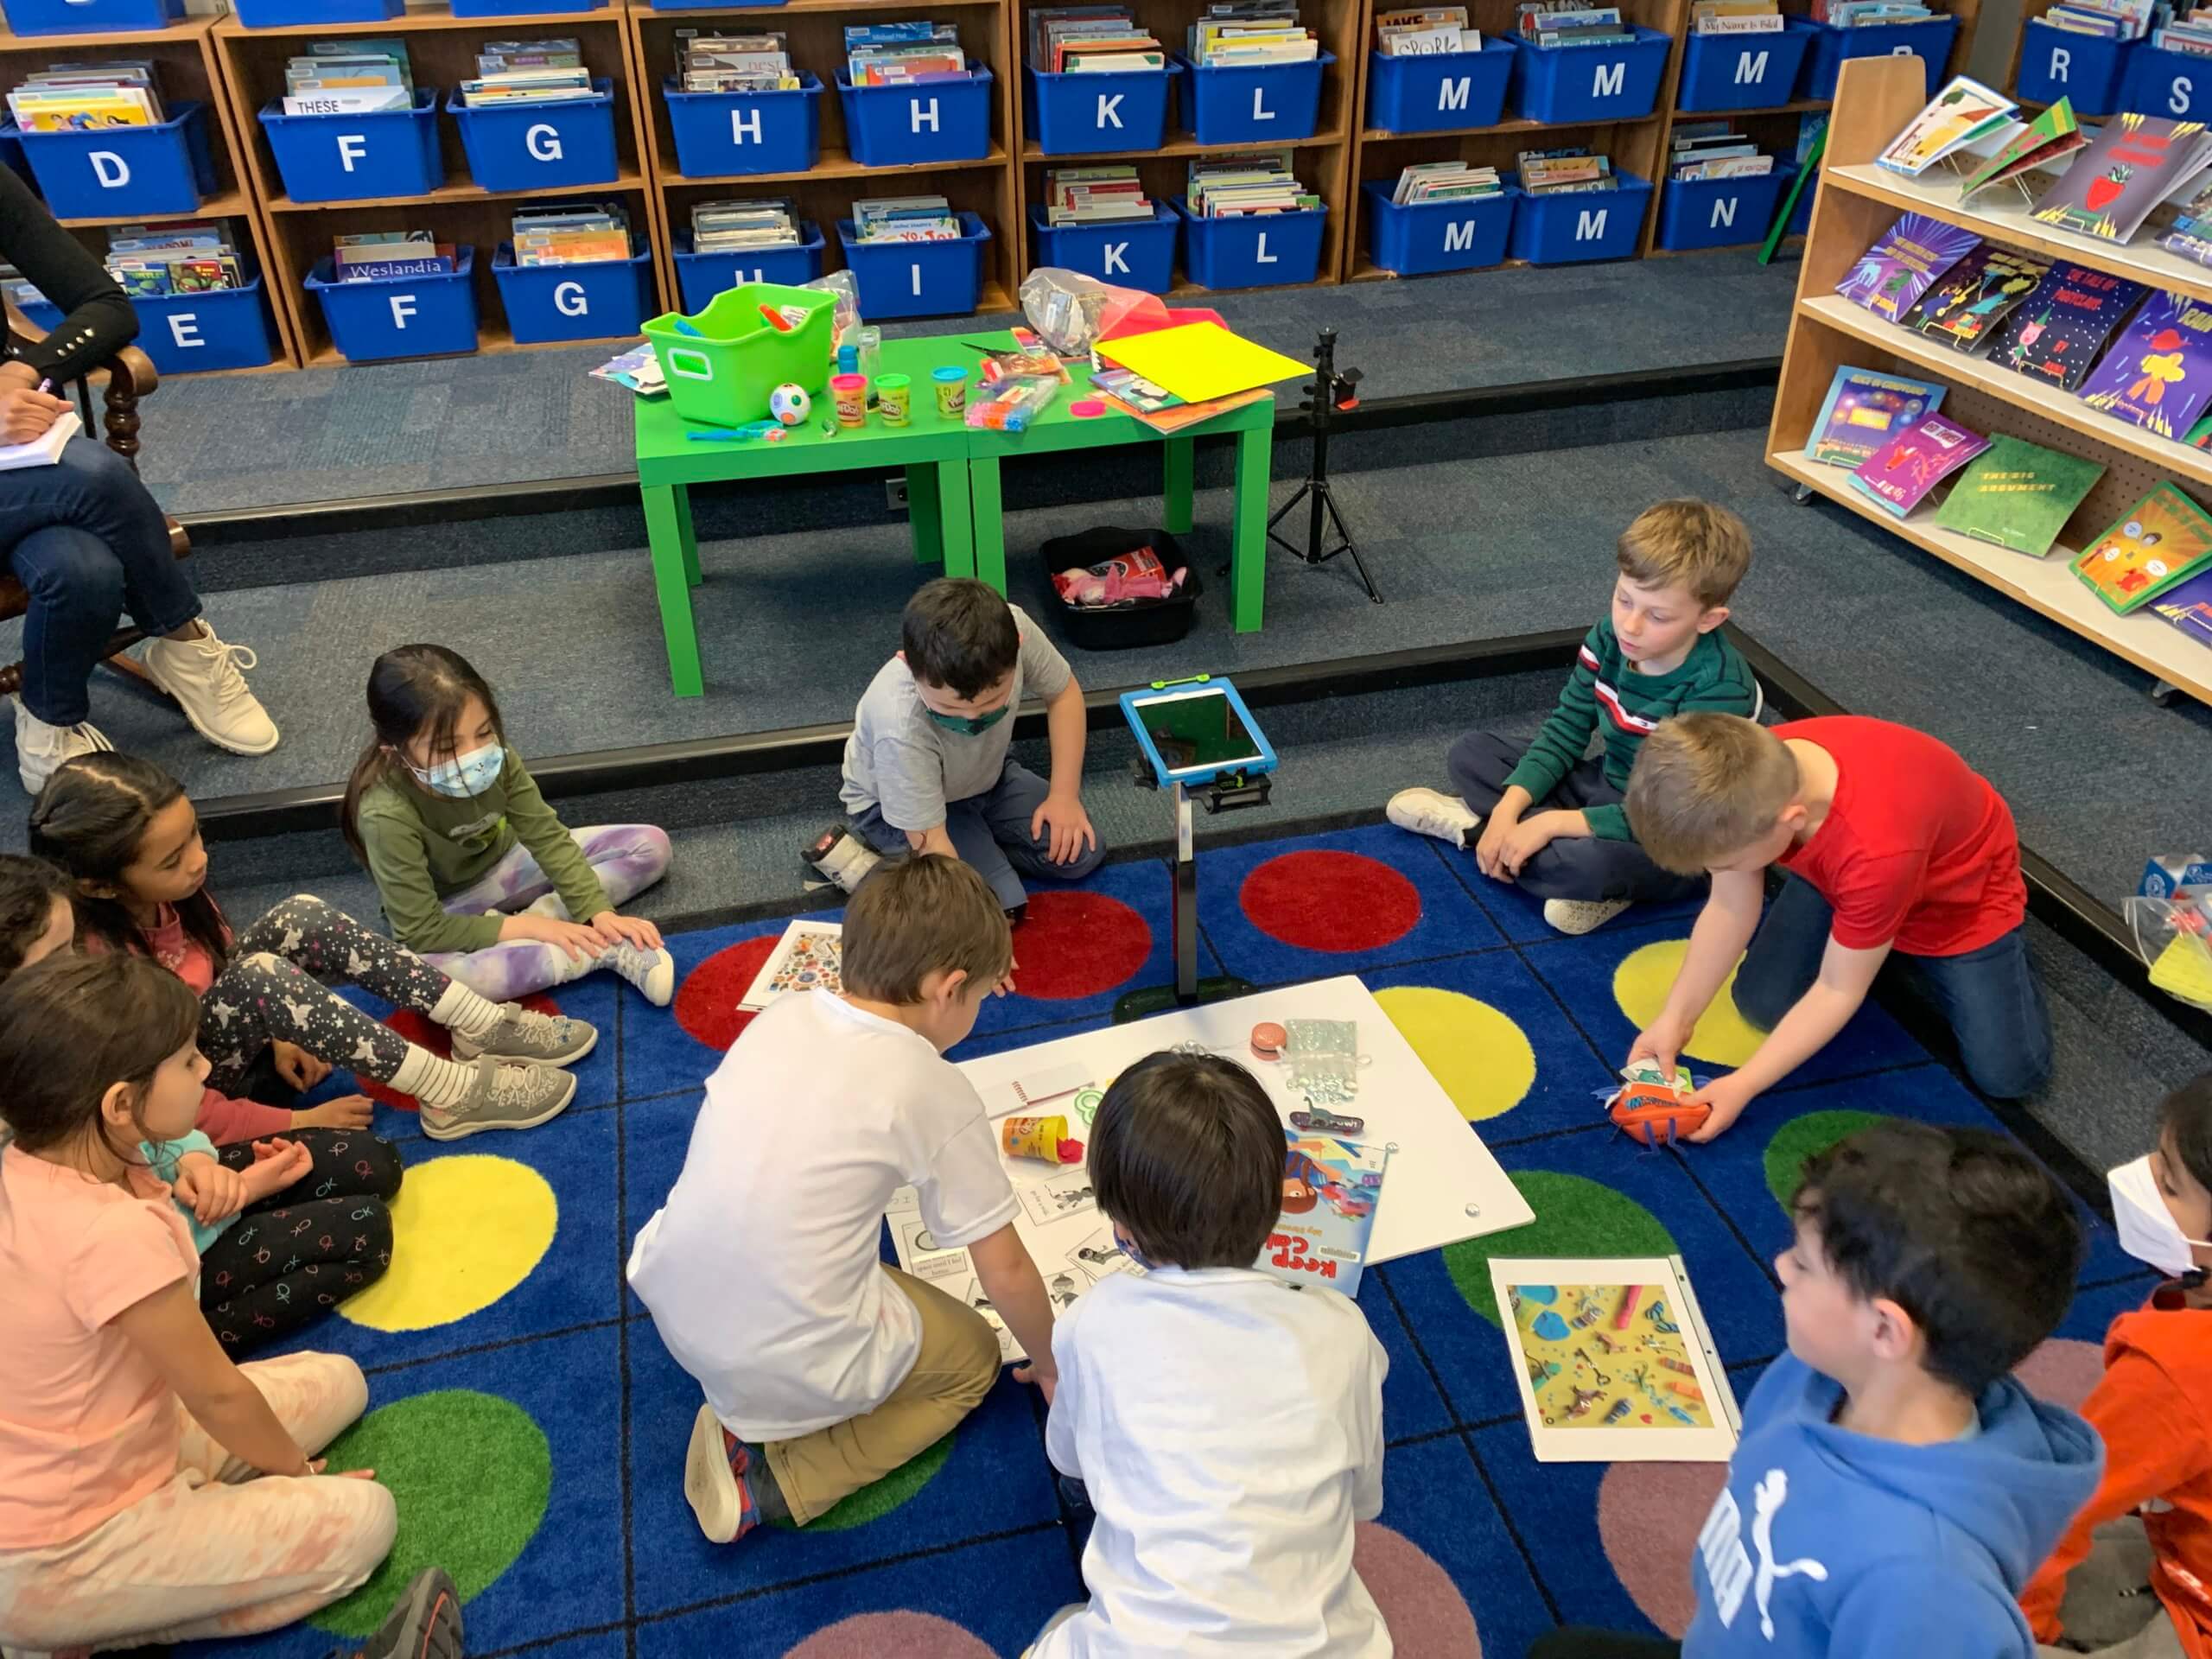
As a class we sat in a circle and created a large board together. We took the flat lay photograph and displayed it on the SMART board.
Next, we discussed what worked and what didn't. The white background colour fell flat and we decided to swap it for an array of brightly coloured bristol boards students used for their individual flat lays. We also noticed we needed smaller items to achieve a balanced look.
On the first day, we had some eager students who had already brought in their ziplock bags of items. They shared items with the class and told us why they chose them. This really helped give the other students ideas.
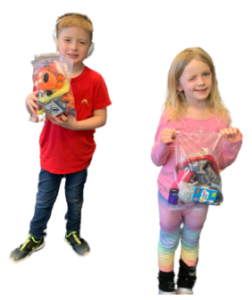
Ben and Amelia with ziplock bag of items for flat lay project
🔊 Check out their audio clip here
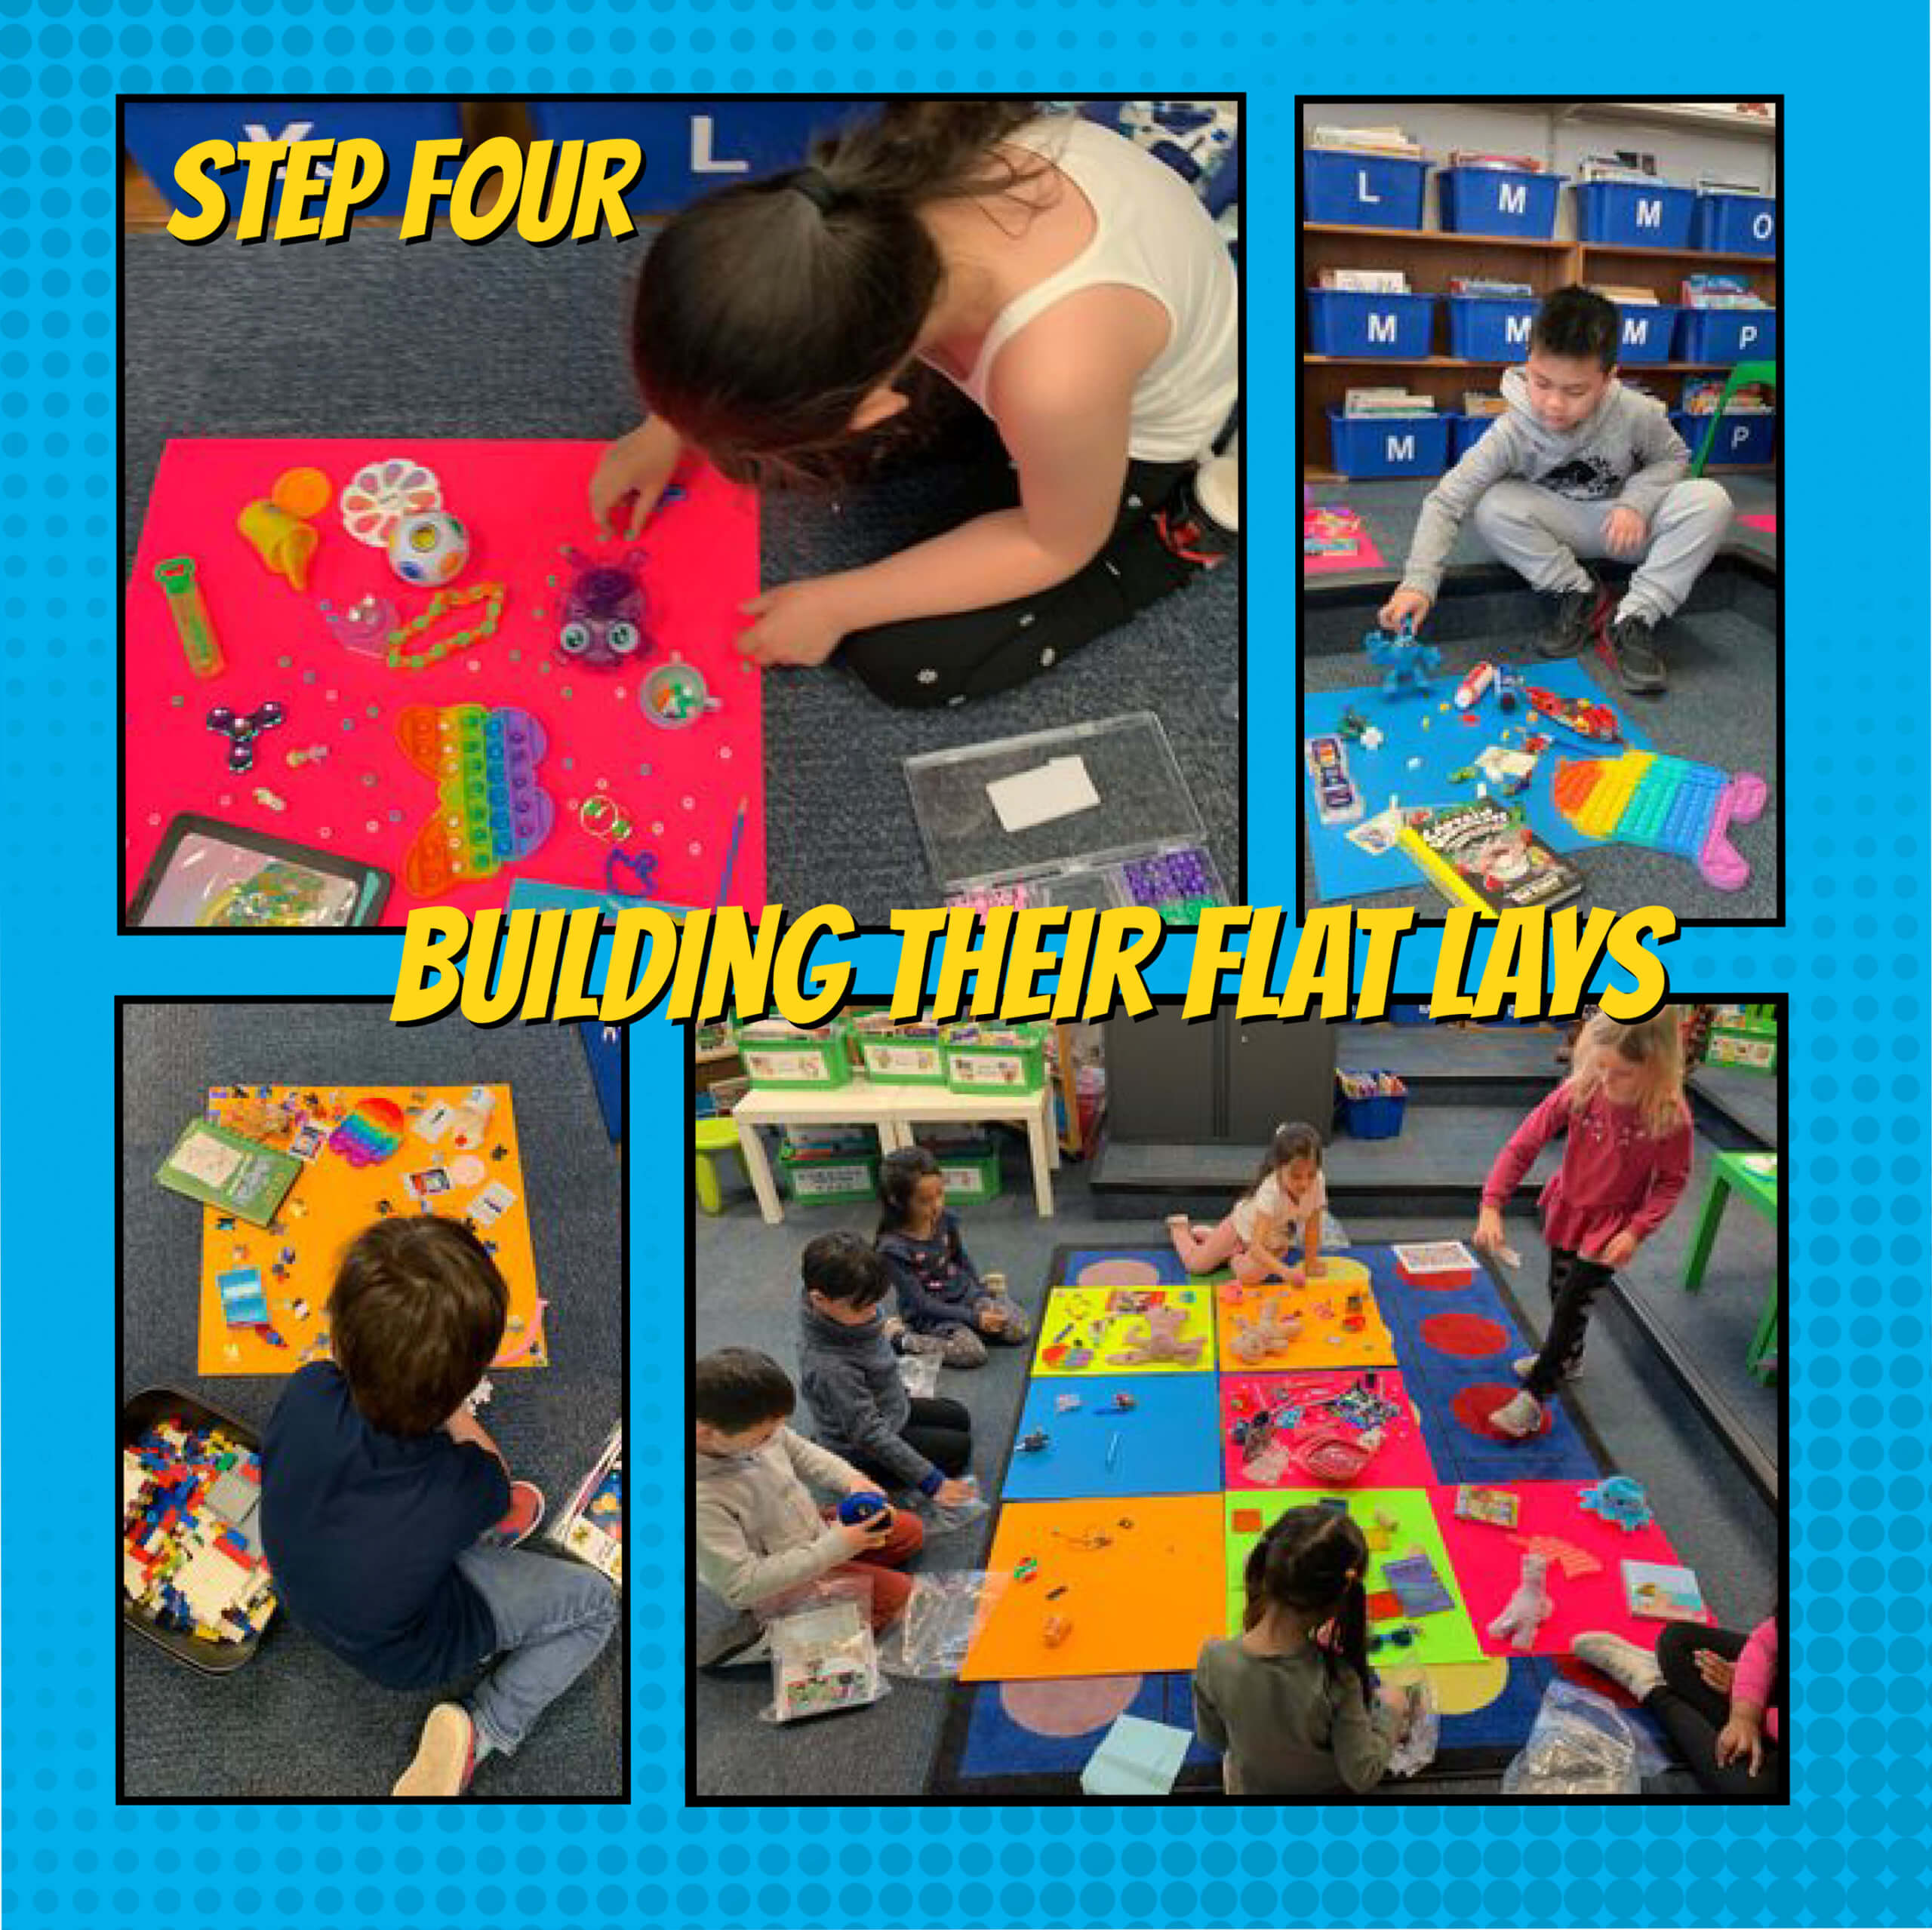
Step 4
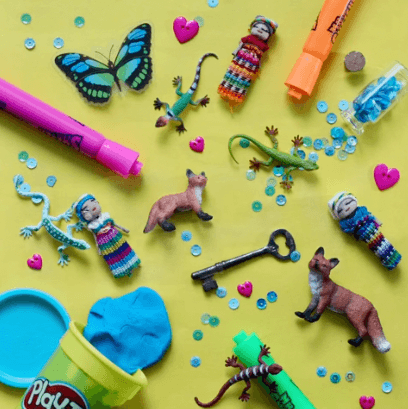
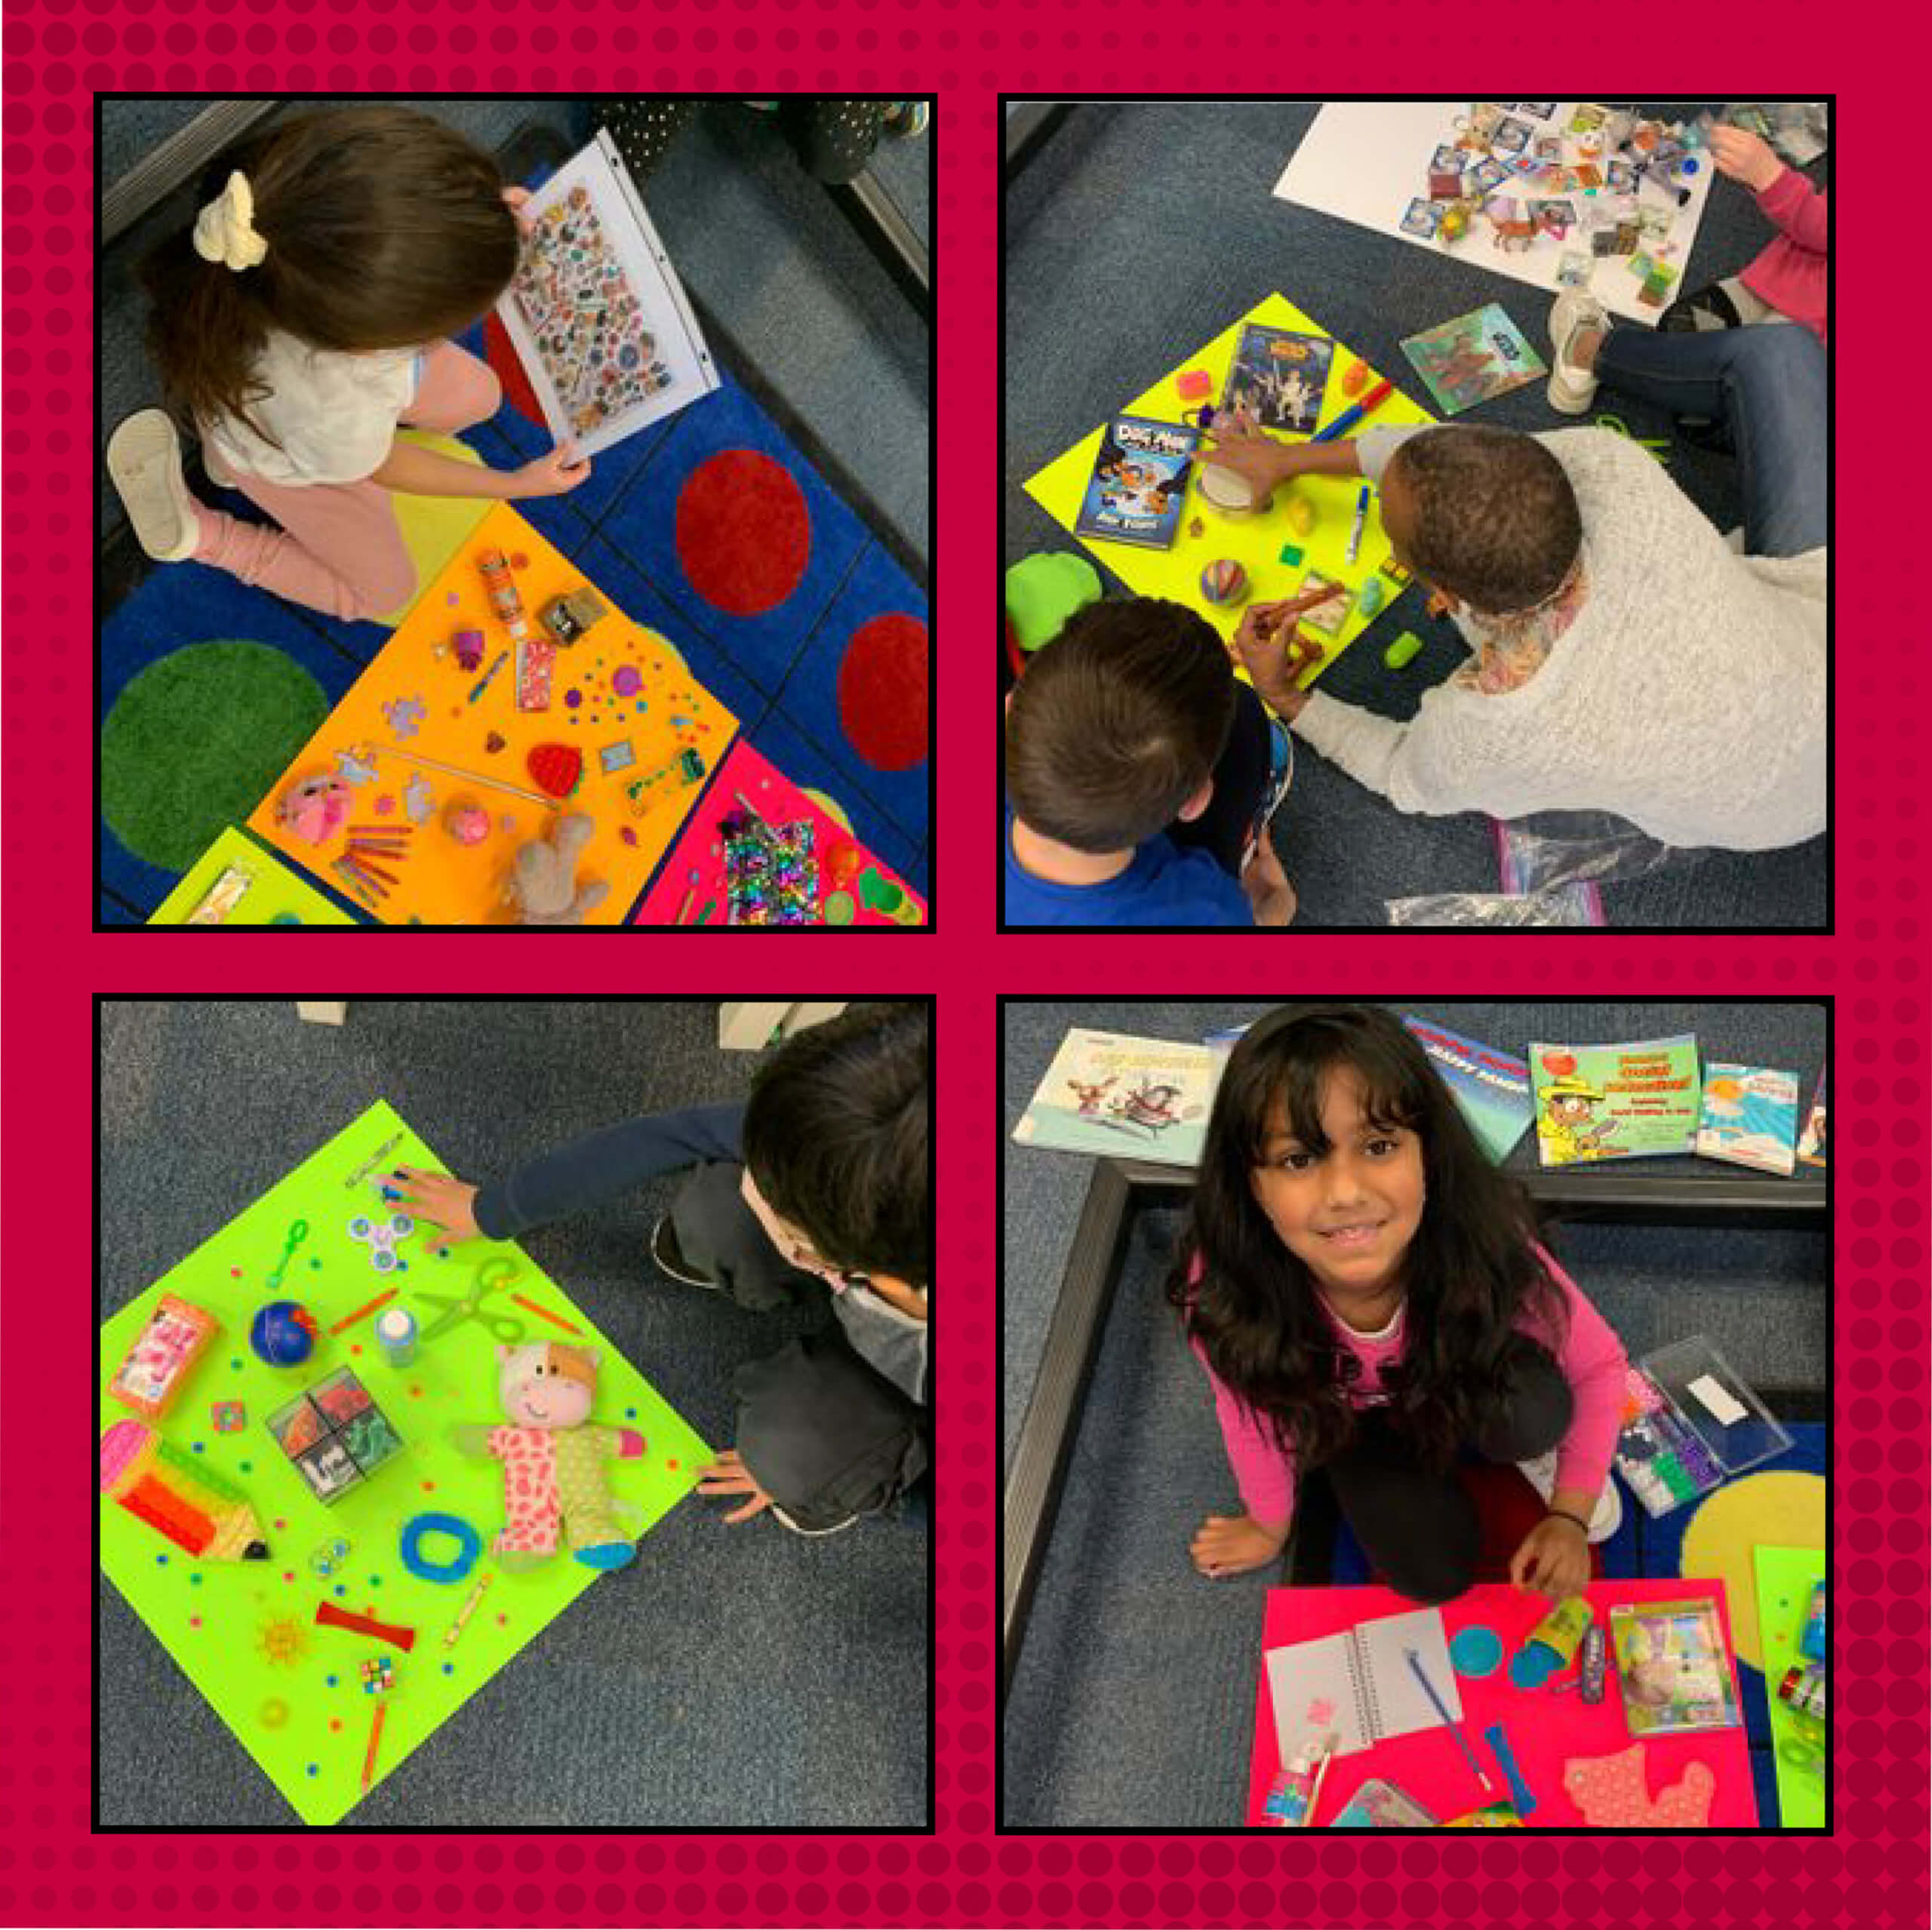
Next, the process of building their individual flat lays began! The students really enjoyed designing them!
We had photographs of sample flat lays as well as several I Spy books on display to give them ideas. Some students required support to arrange objects, but most worked independently. We encouraged students to fill in gaps with extra small items we had in the library (e.g., lego, puzzle pieces, marbles, beads, etc.). We made sure to leave an empty space on some of the boards for the green screen items we had to superimpose at the end.
Each finished flat lay was unique to each student and they couldn't wait to tell us all about them!

Teacher tips for building flat lays:
 Use neon bristol boards for the background (the dollar store has lots of options).
- Choose objects that are various sizes & include multiples of the same object. Start with large objects.
- Use a green screen for large objects to shrink and superimpose on photos. You don’t have to have a green screen. You can also use erase.bg or Adobe Express to remove the background from any photo.
- Turn on the grid on the camera when you are taking the photographs and take close up photos without zoom. Cropping photos after may affect the quality if you plan to print.
- Tips for rhyming riddles: Carefully choose the objects and consider what they might rhyme with!
Part 2: Video explanations
Step 5
The next stage of the project was to videotape the students telling us all about their flat lays.
This was a really important part of the project as it gave insight into why they chose their items and how they use them as coping strategies. It was also useful to assess oral communication. Some students required prompting, but many impressed us with all the different strategies they use to help manage their emotions and calm their brains.
Once the videos were complete, the teachers took photographs of each flat lay. We edited the photos slightly to enhance the colours. Finally, we superimposed all the green screen photos of the larger objects with the final flat lay photos.
Part 3: Writing the riddles
Step 6 - Creating a list
Students were given a printout of their flat lays and they circled all the objects. Then they were given a graphic organizer to help make a list of all those items. These steps were done in the classroom.
Afterwards, they handed it into their classroom teacher who corrected their spelling. For the final step, students were given a template where they had to find rhyming words for their objects. This was a difficult task for many (even the teachers). We conferenced with students and they also worked with their peers. We quickly realized that we needed to rethink the approach.
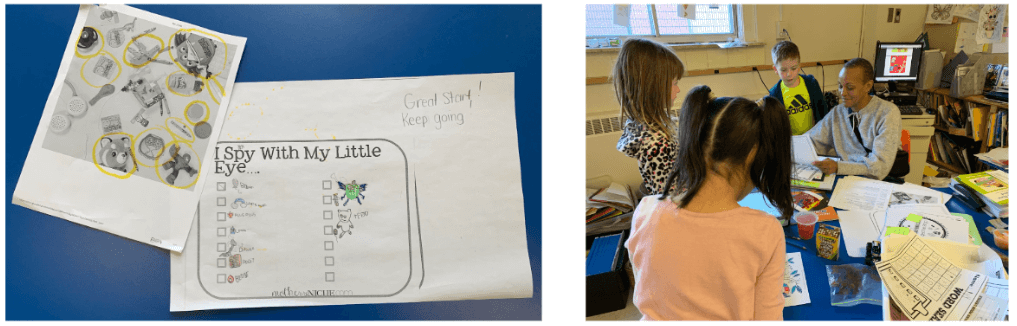
Left: Student sample questions & right: teacher/student conferences
Step 7 - Conferencing & writing riddles
We realized that we needed to conference individually with each student on their riddles and provide significant support.
We tried to connect the clues to our book theme of what calms their brains. This was a challenge. It was helpful to watch the student video explanations that we had just finished recording and use some of the wording from those clips.
The teachers prepared by doing this ahead of time and then we prompted students during the conference with rhyming words and the following questions:
- We need clues for___.
- When do you do that?
- What do you do with it?
- How does it make you feel?
We co-wrote the riddles with students over a period of a couple weeks. Another option could be to use visual clues as they do in some versions of I Spy books.
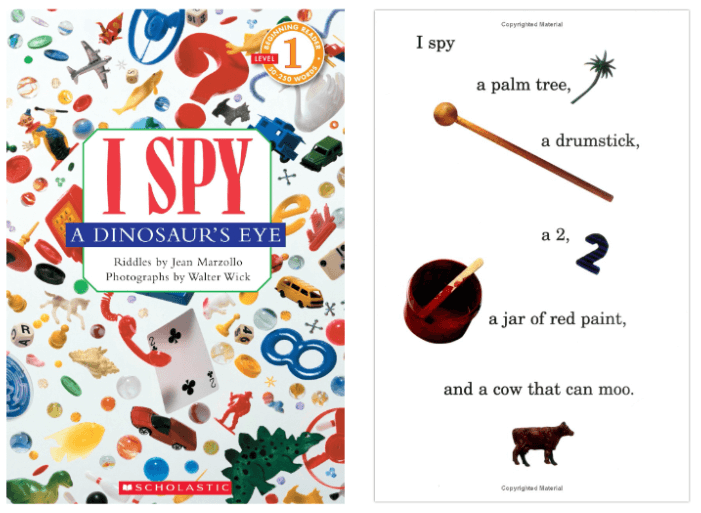
Excerpt from Jean Marzollo and Walter Wick book, “I Spy a Dinosaur Egg”
Published Scholastic, 2003
Part 4: Bringing the book to life
Step 8 - Recording the riddles
We wanted to have the students record their riddles because it always brings a book to life! We love hearing their voices and it helps capture their excitement. You can record directly into Book Creator and we had a few students choose this option. However, we typically prefer to record in another application so that we can edit the audio clips.
This is especially helpful for primary students who may require multiple attempts to record. Furthermore, some students are unable to read so we had them repeat each line of their riddle after us and then edited out our voices.
💡 Teacher tip: Use a QuickVoice or another voice recorder to record explanations so that you can edit the clips and then upload into Book Creator.
Step 9 - Detective fun 🕵️
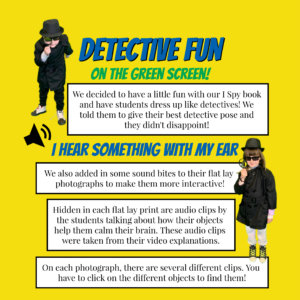
Ms. King’s grade 1 students love to dress up and to act! We decided to have some fun and dress them up as detectives.
They gave us some incredible detective poses and many students told us this was their favourite part of the project! This was also the perfect way to introduce the hidden sound clips in our digital book (see next step).
Step 10 - Invisible audio hotspots 🎙
One of my favourite ways to make the book interactive is to include invisible audio hotspots.
For this project, we added a new layer to our I Spy book with an I Hear challenge. Readers can search for these sound bites by moving their cursor over the flat lay print. We took clips from the video explanations that we previously recorded and edited the audio into short clips that matched the object they were talking about.
“I hear something with my ear.
I’ll give you a hint,
There are ___ in the print”
💡 Teacher tip: Record video explanations so that you can embed them directly into the book. It also allows you to extract the audio from the video and use it on its own for the invisible audio hot spots.
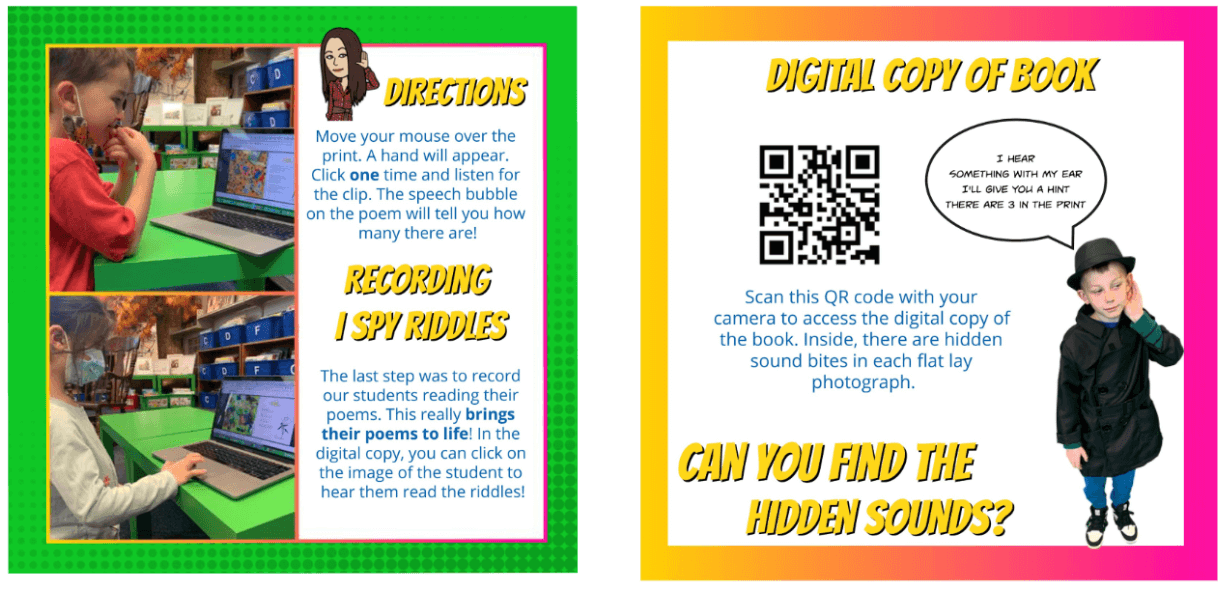
Excerpts from class book with instructions for how to access hidden sounds
Step 11 - Share the book
We published our I Spy class book on Book Creator to share with our parent community.
How to publish your book online
We also shared it on Twitter and tagged Walter Wick, the photo illustrator of the I Spy series. We were thrilled when he commented on the project! The students really wanted to meet him and we thought this would be the perfect finale to our project.
So nice to see such multifaceted and multilayered learning tasks and rewards celebrated here. Well done teachers and students alike! 🏆
— walter wick (@walterwick) April 29, 2022
We reached out and we were fortunate to arrange a short Zoom. Students prepared questions in advance and as a group we chose 5 to ask live. We were able to speak with him while he was in his studio and learned about his process for creating these elaborate scenes!! It was very inspirational.
These authentic experiences where students get to interact with professionals in the field are very impactful and support development of communication skills (e.g., listen actively and ask questions).

The BIG reveal
If you have seen any of our other projects, you know we love a big reveal! We enjoy being able to surprise our students and celebrate their hard work and accomplishments. 🎉
For this project, we tried something new. We took each student's double page layout and had it foamcore mounted as an end of the year gift. We included a tiny magnifying glass with it so they could search for each other’s objects.
💡 Teacher tip: Mini magnifying glasses from Party City.
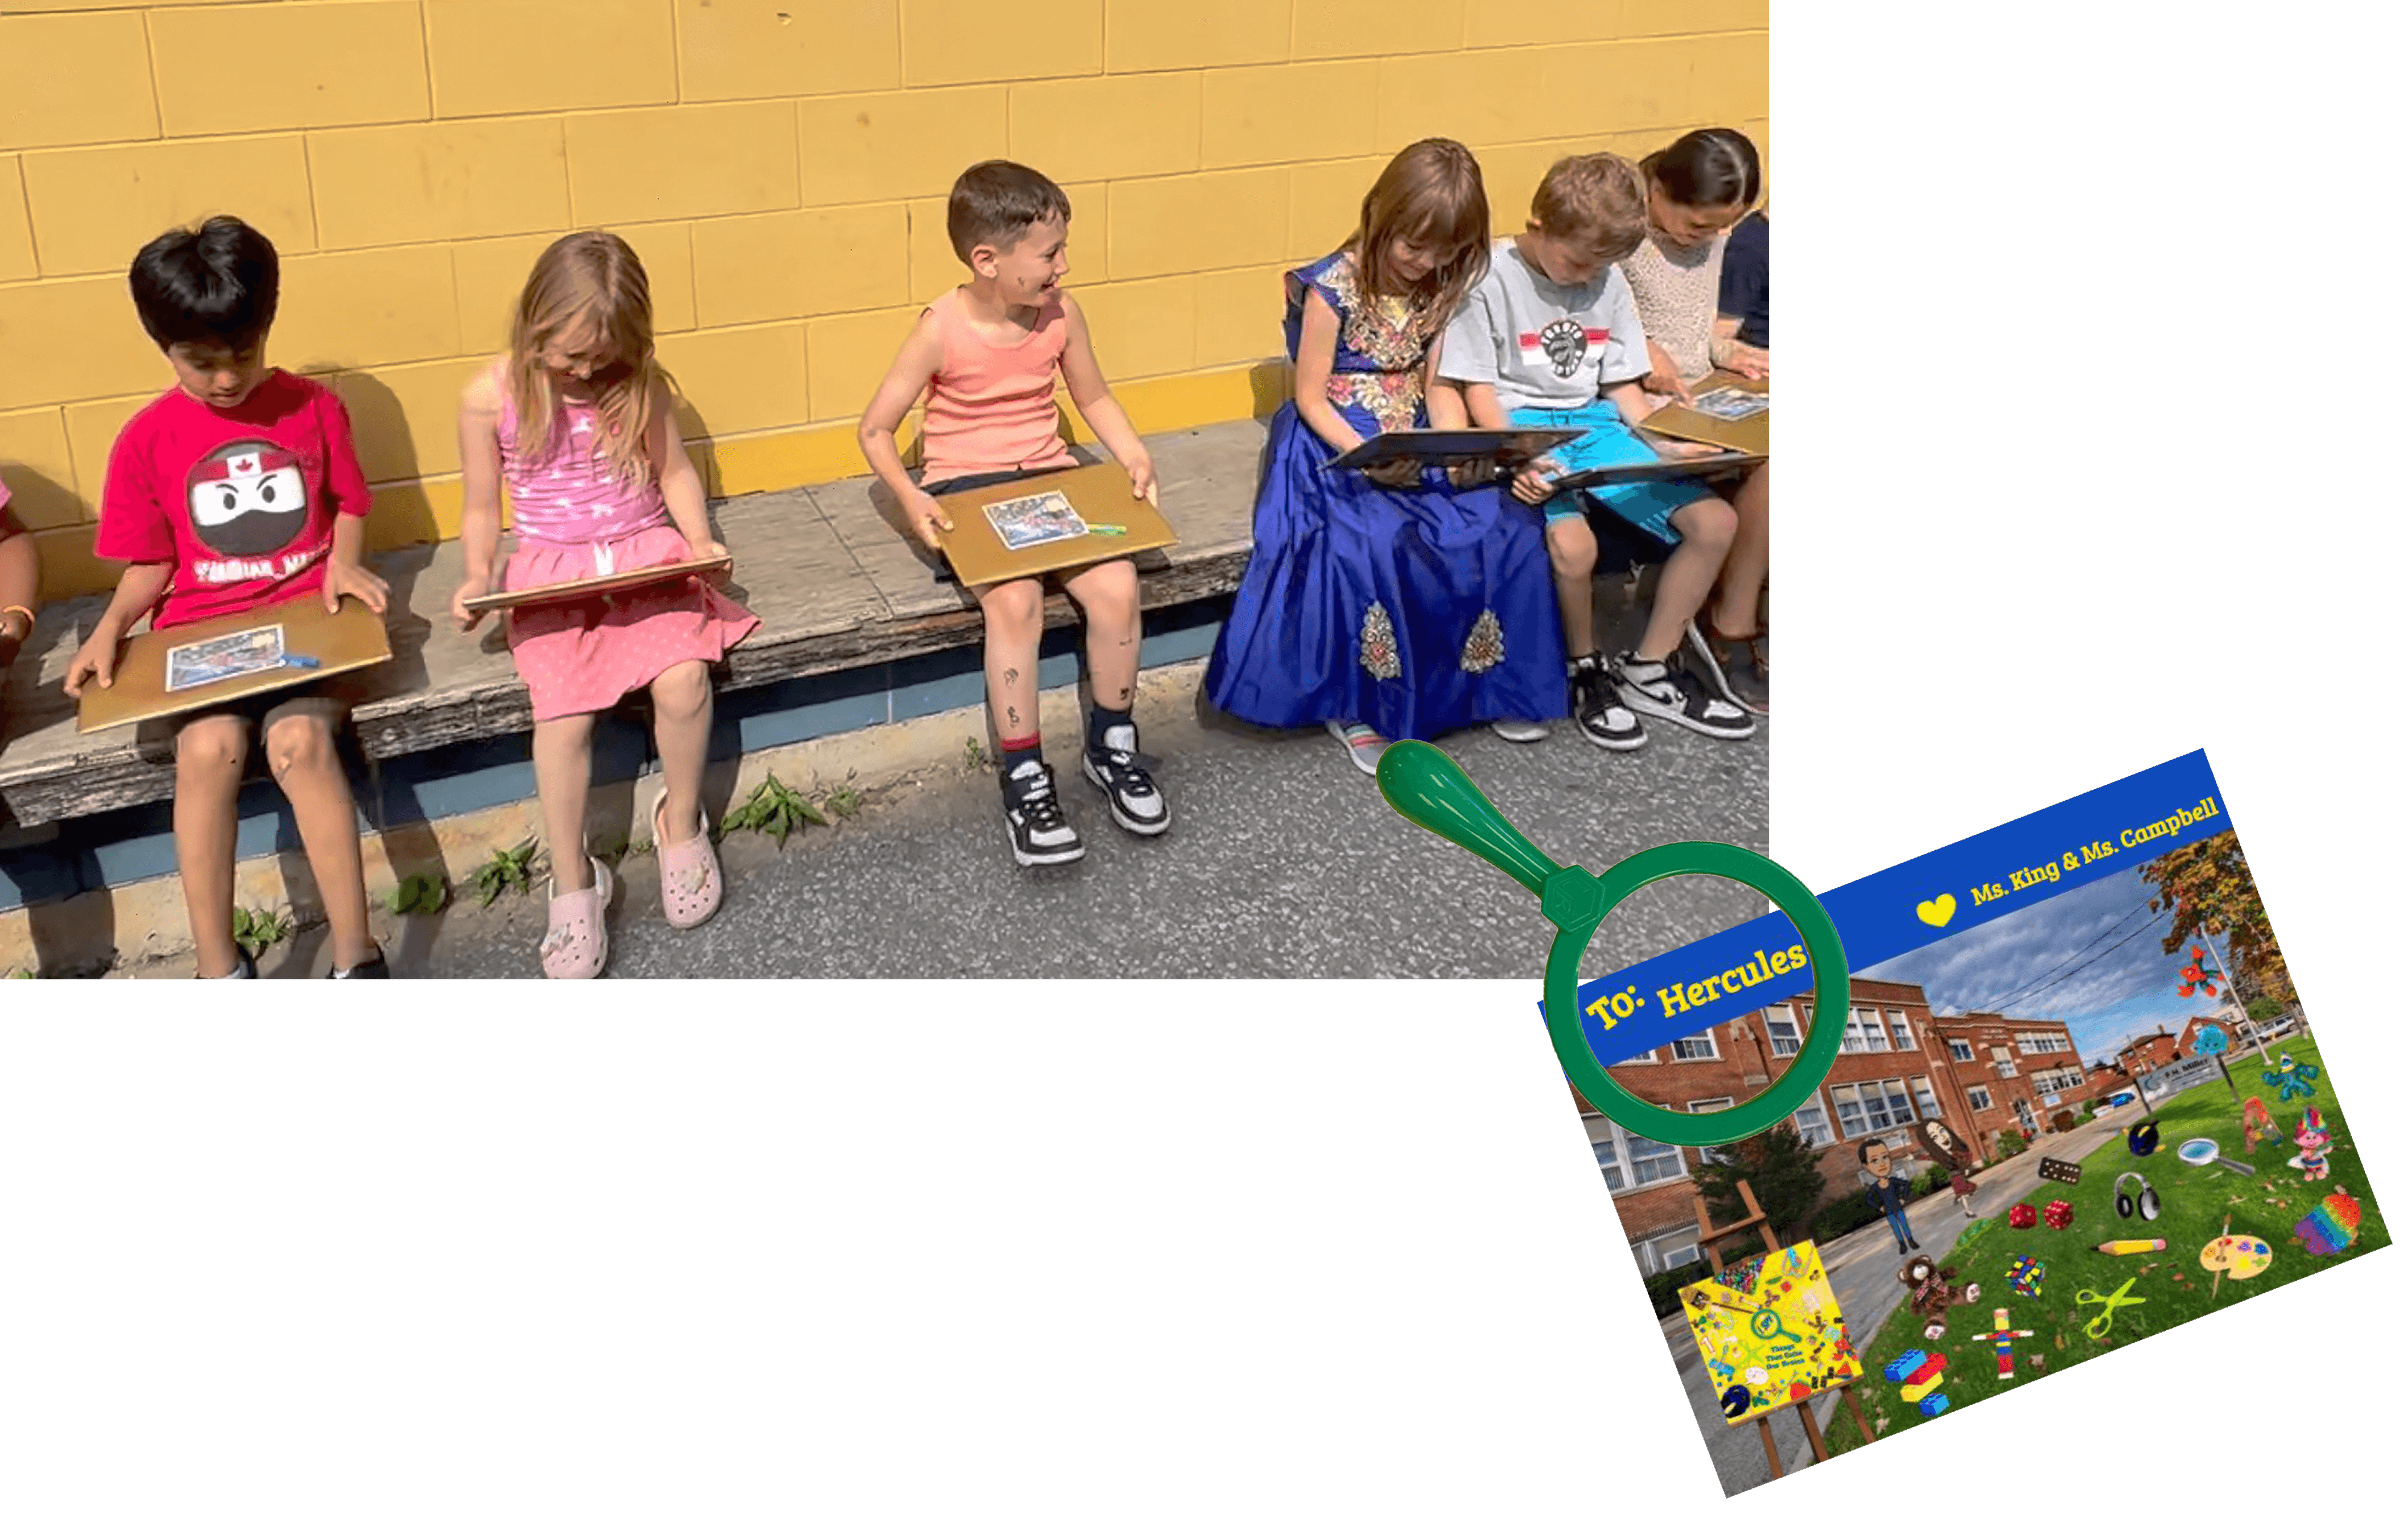
STUDENTS LOOKING AT WRAPPED GIFTS AND CLOSE UP OF CARD TO STUDENTS
It was a magical moment where you could see the pride they had in their work and the eagerness to share with their peers.

This was also a two part surprise because we had also printed hardcover books for the library and their classroom, both from Pikto. We did two versions of the book. One longer version documented the whole learning journey, while the other included just the students’ flat lay photographs with riddles.
Watch the video reveal…we know it will melt your hearts! 💛
“You have a significant influence on students’ lives. You’re a trusted and caring adult, and can model healthy habits, validate students’ experiences and feelings, and help them learn about and care for their mental health”School Mental Health Ontario Website
We are honoured to be a part of our students’ lives and grateful that we get to teach and support them, watch them grow and share these moments with their families.
Mira Campbell has 18 years of experience as a Teacher-Librarian and Special Education Teacher with the Toronto District School Board (TDSB). She was part of their Digital Lead Learner program for 8 years and is a Book Creator Ambassador. She enjoys collaborating with teachers during Library Partnership projects and loves to celebrate students’ hard work with big reveals!
Related posts
-
 14 December, 2015
 -
 13 August, 2018
 -
 17 December, 2015
 -
 16 June, 2022
 -
 13 September, 2022
 -
 24 June, 2019
 -
 1 December, 2021
 -
 21 April, 2020